Last Christmas I put together a fun Rudolph the Red Nose Reindeer Holiday Party on Christmas day. It is my absolute favorite Christmas movie, so it was fun for me to design all the different printables and pull together this festive party. Today, I am sharing all the printables so you can host your own Rudolph themed party this upcoming Holiday season. Continue reading “Rudolph Party Printables”
Tag: Rudolph the Red Nosed Reindeer
Rudolph Holiday Party
I am so excited to share my all the details from my Rudolph party with you today! I love bringing my ideas to life and seeing a party vision come together.
For this party, I had hoped to do something in the weeks leading up to Christmas but found it incredibly hard to plan something with all the other parties and obligations people have at this time of year. As Christmas day approached, I still really wanted to execute some of the ideas I had come up with in my Rudolph Treats inspiration post and decided to put some snacks and treats together to enjoy with my family on Christmas Day. My niece had also just turned one just a few days before Christmas, so I thought it was the perfect excuse to subject my family members to my party planning craziness.
For Christmas day, I had already planned to put out some light snacks to munch on in the afternoon and tide everyone over until it was time for turkey dinner. Putting a Rudolph spin on everything wasn’t that much extra effort and the little details really helped add to the excitement of the day.
The turkey pinwheels were made the day before and simply had to be sliced and arranged on the plate. Using green tortilla’s and finishing the stack off with a star cut from a yellow bell pepper made for a cute little Christmas tree next to my stuffed abominable toy.
Then, with the help of some pre-made tart shells, my Bumble-Berry Tarts were another clever tribute to everyone’s favorite abominable monster.
We also enjoyed a variety of sliced cheese, meat and Christmas shaped crackers to snack on. The Santa belts around the Babybel cheese were a little over the top, but they were a huge hit with the kids.
My maraschino cherry “dirt covered red noses” and reindeer hooves went over well, but one of the most popular items was the cranberry baked brie. You can’t go wrong with melted, gooey cheese and the touch of cranberry and pecans gave it that festive touch.
My fruit and vegetable platters got a holiday spin by arranging them into a Christmas tree and a wreath. The tree shaped pan for the fruit was a foil cake pan I came across at the Dollar Store and filled with red and green fruits.
These meringue hats were my second attempt at meringue cookies and they are surprisingly easy thanks to the help of my KitchenAid stand mixer to effortlessly whip the egg whites. My first batch were labelled as dwarf hats for my Snow White Picnic Party and these ones were layered in red and blue as an ode to Hermey the elf’s iconic hat.
I had planned to bake and decorate a cake, but ended up cutting it out for the sake of my own sanity. Between everything shown here, and an entire turkey dinner to cook Christmas day, it just ended up being too much.
Since we were celebrating my niece’s birthday I still wanted some type of cake, which luckily cake in the form of the Rudolph themed cupcake decorating kit I had tucked away after getting it on clearance after last Christmas.
My punch ended up a lot less white/clear then I was hoping, but it still worked as Sam the Snowman. My original plan was to use a plain round glass vase, but I found this great glass cookie jar that couldn’t have been more perfect to add the mustached face to – the lid even works as his hat!
I also was happy with the way my tissue paper wrapped glass vase turned out looking like a Santa sack to hold Yukon Cornelius’ silver and gold wrapped chocolates.
And, if all this wasn’t enough of my favorite red-nosed Reindeer for one day, I also had the joy of unwrapping a Build-A-Bear Rudolph from my son and a stuffed Clarice from my daughter on Christmas morning. My son was so excited to give the gift to me and I love that my husband took the effort to go to the mall with the kids and have them each build a reindeer for me. |He let them pick out the clothing and I think they really show each of the kids personalities. I look forward to having these guys out on all our Christmases to come.
I hoped you have enjoyed looking! This food table was a lot of fun to plan and hopefully I have given you some easy ideas for your party planning next holiday season.
And, to host your own Rudolph the Red Nosed themed Christmas or Holiday party, I have made things easy by providing all the free printables. Just click on the link below to take you to the goodies!
Deck the Halls!
It is our very first Christmas in this house and I am very excited to share with you pictures of how we have decked our house out for the big day!
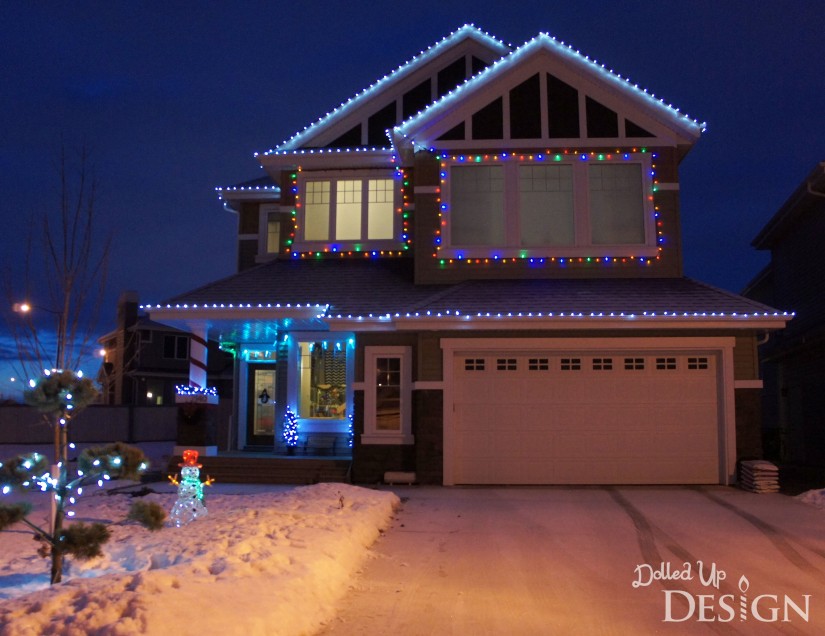
Outside my husband spent one very long afternoon up a ridiculously large ladder before the snow hit to get our exterior lights up. It makes me happy when I go out at night and come home to the twinkling lights!
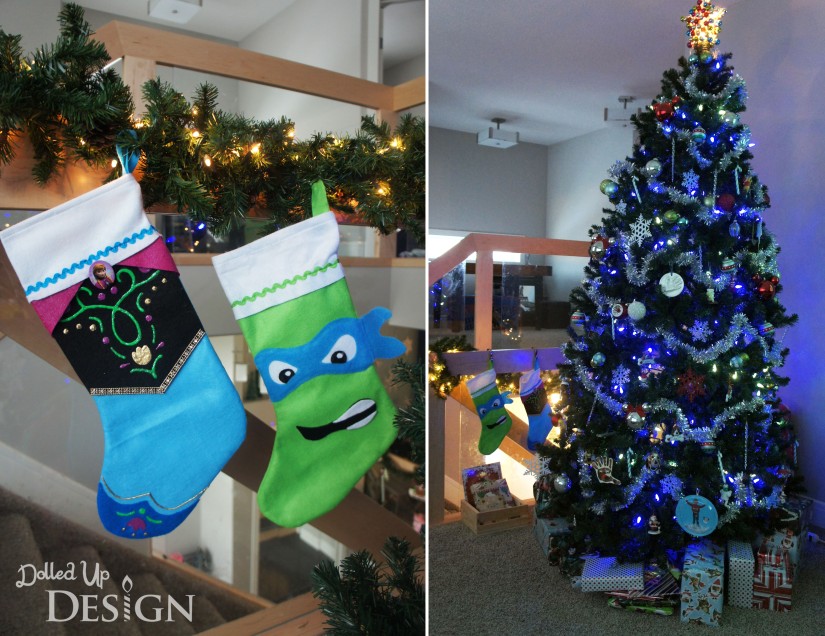
We decided to make the switch from a real Christmas trees to an artificial one this year. I miss the piney smell, but it is sure nice having the tree up early to enjoy and not having to vacuum up pine needles. It only took a few days and my two year old was bee-lining to the tree first thing in the morning to make sure it was lit up!
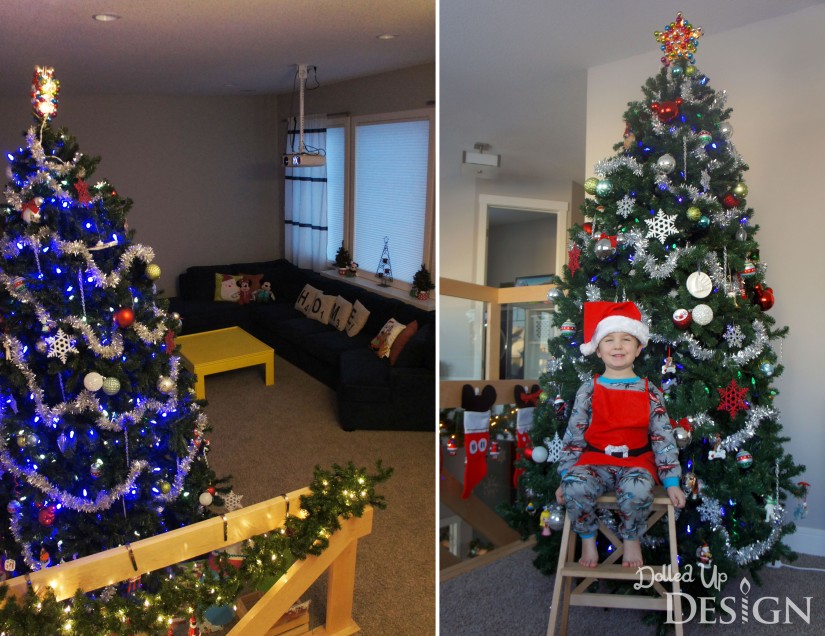
The tree is upstairs in our bonus room so the kids won’t have far to come down and see if Santa has come. There was some debate over where to put it, but I think this works best. There is lots of room for the 9 foot tree and that room has a soft carpeted floor for the kids to open their gifts on and play Christmas morning.
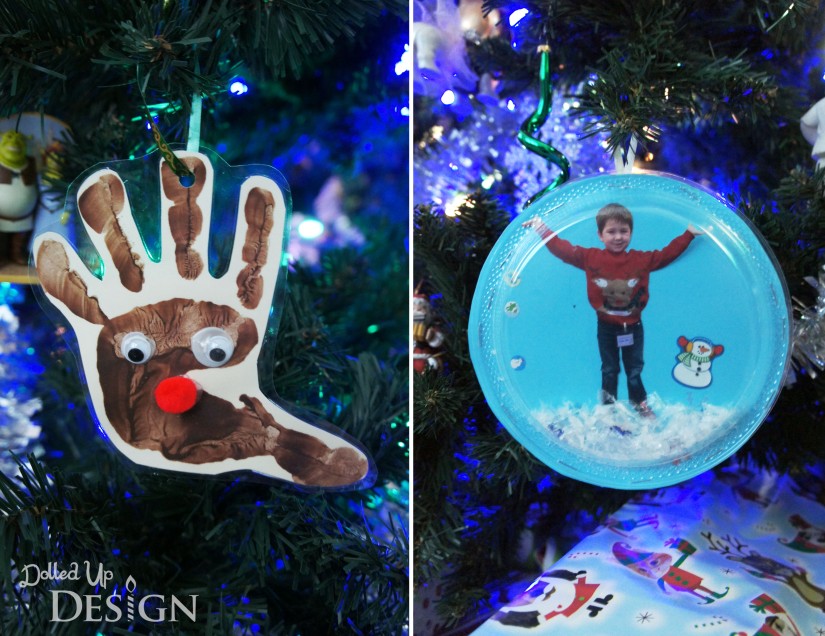
Two of my favorite new ornaments on are tree this year are this handprint reindeer and snowglobe my little guy made at preschool. He is not big on crafting, so I appreciate when he does actually bring home a craft.
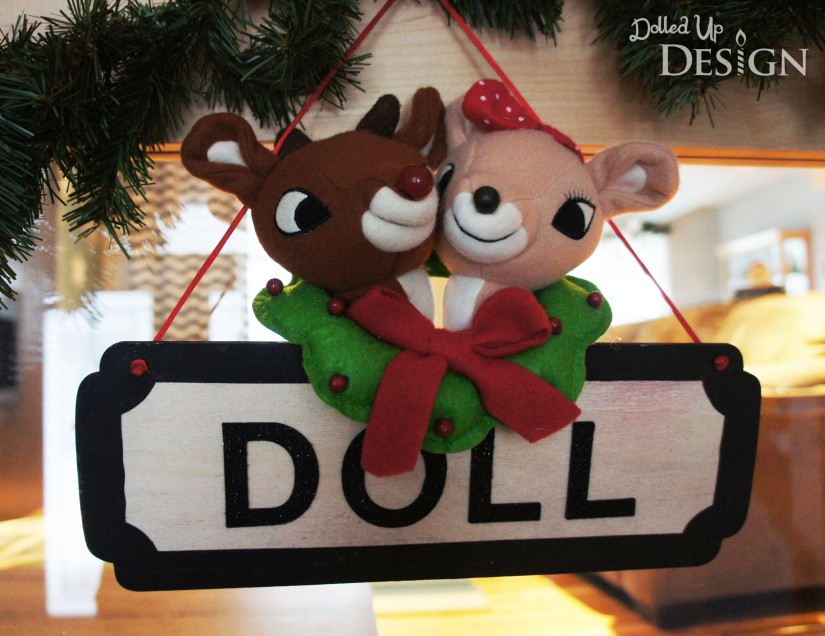
I also was feeling a bit of puppy mommy guilt as we were decorating the tree and I realized Rumbull had no ornaments yet so I got him this one when we were at the mall for our annual visit to Santa. I was very excited to find a personalized one that matches Nova’s!
The kids DIY stocking are new this year and you can read more about how I made them here. They have been hung on the stair railing next to the tree where Santa can easily find them.
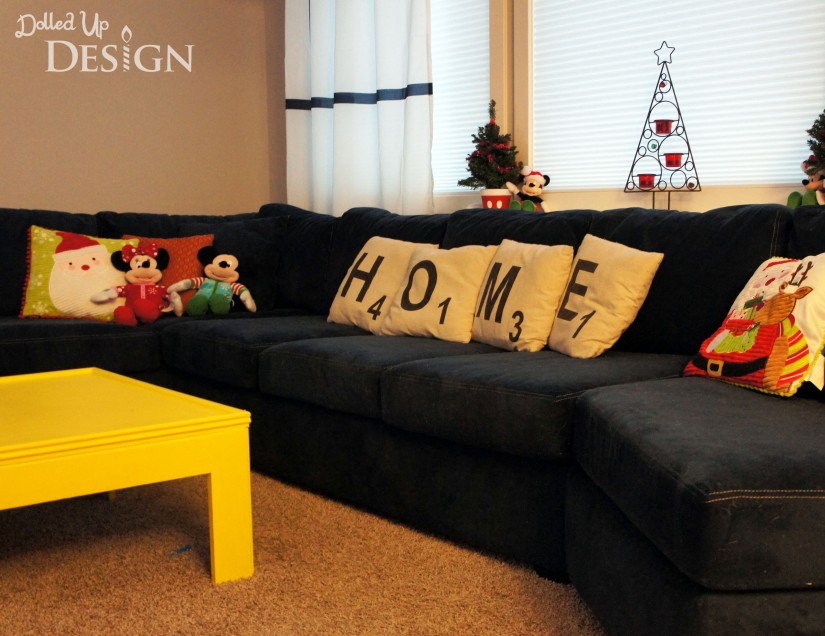
I also found some new throw cushions for the couch and a placed a few small Christmas accessories we already owned throughout the room to make it festive. Dontcha just love our giant couch!? It has been perfect to cuddle up on as a family and watch all those great Holiday specials over the last month!
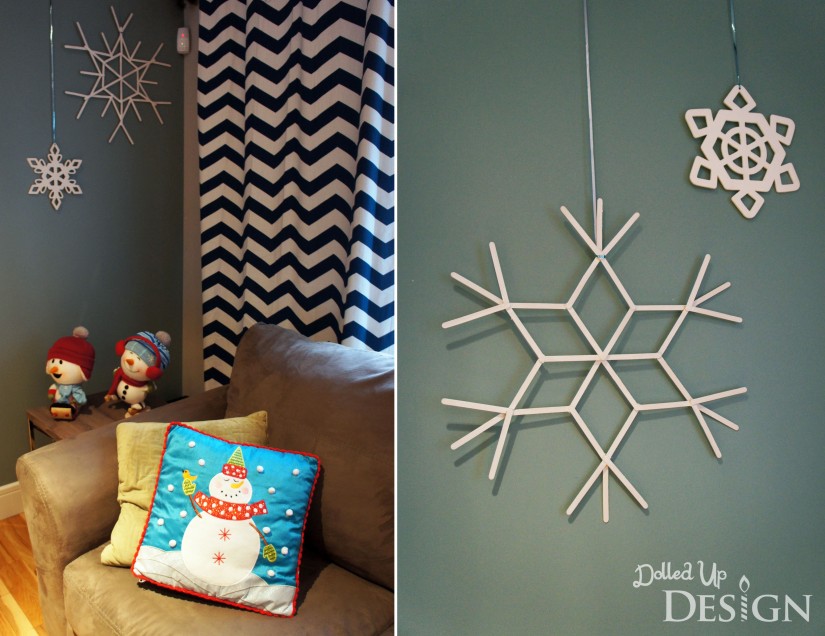
On the main floor, I still haven’t managed to get any pictures hung on the living room walls so I had a blank slate to work with for Christmas decorations. My sister in law pinned these pretty DIY Snowflake Popsicle Ornaments from Fab DIY and when I realized how easy and inexpensive they would be, I decided to make some.
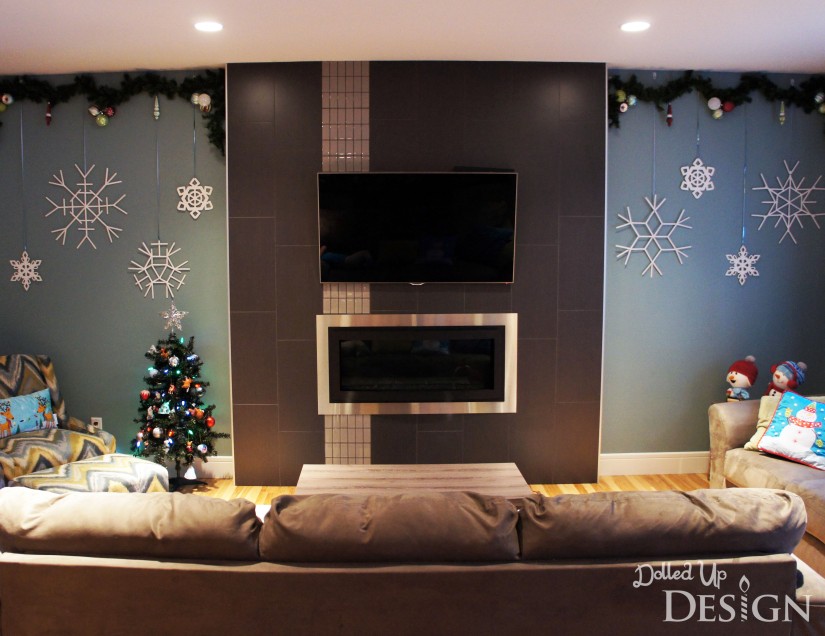
I painted mine white and hung them alongside some wooden snowflakes I found at the Dollar Store. I love the way they pop against the color of our living room wall and the big impact it makes for just the cost of some popsicle sticks and hot glue! And, you can also see my sister in law’s stir stick versions here.
And, of course, I added a couple more Christmassy cushions for the couches in this room!
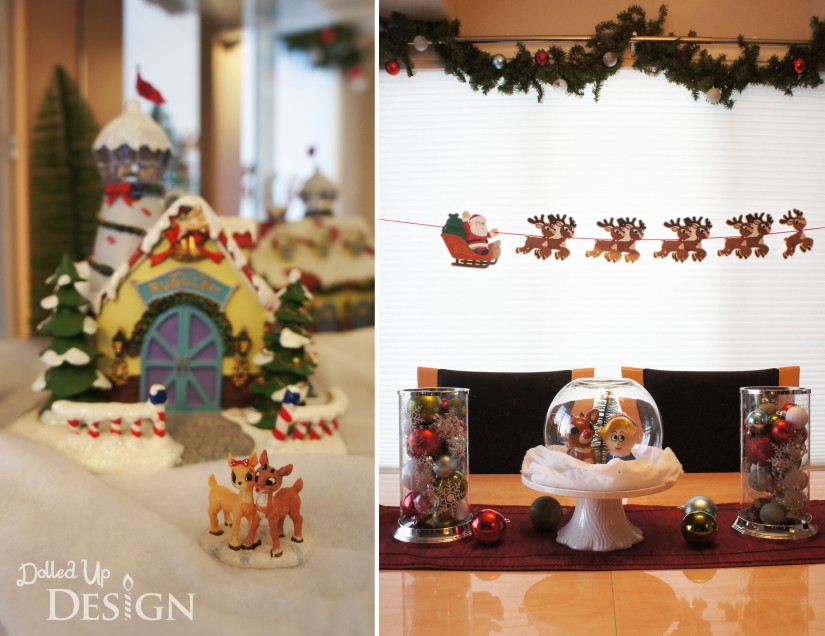
Our fireplace has a clean, modern look that I really like, but I do miss not having a mantle to decorate. In our old house we had a large corner mantle that I would set my Christmas village out on so this year I had to figure out a new solution. I ended up filling my China cabinet with the village and it turned out pretty well.
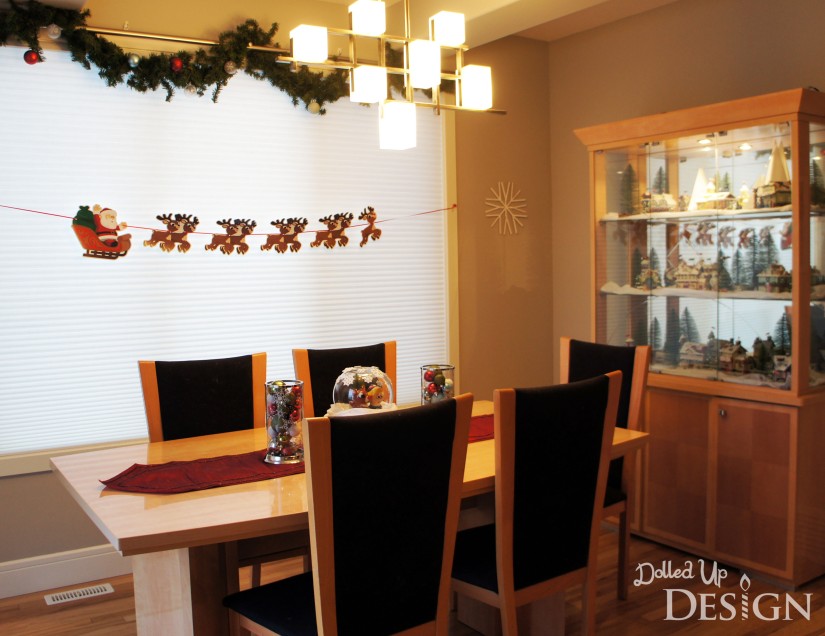
My Christmas village is Rudolph the Red Nosed Reindeer themed so I decided to carry that theme through some of the other decorations on our main floor. My DIY Rudolph banner look great hanging over the dining table, and I love the little snowglobe inspired centerpiece I made using with my new ornaments from Target. Hop on over to Moms and Munchkins to get the free printable file I created to make your own flying Rudolph Banner.
We had considered putting the Christmas village up in the niche over the front closet, but the configuration wouldn’t have worked well. I ended up coming up with this cute Rudolph scene after making some simple mountain shapes from foamcore and hot glue. We already had the sleigh and used it as an excuse to buy the Rudolph and Hermey figures from Walmart.
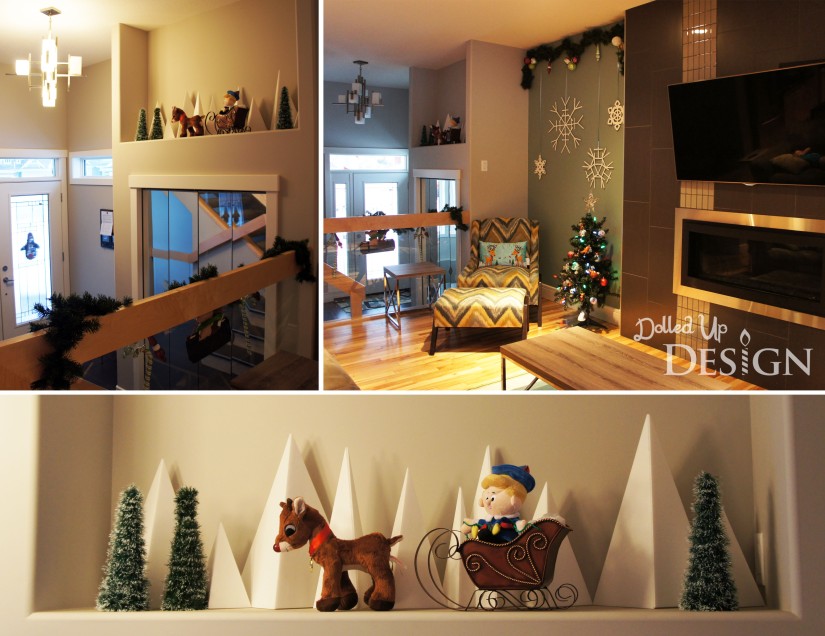
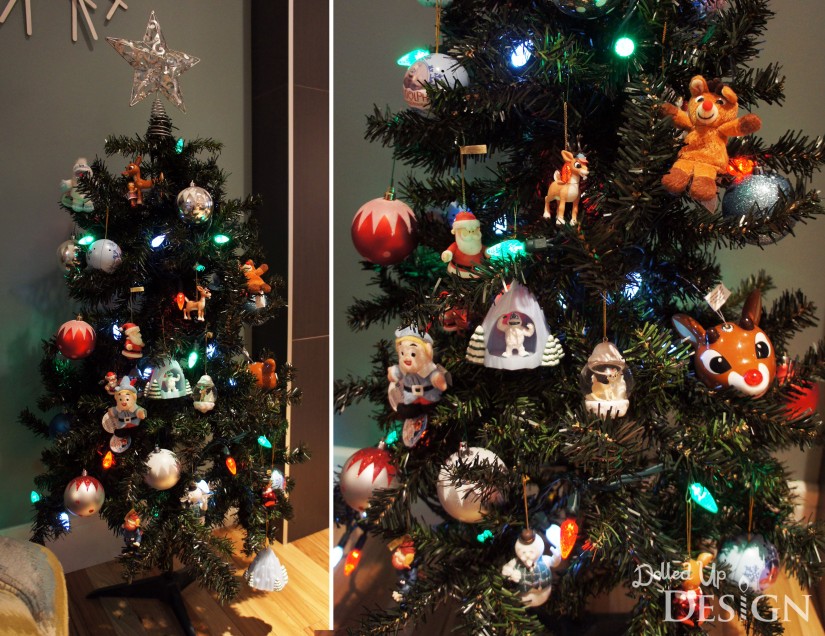
I also put up my small 4′ tree in the living room and put all the Rudolph ornaments I have collected over the last several years on it.
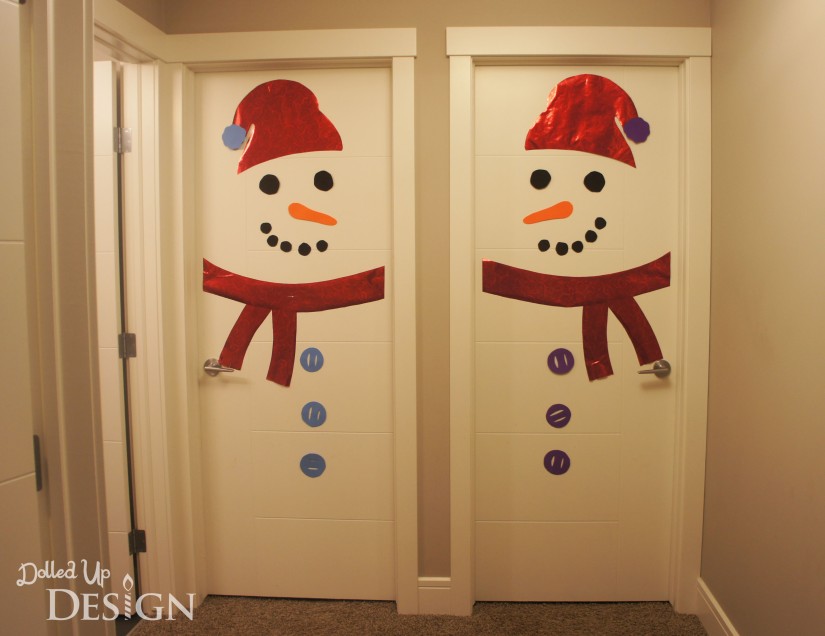
Finally, one simple DIY project I did were these quick snowmen on each of the kids bedroom doors. This is not an original idea, but still one worthy of a share because it is so simple and fun for the little ones. Mine were cut from foam sheets and wrapping paper.
Phew. If you have made it this far I hope you have enjoyed my tour. I think I have made a good start to decorating our new house for the holidays and hopefully I can add to my decorations over the next few years. I would love some Christmas themed accessories and towels for the bathrooms!