

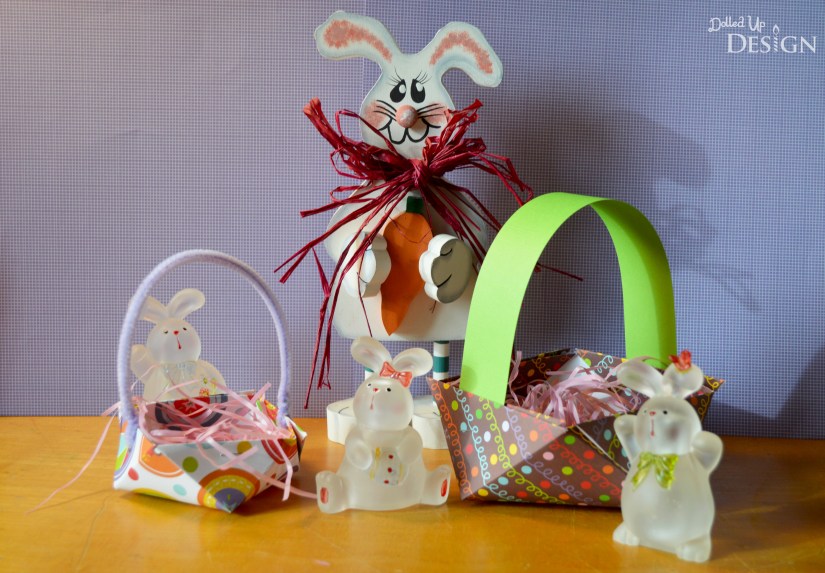
Today I am excited to share this quick little paper craft courtesy of my mom, Christine Wolzl. These simple paper baskets would be a fun little craft to do with kids and are so easy to customize using your favourite color or patterned paper. They would be great at a kids party for favour baskets or filled with treats as part of the place settings at Easter dinner.

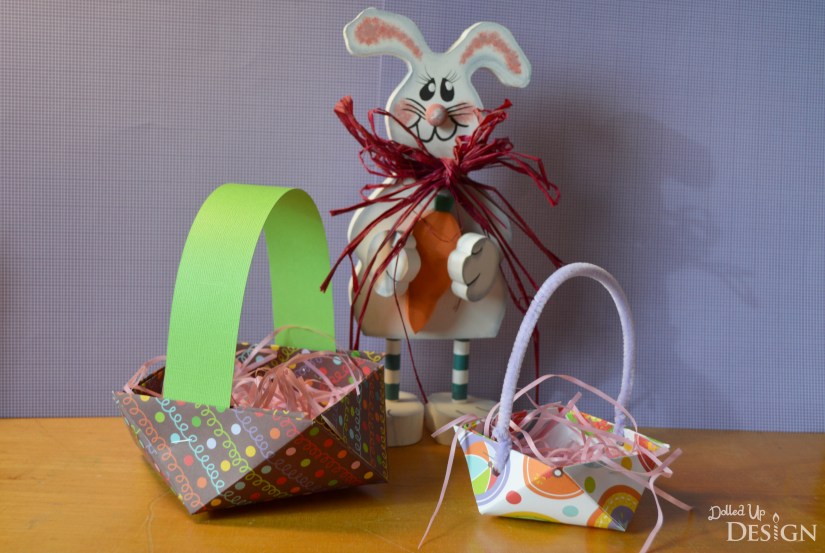
Easter is just around the corner! This quick and easy project would make a cute child/parent decorating accent in your home. The 3D Easter basket makes a wonderful table centerpiece, or combine it with your other Easter decor. The unique way it is folded gives the basket a rounded bottom. Just a word of caution; if you are using it as an Easter basket, I would encourage you to have your child carry it like a bowl. The handle works well for light items like chocolate eggs and jellybeans, but the basket easily tips if your child is carrying something heavier like a coloured hard boiled egg. I have included both written and picture directions for creating your own 3D Easter basket.
There are few supplies necessary for this project:
- One sheet of 12 inch square scrap booking paper (Use light scrap booking paper. Card stock is too stiff, and construction paper tears too easily.)
- A strip of 12 inch card stock (1.5 inches wide) or a pipe cleaner and a hole punch
- A stapler
- Scissors

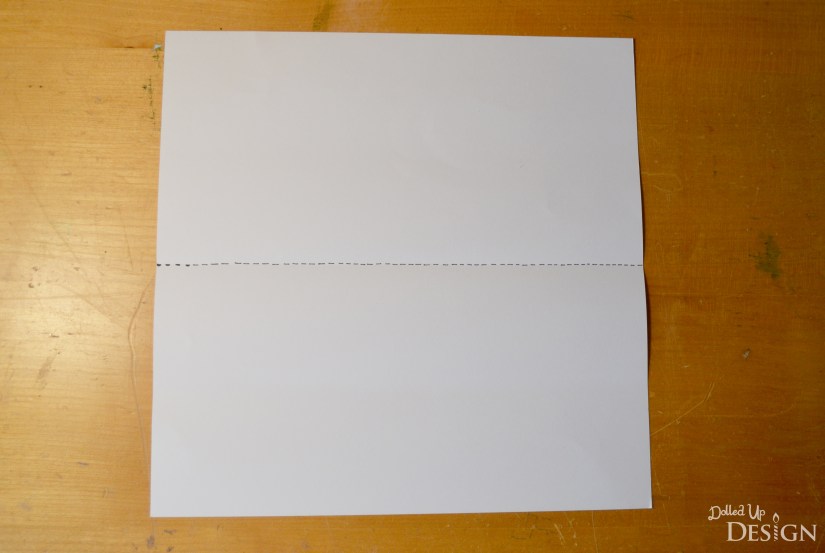
1. Working with the scrap booking paper face down, fold it in half.
2. Fold both ends to the center. Your paper should now have 4 boxes.
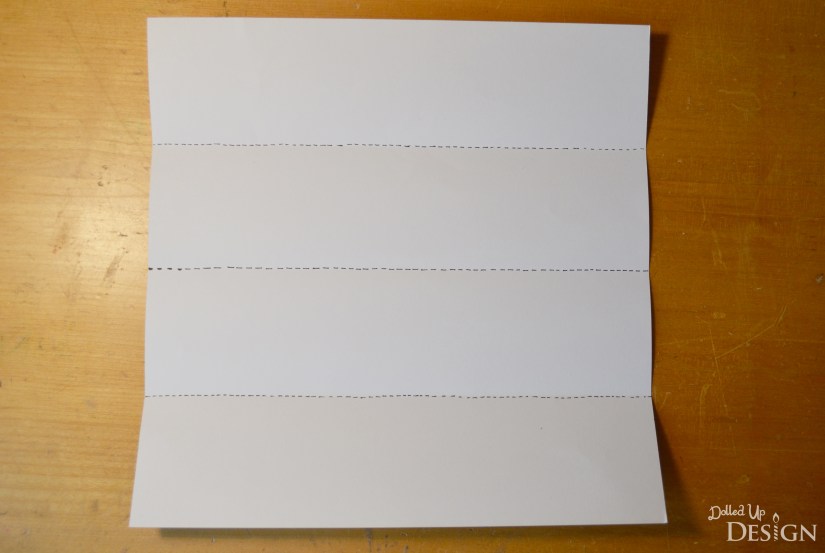
3. Turn the paper so the folds are vertical. Fold in half first. You should have 8 boxes now.

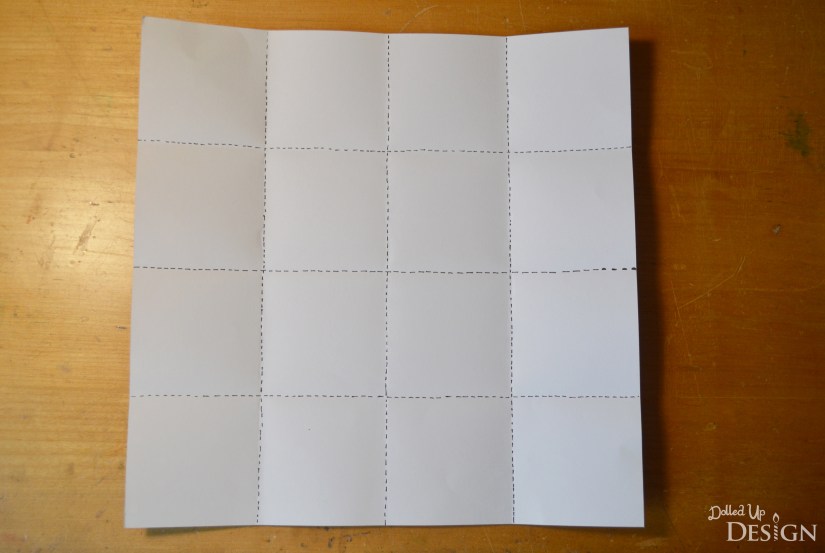
4. Fold both ends to the center. Your paper should now have 16 boxes.
5. Cut the 4 corner out carefully with the scissors on the folded lines.
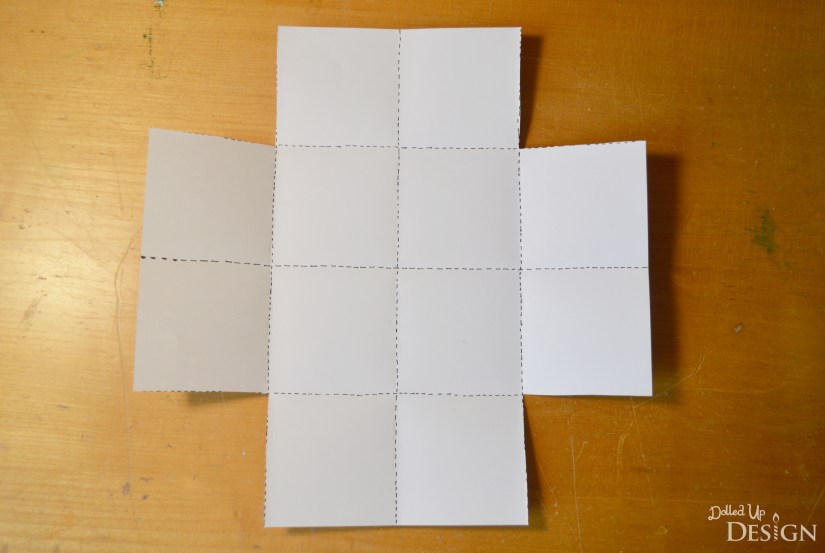
6. Snip the middle fold line on each side to the next fold line.
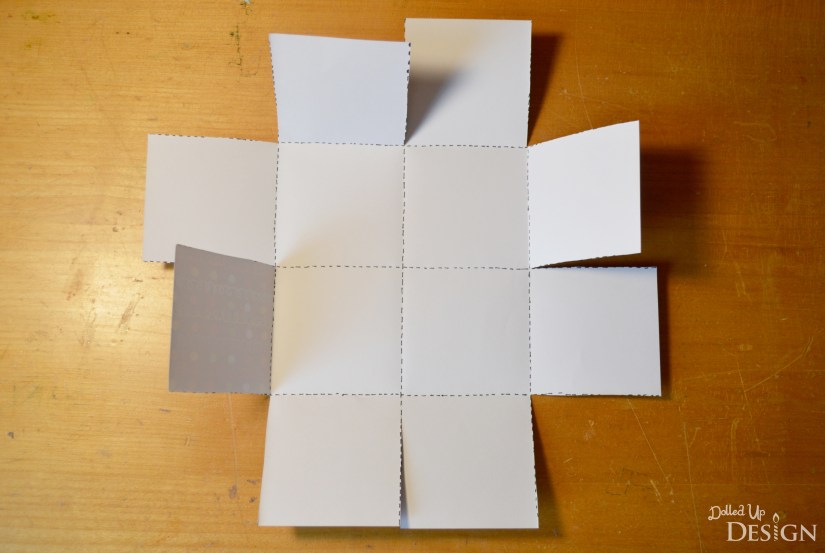
7. Fold the 2 boxes on each side to the center by taking the outside corner and folding it to the opposite inside corner. The triangles need to fold inward, so you end up with a point.
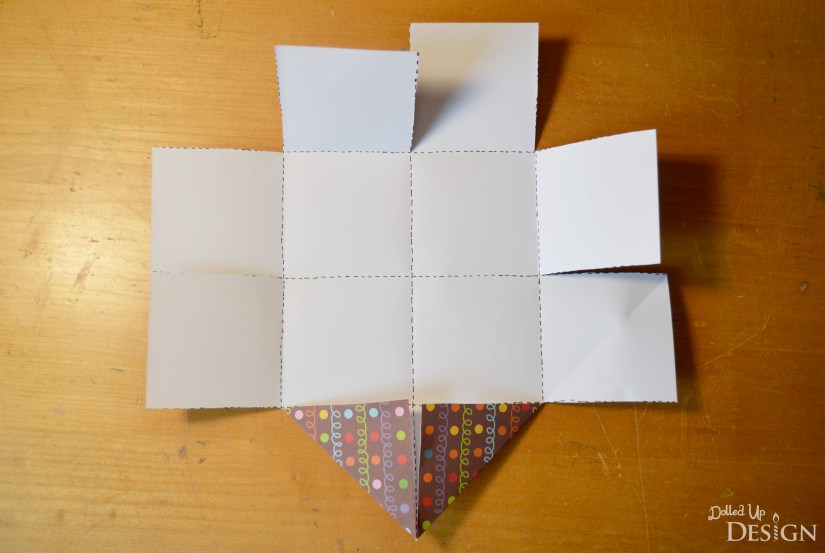
 8. Bring the 2 triangles together so they overlap, slipping the card stock strip in between. Staple together. Then repeat on the direct opposite side, stapling the card stock handle in between the overlapped triangles.

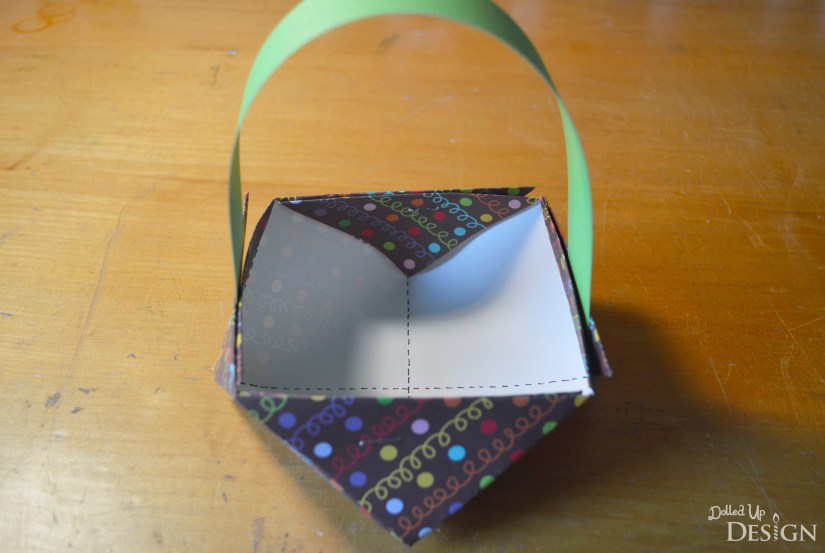
9. Complete the basket by stapling the remaining 2 sides by overlapping the triangles. Fill with Easter grass.
To make a smaller basket, use a smaller square of paper. The little basket was made using an 8 inch square of paper. A pipe cleaner was used for the handle instead of the card stock strip. A hole was punched in 2 opposite sides and the pipe cleaner was threaded through and twisted closed. This size is perfect for a single coloured egg.
With younger children, I find it helpful to trace with a pencil over the lines they need to cut. The more accurate the folds and cuts, the nicer the basket turns out. This project is also great for reinforcing counting skills, and with older children, teaching fractions.
I hope you enjoy creating the 3D Easter basket. Once you get the hang of making them, they might just multiply like bunnies! I wish you a blessed Easter!
Thanks again for sharing mom!
