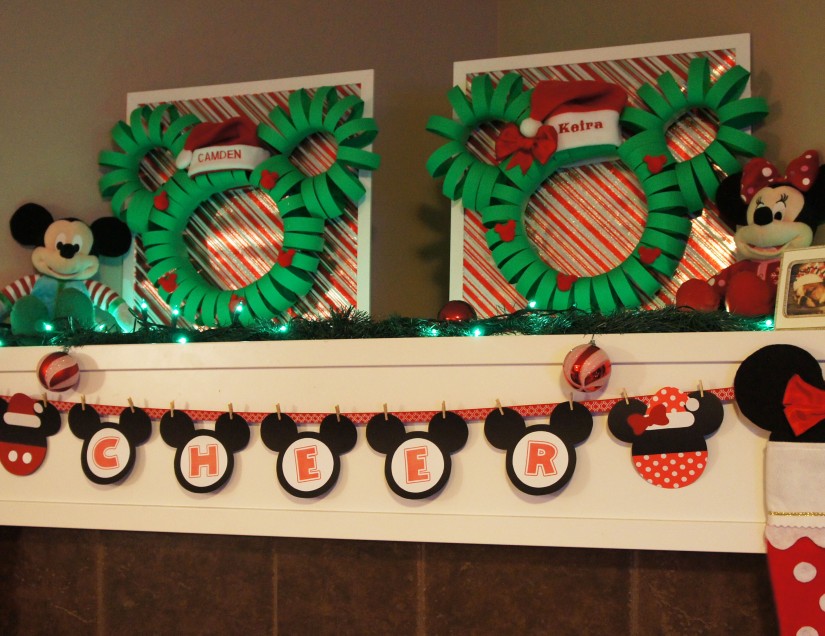
We have a very large corner mantle over our fireplace that normally gets filled by my Christmas village for the holiday season. I absolutely love my Christmas village, but each building is boxed up individually and it is a ton of work to bring up from the basement, set out and arrange. Just like a lot of the other Christmas décor, we decided to keep the Christmas village packed up and that left me to figure out a new way to decorate that space for the holidays.

My initial idea for the mantle was to do a large wreath. I had seen other crafters versions where they had various sized artificial wreaths zipped tied together to form a Mickey shape and thought that would be easy enough. Unfortunately I didn’t have any luck finding smaller sized wreaths for ears, so I went to my plan B which was to buy foam wreath forms from Michaels and wrap them in green garland. Well, the price on the styrofoam shapes was more then I was expecting so I decided it just wasn’t worth it and moved on to a plan C – cutting and crafting my own paper wreaths from Dollar Store posterboard. And, because I had done Mickey and Minnie versions of everything else, it only made sense that I would make 2 versions of the wreaths.
A paper wreath is nice and all, but I was worried it still was going to look pretty plain. I needed some way to dress them up and that is when I recalled these:

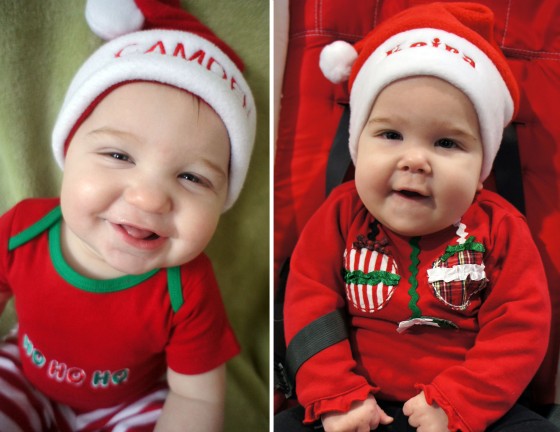
For each of my baby’s first Christmases, I ordered them personalized Santa hats from a wonderful eBay seller out of the UK. They no longer fit Camden’s or Keira’s head, so I was happy to find a way to repurpose them and put them on display.
I found and followed the Construction Paper Wreath Tutorial from Our Small-Town Idaho Life, with mine just being on a bit larger scale. The posterboard was a bit awkward to work with due to it’s size and stiffness, but it was worth it for the impact the finished wreaths make.
For each of the large wreaths, I began by cutting a full sized piece of posterboard in half lengthwise and then folding each half again lengthwise.
Along the non-folded edge, I marked out 1.25 ” strip that would later be used as my gluing area. I then marked along the fold in 1″ intervals and used my ruler to draw in straight guide lines perpendicular to my glue strip.
I then cut along each of the lines from the fold upwards, making sure to stop cutting when I reached the glue strip guideline I first marked out.
Once all strips were cut, it was time to flip my cut posterboard sheet inside out and join the glue strip on each side together to form a cylindrical tube. I chose to work with rubber cement because it is fairly forgiving if you need to reposition a little, but it creates a quick, permanent bond (so long as you coat both sides of the paper you are bonding together.)
Once my tube was formed, I inserted the last ring on one end into the last ring on the other end to create a circle. If you didn’t want a Mickey shaped wreath, you could now decorate your wreath.

For the ears, I repeated the same cutting and gluing process to 4 sheets of posterboard I had cut down to 8″ x 11″. Once I had my tubes, I trimmed each of 4 loops from one end, leaving the glued strip so I had something to attach the ear onto the big wreath form with. I then fed it through 3 of the loops on the big wreath and attached it on itself on the other side to form the ear.

I fit the kids Santa hats onto the loops to find the spacing I needed between the ears and then attached the second ear on the other side of the Santa hat. I was lucky that the hats fit snugly on the loops and I was able to keep them on without gluing or damaging them.

I then hot glued on some red pom pom’s to both wreaths to create hidden Mickey holly berry bunches. To differentiate between the Mickey and the Minnie wreath, I also added a red bow to Minnie.
The wreaths were a little flimsy on their own, so for my final step I cut a piece of wrapping paper to fit inside two large square picture frames (from Ikea) and hot glued the wreaths directly onto the wrapping paper. This will allow me to remove the wreaths and still use the photo frames after Christmas. I am sure the wreaths would be fine hanging directly on a door or wall, but this seemed to be the best solution for displaying them on my corner shaped mantle.

The framed wreaths fill our large mantle up nicely and I love the personal touch they have with the kids names on the Santa hats! The large stuffed Mickey and Minnie also on the mantle are toys the kids received last Christmas. They work perfect up there, but it has been a battle with my 3 year old to allow me to keep his Mickey up there.
Make sure to check back tomorrow to see the Mickey and Minnie stockings I crafted for the kids!
Related articles
- Mickey Christmas Wreath Tutorial (amanandhismouse.net)


2 thoughts on “Mickey Paper Wreaths”