My little guy’s love of all things Mario has not faded in the past few months, so when it came time to start planning his 5th birthday he was very confident in what he wanted for his party theme. I grew up playing Mario on original NES and knew it was something I could have a lot of fun with so I was more then happy to go along with his request.

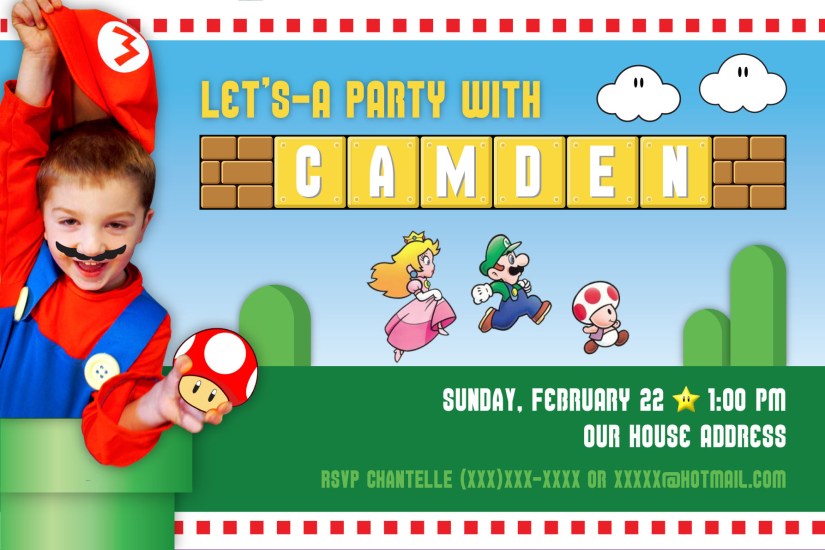
The invite was a simple 5″X7″ single sided card that incorporated a picture of the birthday boy in his Mario costume and the bright graphics seen in the Super Mario video games.
The party ended up being just 4 days after we returned from our Disneyland trip so I had to be organized and do a lot of the decorating and DIY projects before we left.
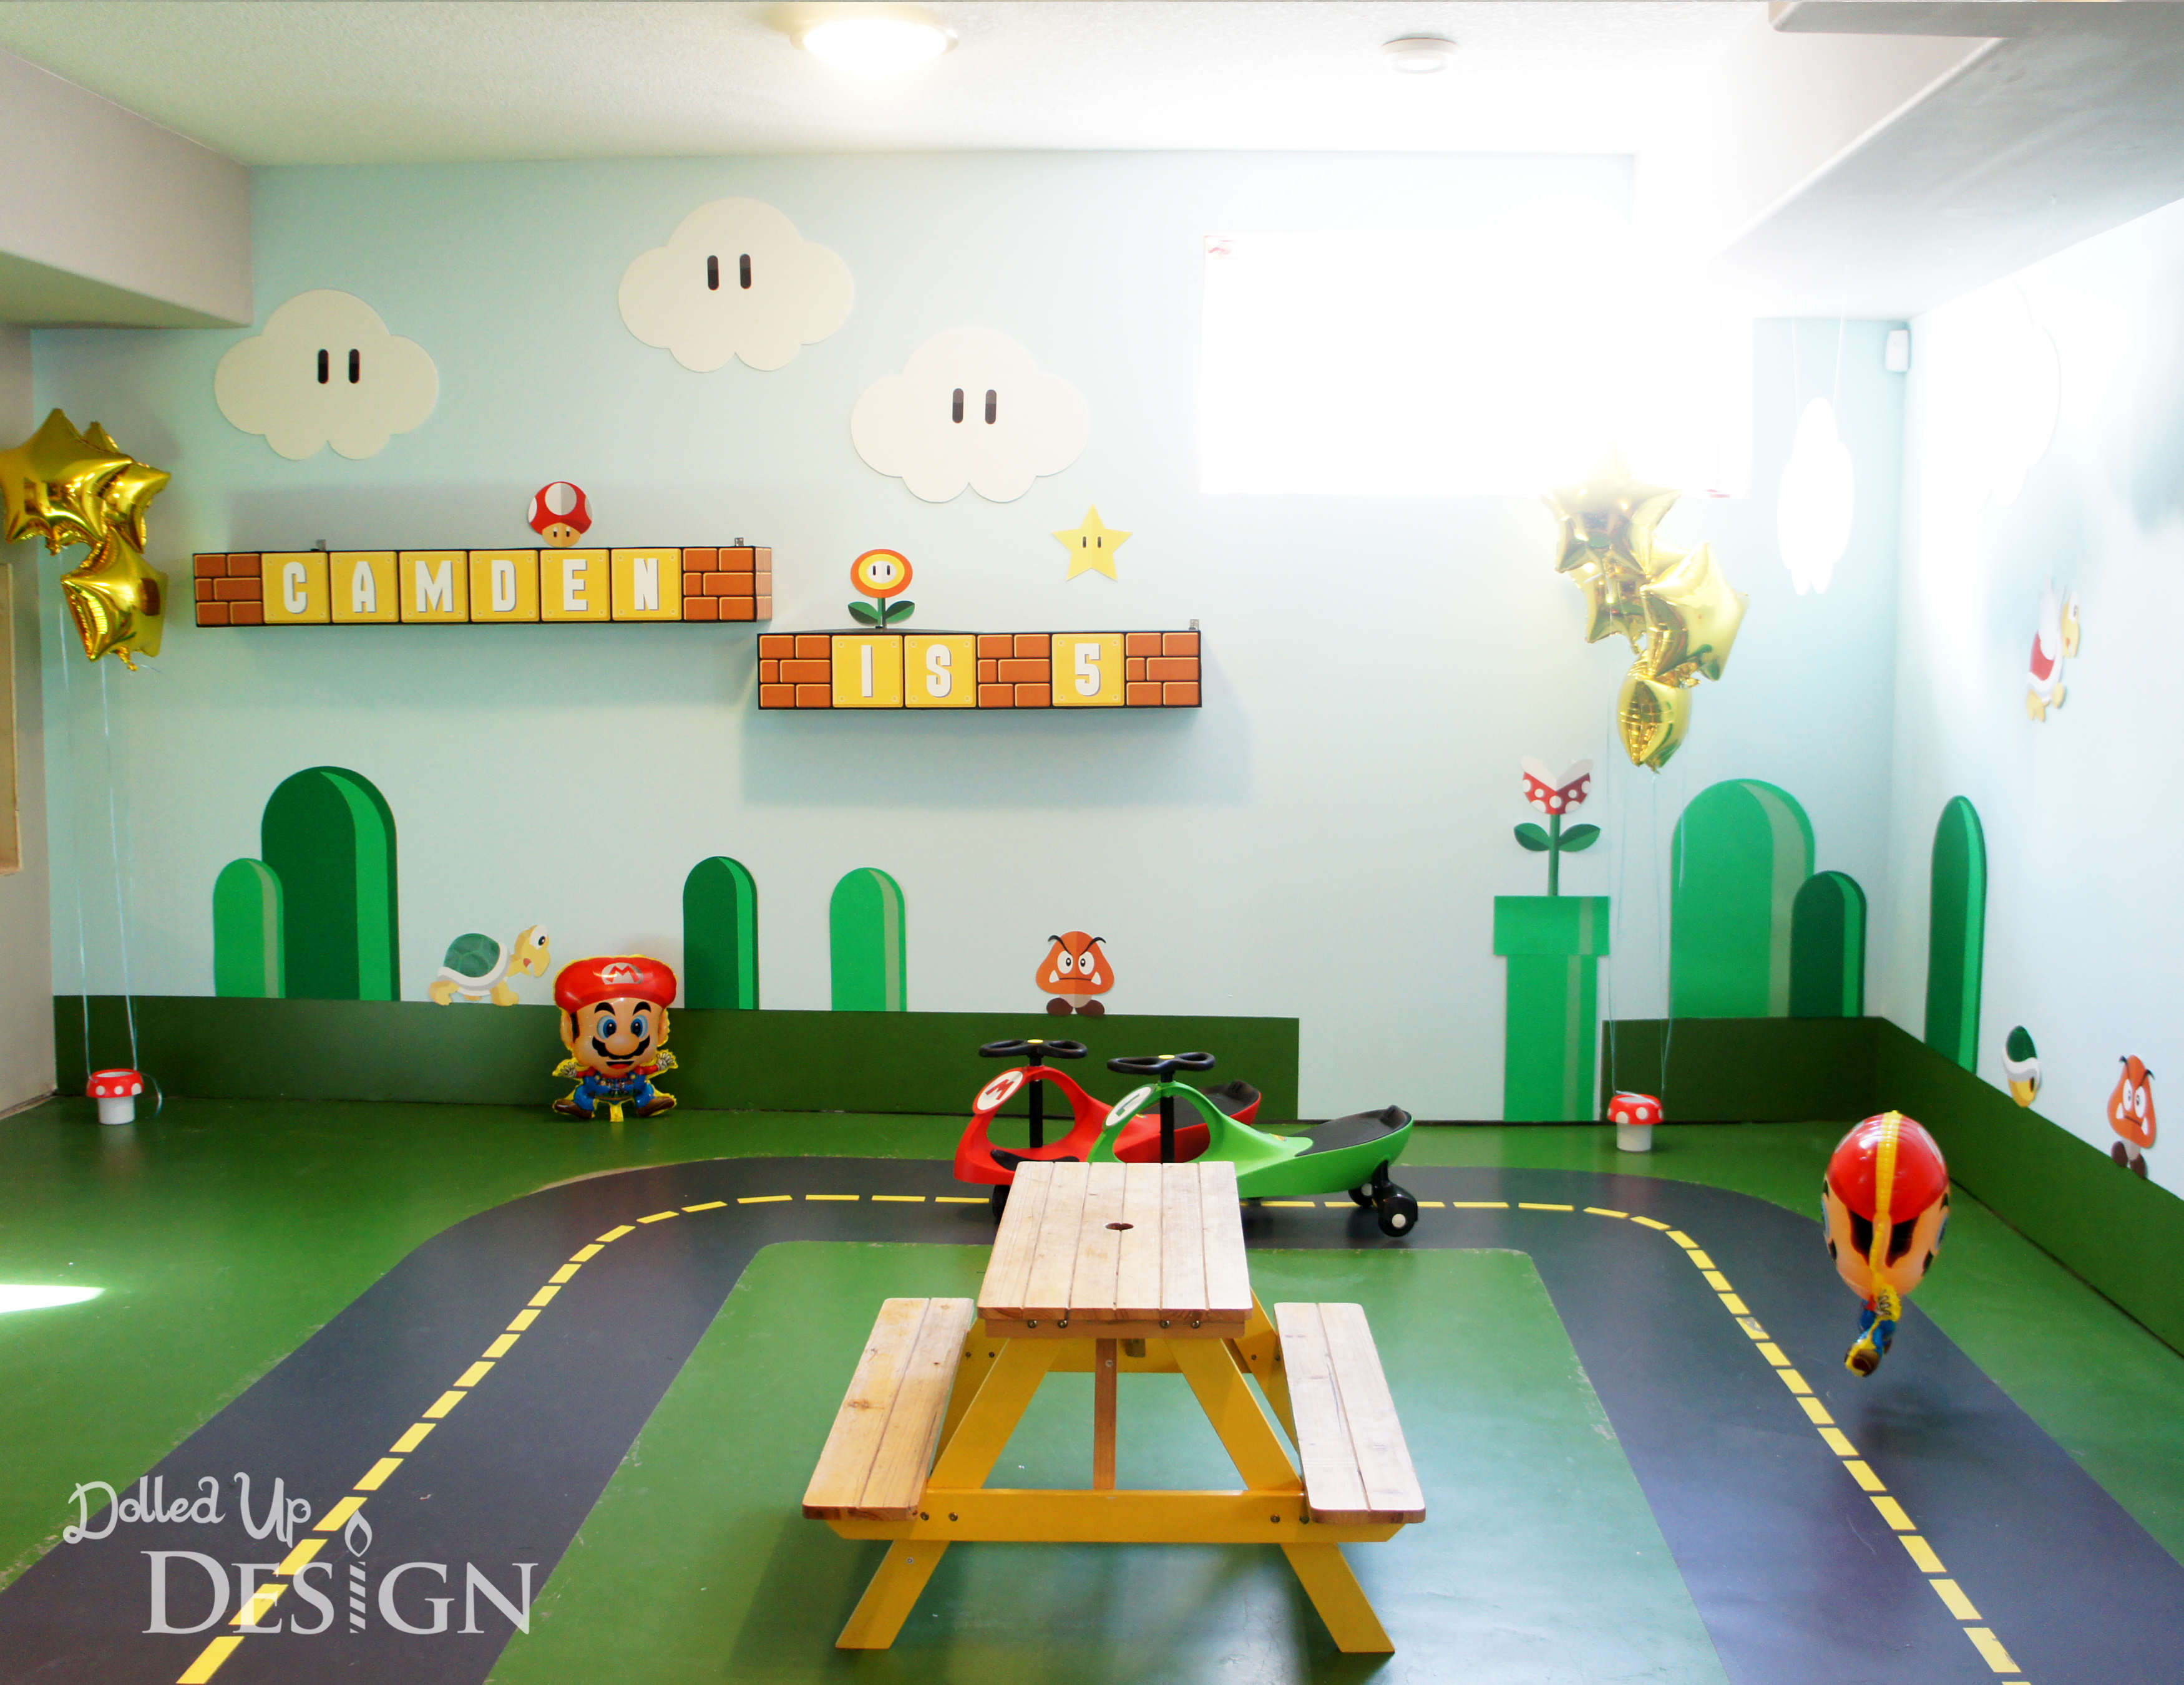
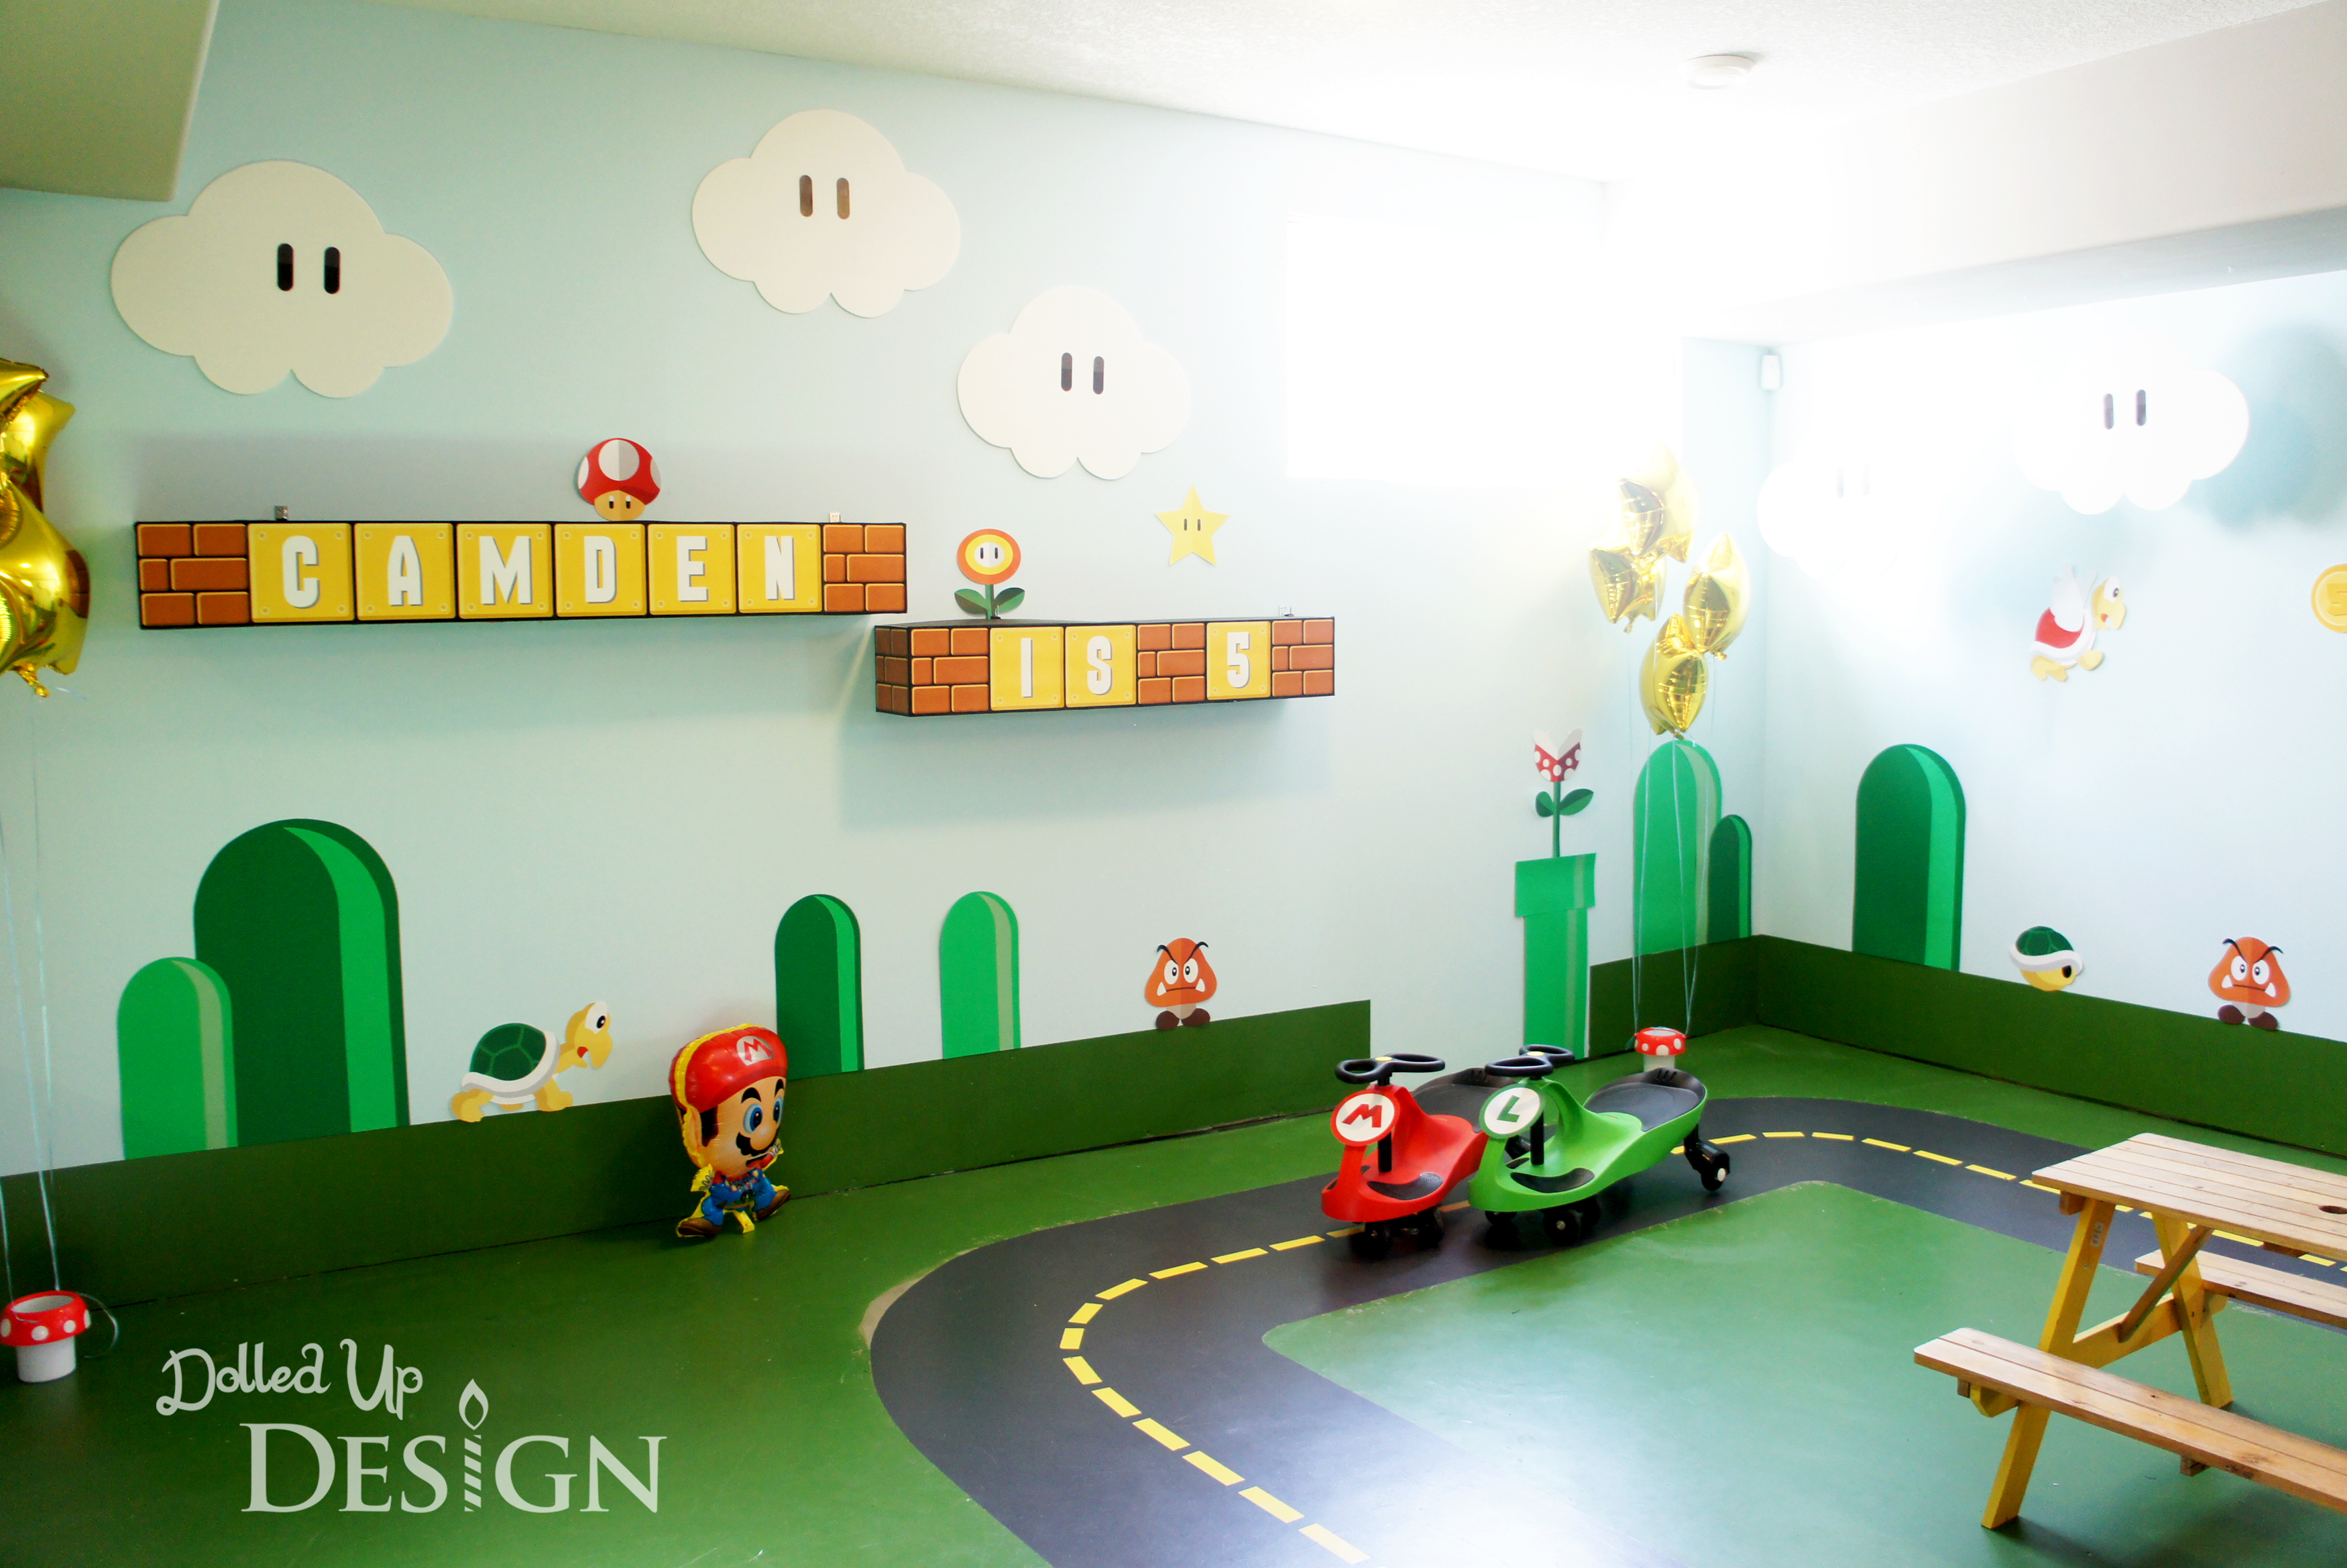
To try and keep costs down after the trip, we ended up hosting his party in our home this year. I still wanted it to be special so I used it as my motivation to complete some of the half finished projects in the basement and create a fun space for the kids to play during the party.
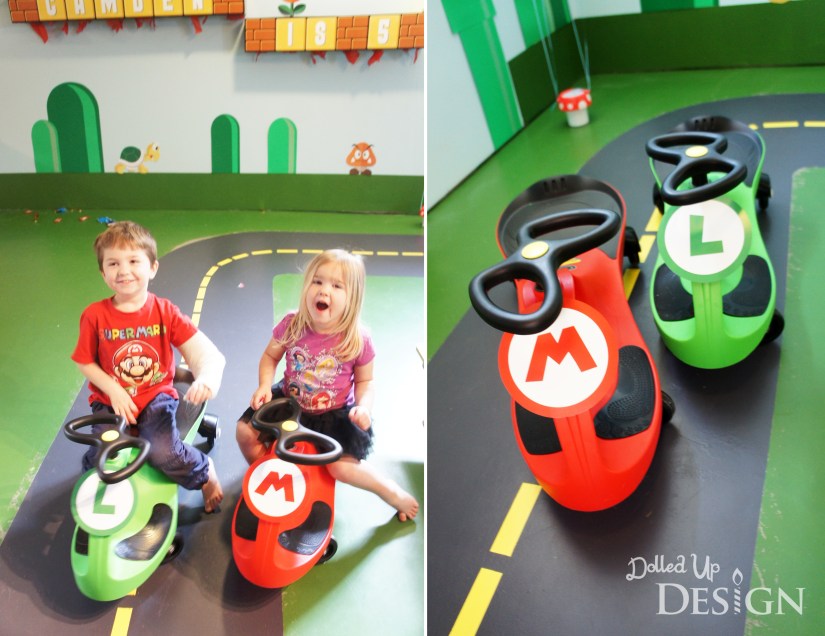
One big project was the painting of the racetrack on the cement floor. Our house is plenty big enough that we don’t need to finish the basement as another living area, but I did want to make it a fun spot for the kids. I still have touch-ups to complete, but the painted floor makes the basement feel so much more inviting and finished.

The kids each got a Plasma Car for Christmas and they just happened to be red and green so I decided to add on the red Mario “M” and a green “L” for Luigi so the kids could have Kart races during the party. These work great on the cement floor and I will admit to even have taken one for a spin around the newly painted track.
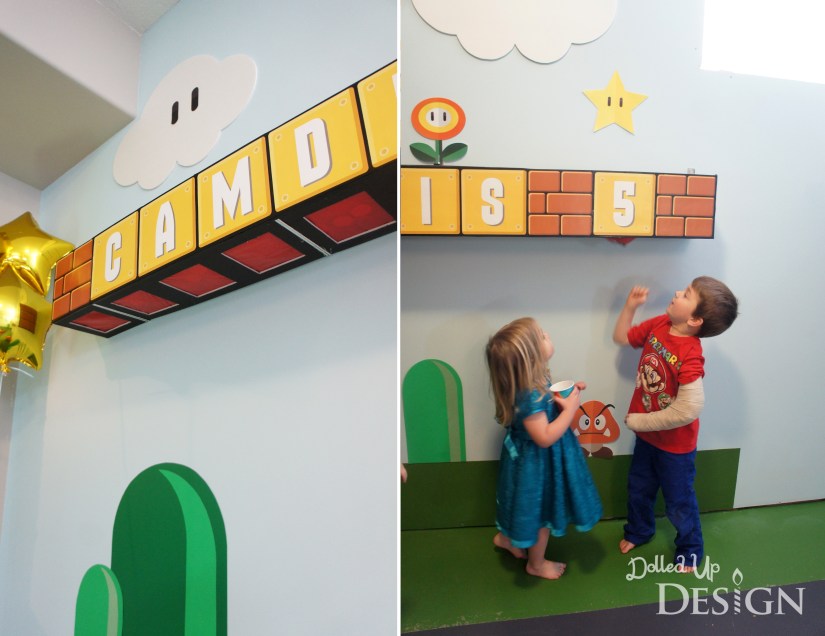
The basement walls were also a blank canvas so I also decided to paint two of them with blue and green and then cut some bush shapes and printed Mario themed figures out of paper to stick overtop. The final additions were large white clouds cut from sheets of foam core and the Mario item boxes I constructed to hang on the wall. It turned out better then I pictured and I love that our basement now looks like something straight out of a video game!

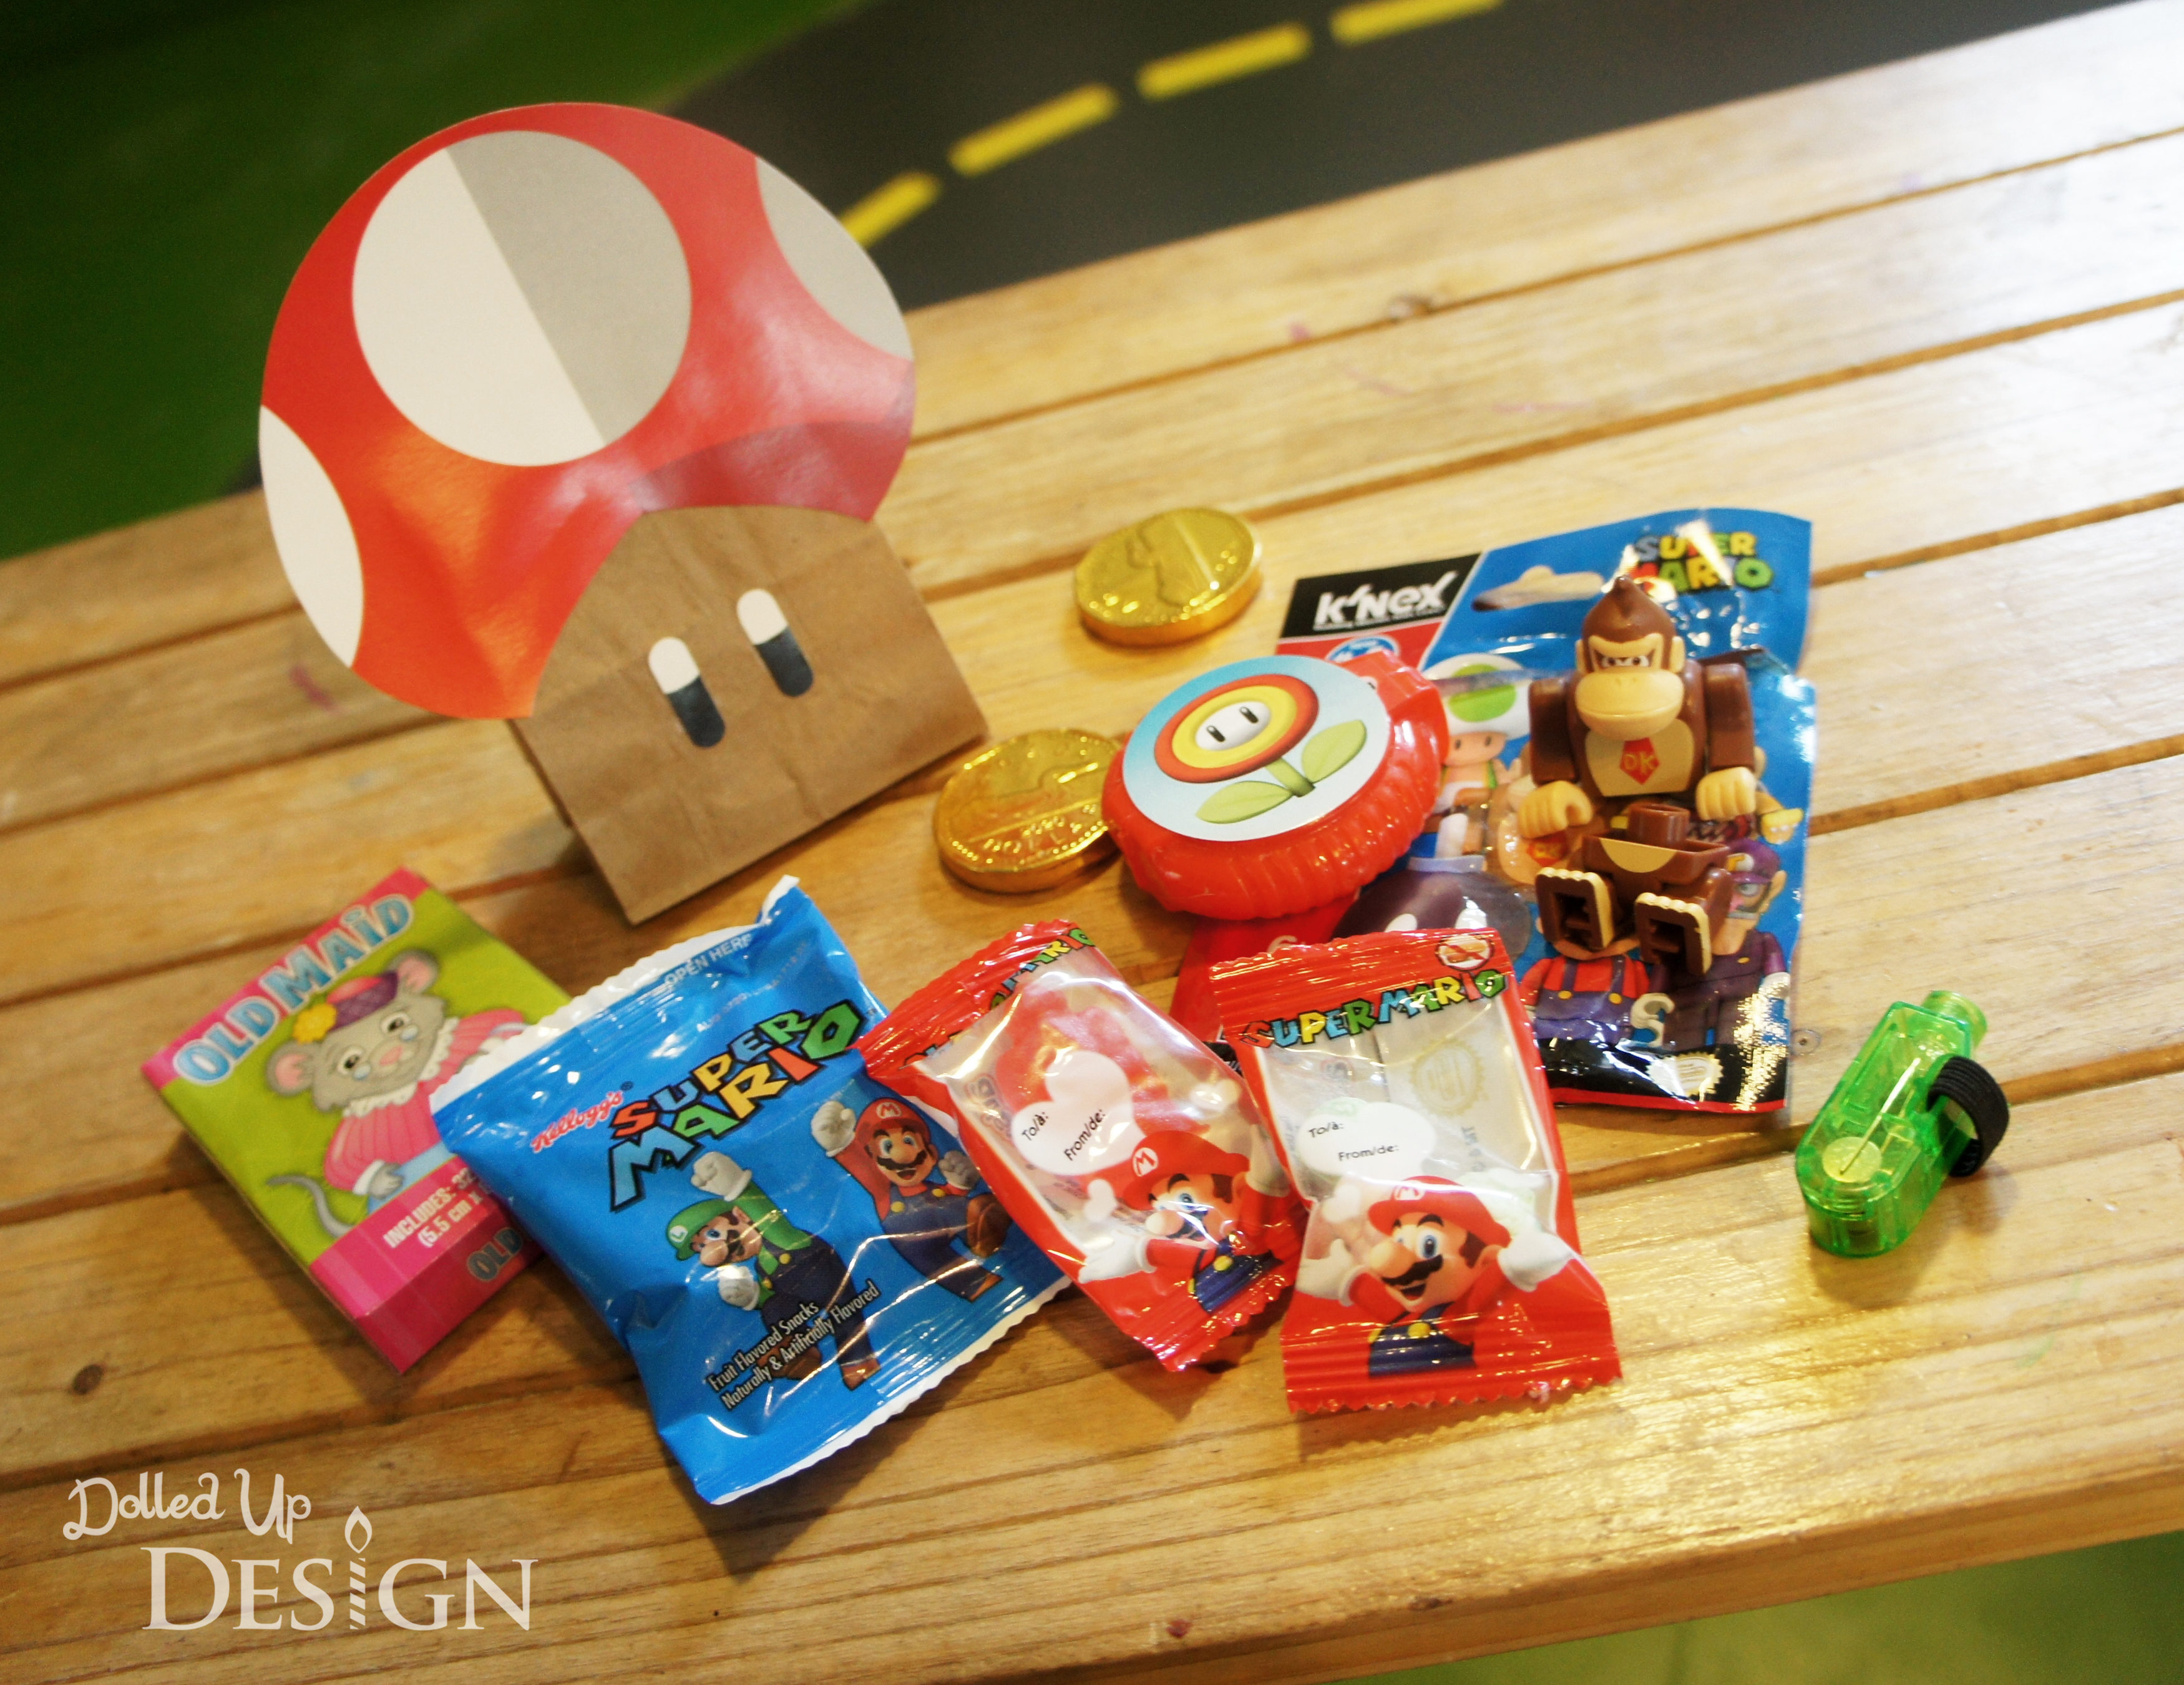
The brick and item boxes on the wall read out “Camden is 5”. These were built from foamcore and contained a fun activity and surprise for the party. I made each box as a separate box with tissue paper access for our guests to punch through and their loot bag items to spill out of.
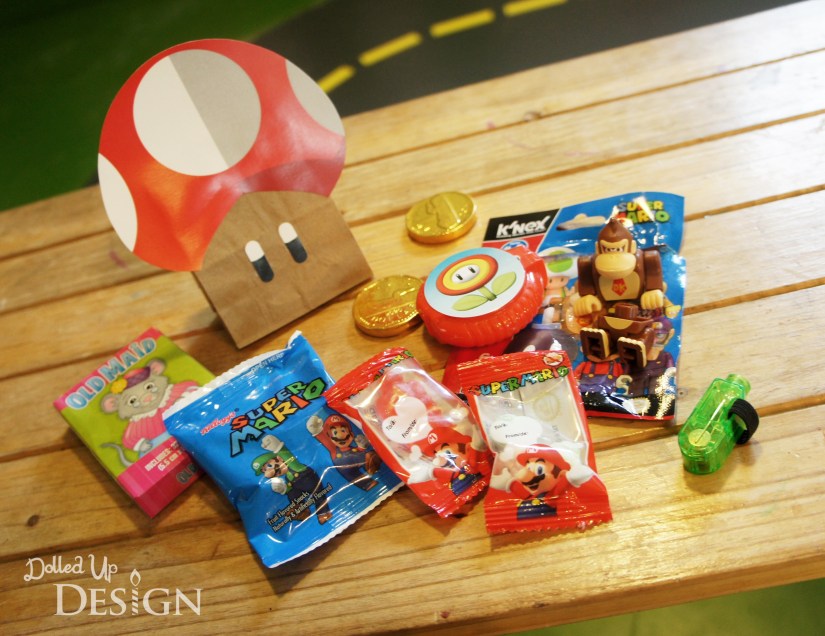
The loot bag items included K’nex Mario figure mystery bags, Mario themed fruit snacks, chocolate coins, bubble gum tape, finger lasers and some other small Mario candies I found in the Valentine’s section at Dollar Tree. I also gave each guest a card game set as they were leaving.
To collect all the items that spilled out of their punch box, the kids each received one of these mushroom bags I made by gluing a paper mushroom top and eyes to a small paper bag.
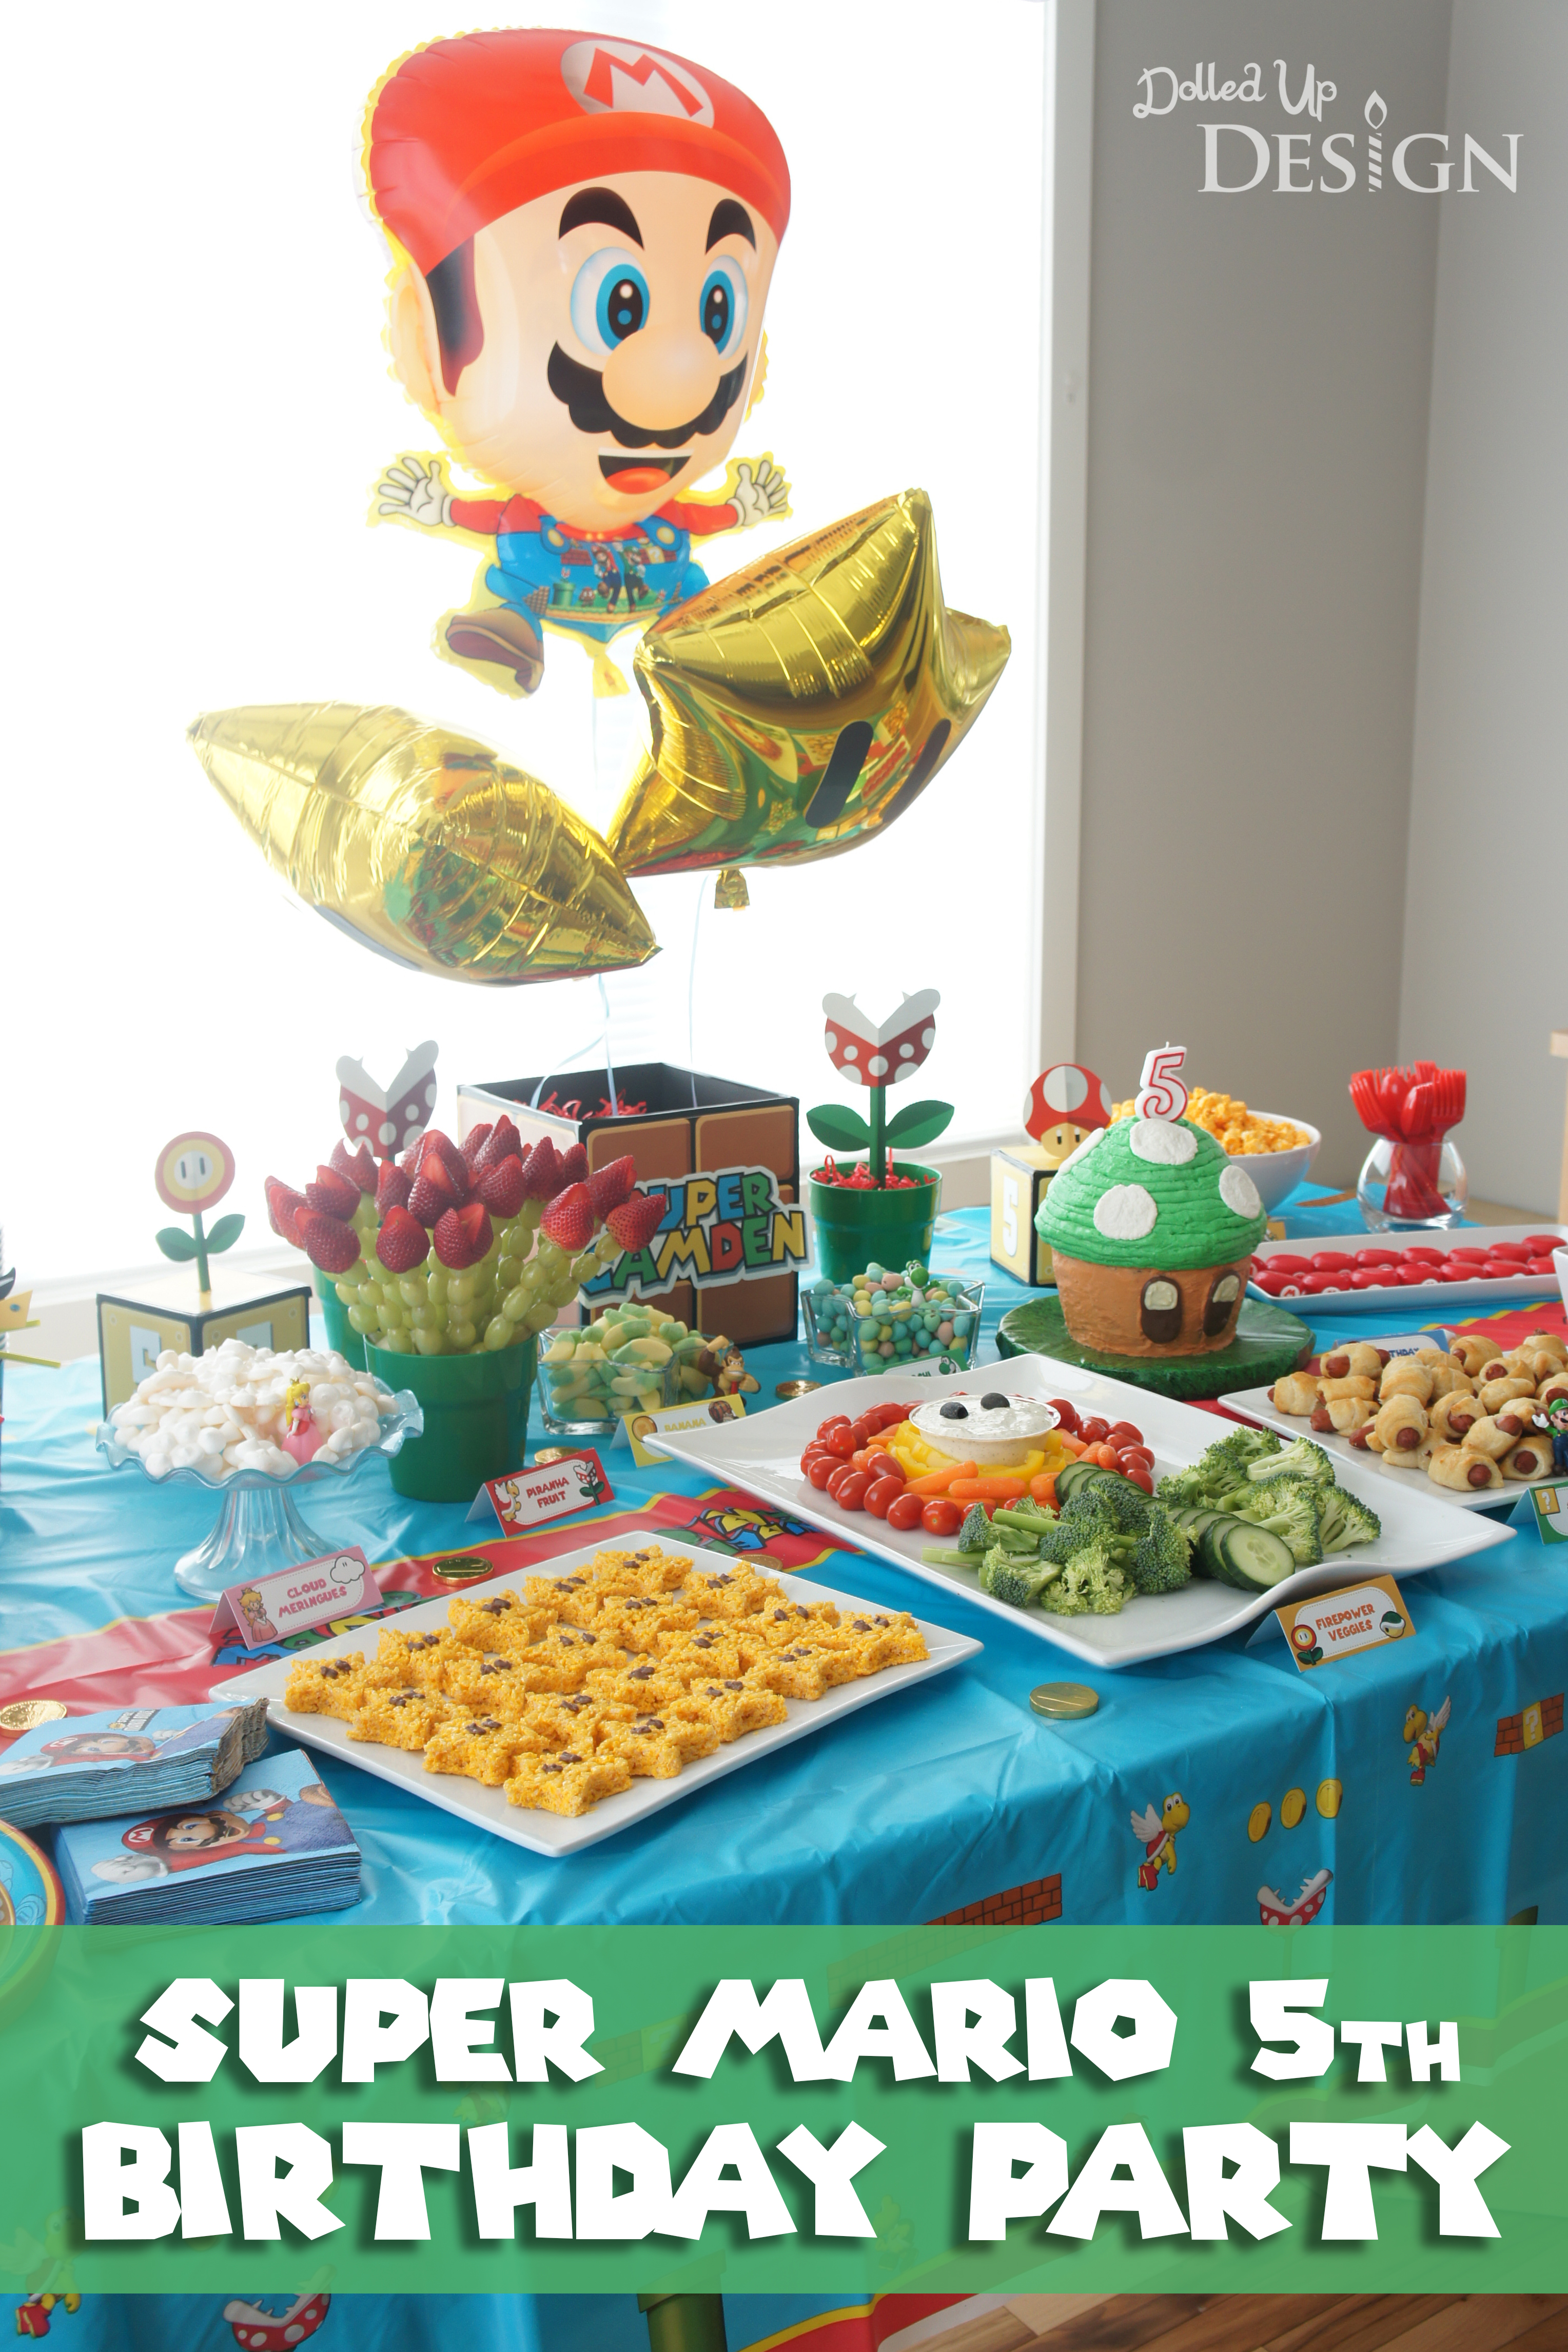
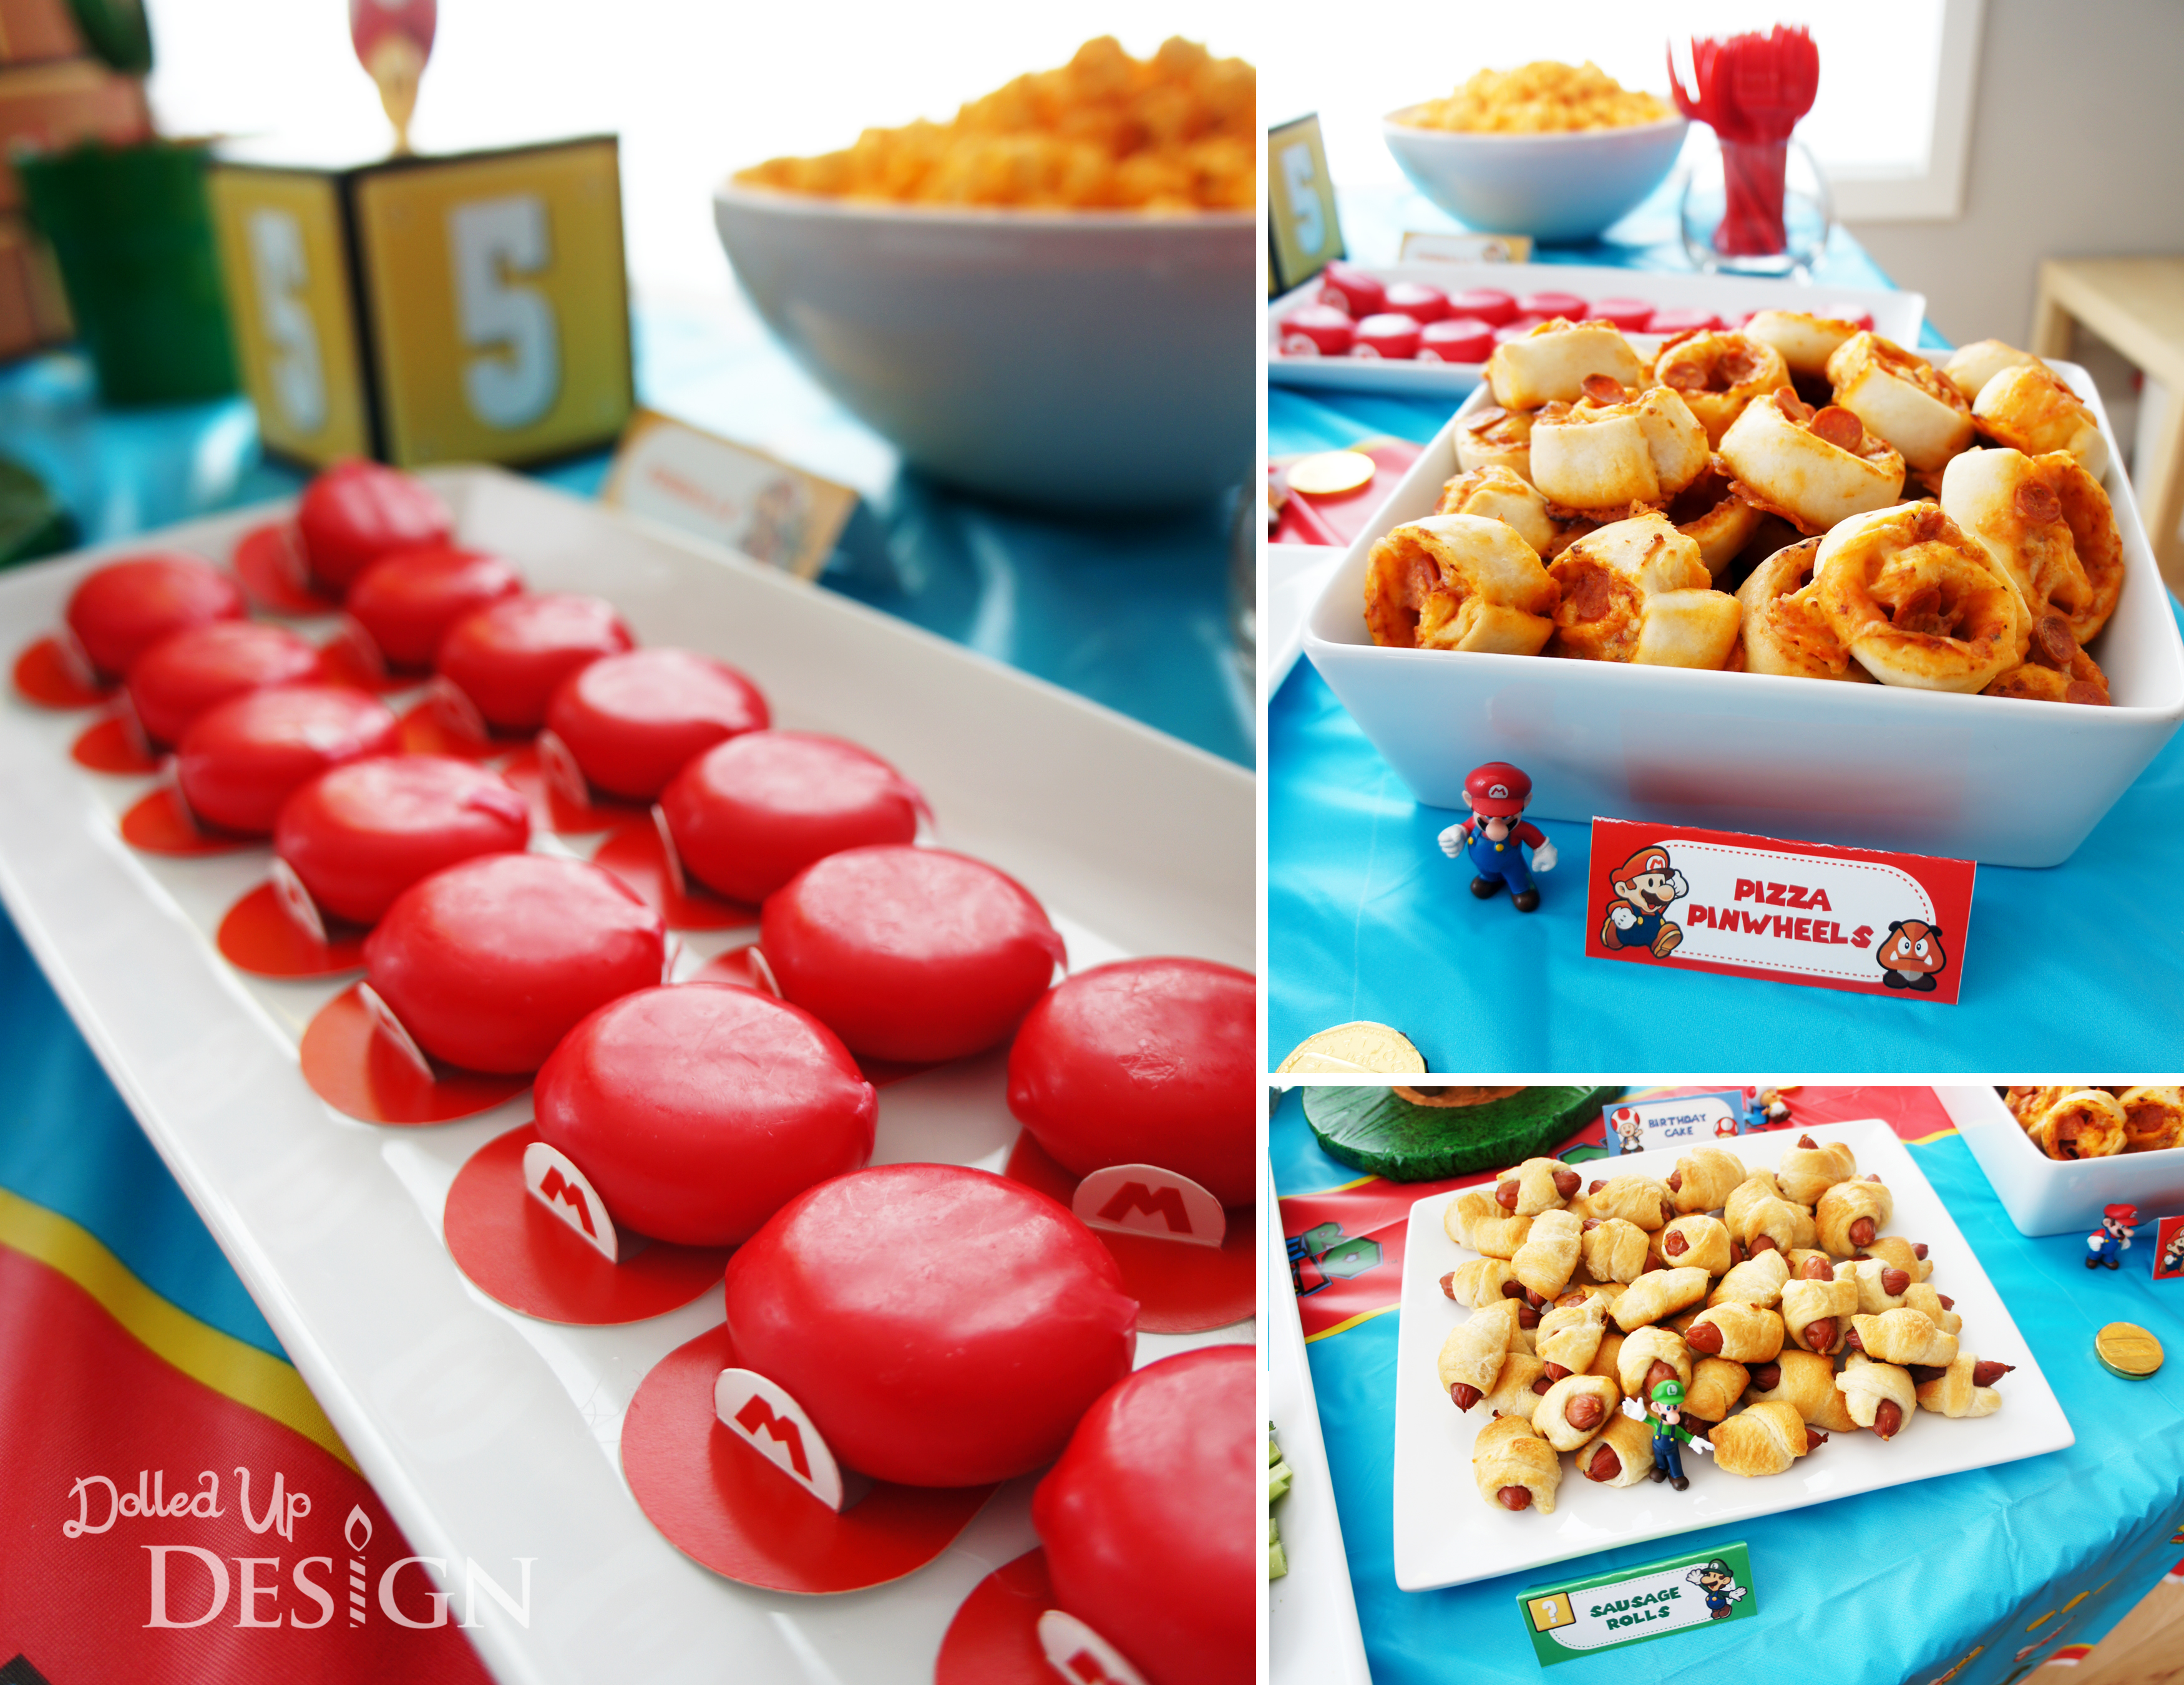
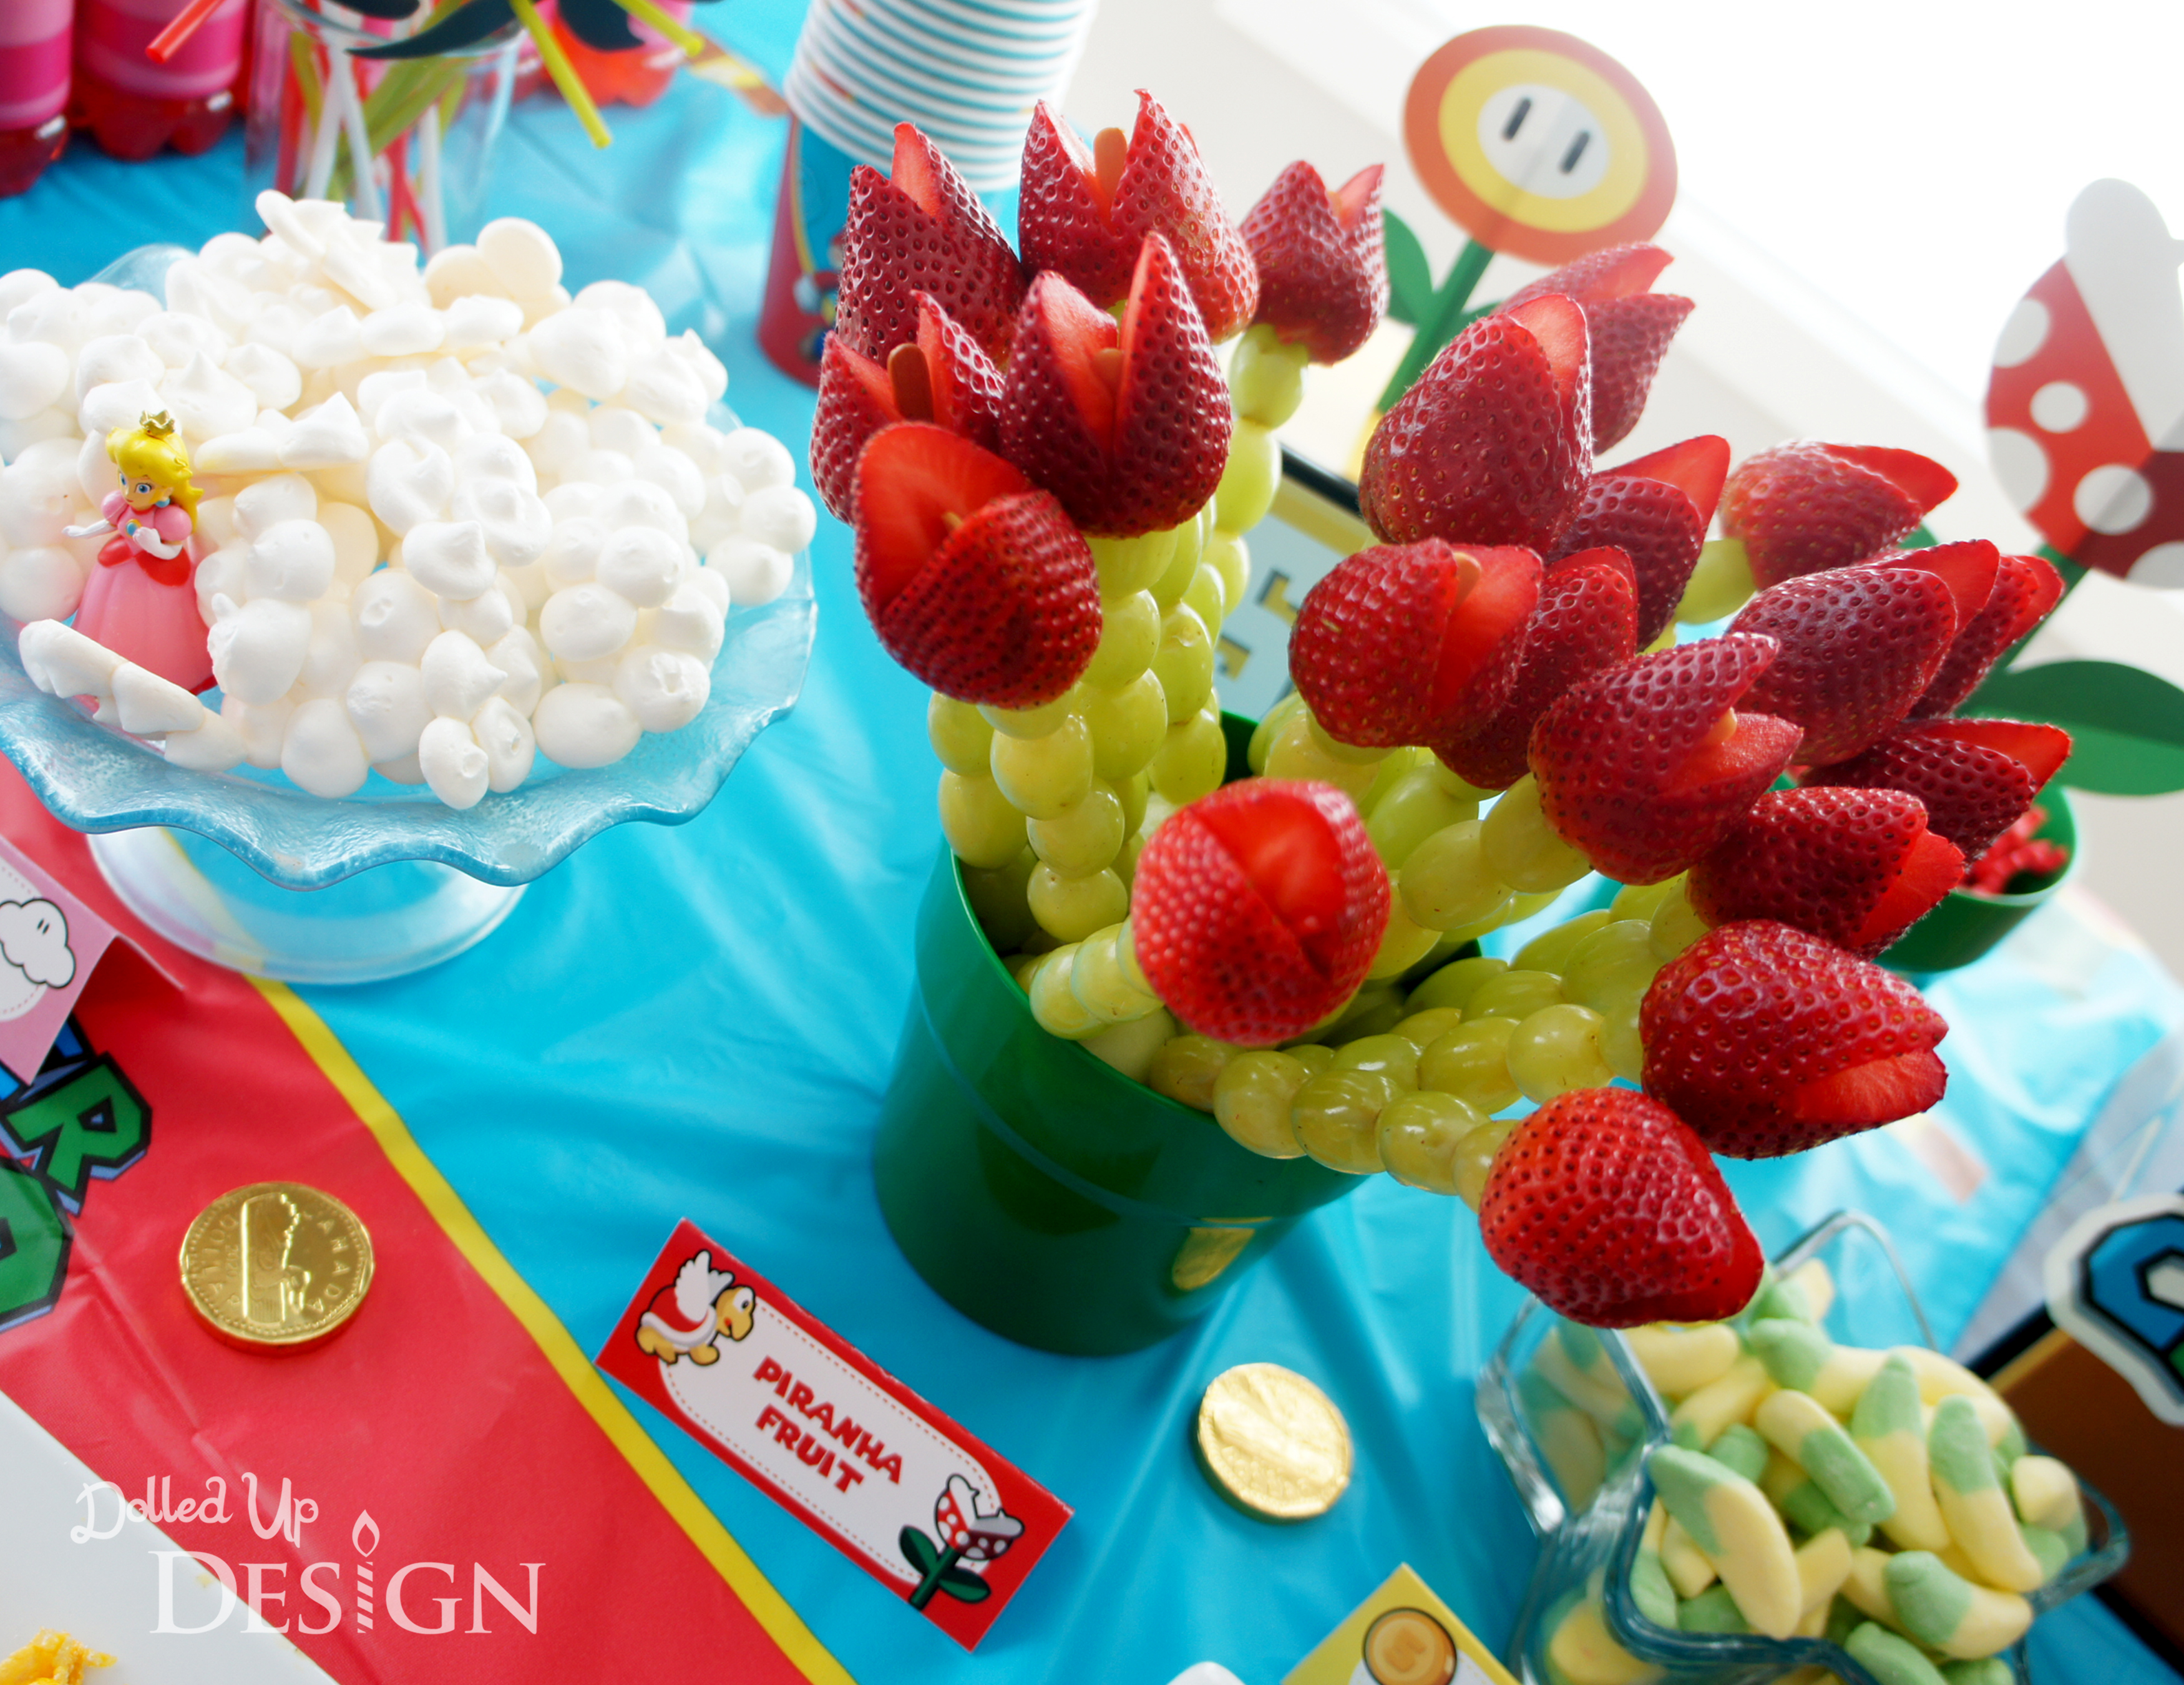
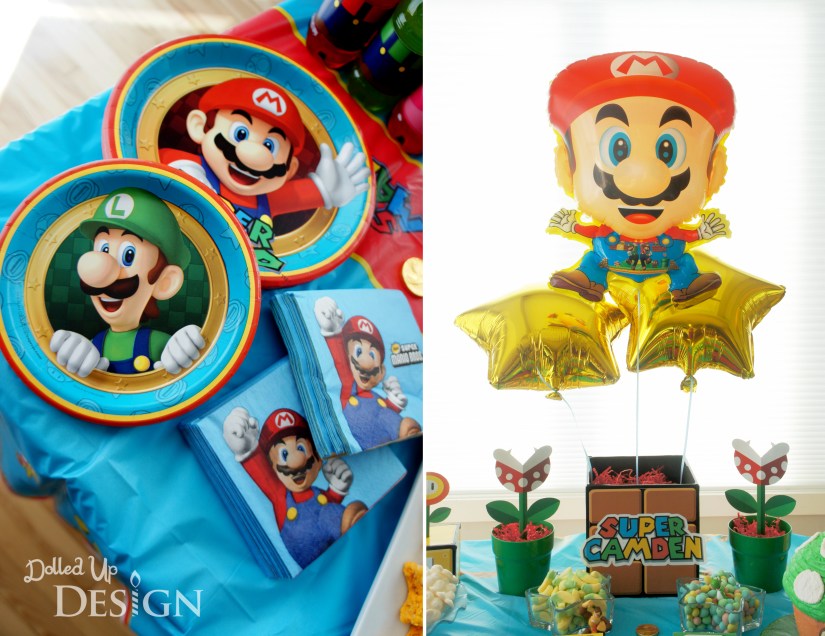
For the food table, I used a pre-printed tablecloth and partyware ordered from Birthday Express. The centerpiece block was created from foamcore and I made piranha plants by inserting cut-out paper images into flower pots I picked up at Ikea.

The party started at 1pm so I wanted some light snacks, rather then a full meal. I decided on pizza rolls, pigs in a blanket and other simple kid-friendly finger foods.
One of my favorite food details was the idea I came up with to turn the Babybel cheese into Mario hats.

The firepower veggie platter was easy to put together and a fun way to get some veggies into the kids. Mine included yellow bell pepper, baby carrots, grape tomatoes, celery, broccoli and cucumber. Having now planned quite a few kids parties, I have learned that the cucumber always is the first to go and I make sure to include it in any kind of veggie platter I might be making for kids.

The piranha plant fruit skewers were simple to make and went over well with the kids. I filled my flower pot with honey dew melon balls to stick the skewers into and threaded the grapes and strawberries onto wooden coffee stir sticks so there were no sharp points for the kids to hurt themselves with.

For sweet treats, I had originally intended to make star shaped sugar cookies, but the Rice Krispie treats were easier and still turned out pretty cute once I piped on melted chocolate eyes.
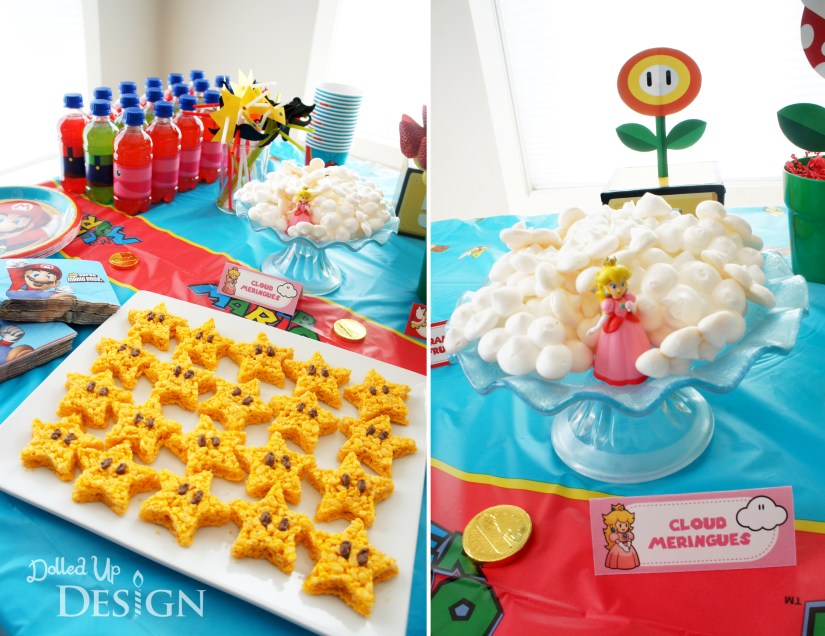
I have become obsessed with meringue cookies and included them on the food table for my last few parties. They are easy to whip up with just a few ingredients and can be piped into a variety of shapes like the clouds I made here.
Chocolate Cadbury Mini Eggs labelled as Yoshi Eggs and gummy bananas with a Donkey Kong label also made for some quick and easy Nintendo themed treats on the table.
For your own printable copy of my food labels, click here: mariopartyfoodlabels_dolledupdesign

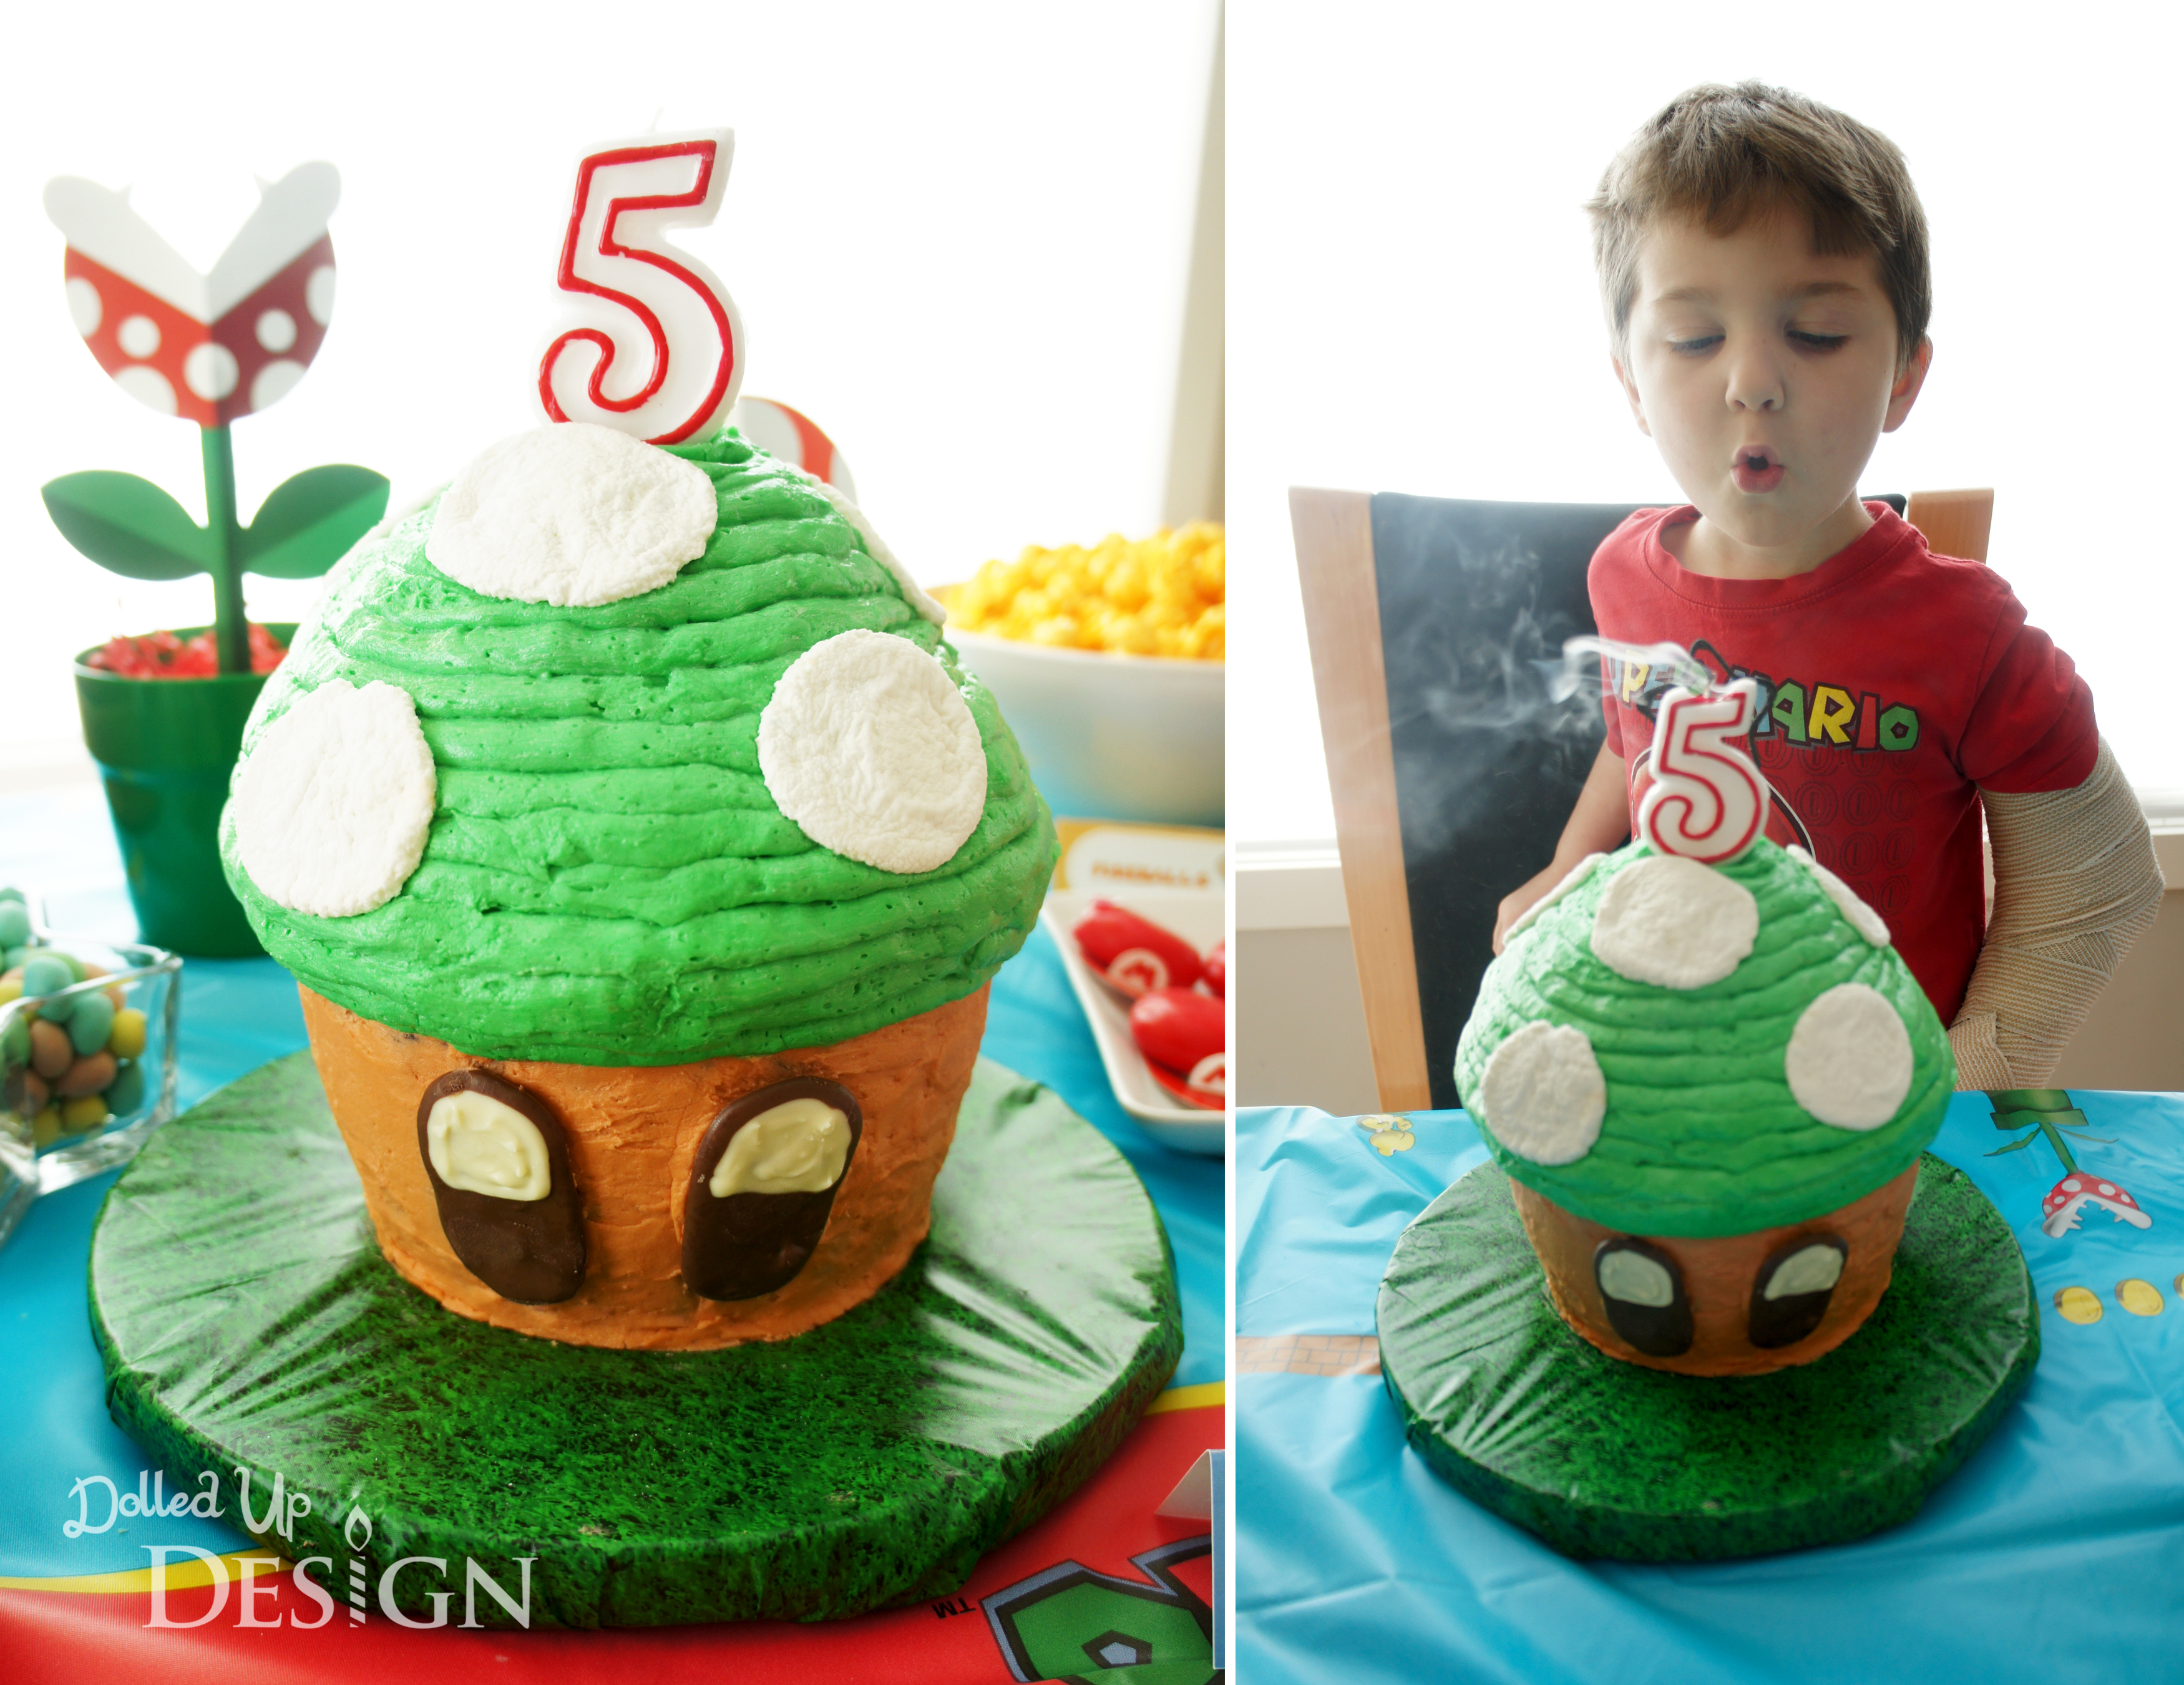
And, of course there was birthday cake! For the cake, I decided to use my giant cupcake pan and try to make a mushroom. I was intending to make the top red, but the birthday boy requested his favorite color green and I didn’t see any good reason to convince him otherwise. To make the white spots on the mushroom top, I simply took my rolling pin to some large marshmallows. It is not perfect, but I was pretty happy with the end result.

One final fun detail were the Hawaiian Punch drink bottles I transformed into Mario, Luigi and Princess Peach with paper labels. They were a hit sipped up through moustache and crown drinking straws. To see more pictures and print your own free bottle labels, please visit my Mario Party Drinks guest post over on Moms and Munchkins.

This was a fun party to plan and I love how excited my boy got over seeing all the small details. I am afraid I am creating a bit of a party monster, though, because as we were food shopping for the party he began picking out items and telling me how I could transform them to fit the theme. “Just add a Luigi hat and me and my friends can have these yogurt drinks at my party!” I absolutely love his enthusiasm and it definitely makes all the planning, painting, crafting and baking worthwhile.
Happy Birthday Camden!