Big Hands, Celebrations, Crafts

Mickey Ear Ornaments (Take Two)

Mickey Mouse Ear Ornaments_Make It Yourself

It has been quite a few years since I made my original Mickey Ball Ornaments and the post is still wildly popular at this time of year.  I still love them mine and am always excited to put them on our Christmas tree year after year.
Continue reading “Mickey Ear Ornaments (Take Two)”

Big Hands, Celebrations, Crafts, Gift Ideas, Little Hands

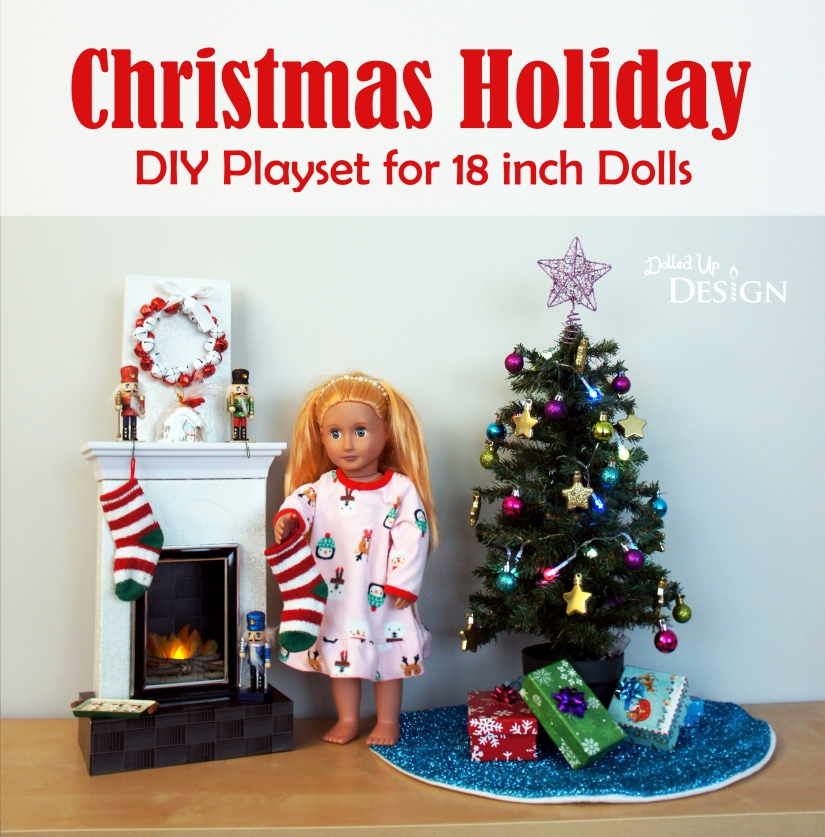
Christmas Holiday DIY Playset for 18 Inch Dolls

Christmas Holiday DIY Playset for 18 inch Dolls

My daughter has begun collecting Our Generation doll’s and I love the wide variety of accessories and playsets available for them.  Everything is just that much cuter in doll size! Continue reading “Christmas Holiday DIY Playset for 18 Inch Dolls”

Celebrations

Moana Party Inspiration: DIY Kakamora Cups

Moana Party_Kakamora DIY Party Cups

We recently celebrated my daughter’s 5th birthday and the birthday girl requested a Moana themed party.  Even though we planned a very small family celebration, I love a good theme and can’t help myself from coming up with a few DIY projects to set the scene and make her day extra special. Continue reading “Moana Party Inspiration: DIY Kakamora Cups”

Celebrations, Everyday Life, Gift Ideas, Two Legged Fun, Uncategorized

Disney On Ice: It Pays to Be Prepared

Disney On Ice: Dare to Dream Review

Since a Disney trip is not in the cards for us this year, I decided to try and fill that void by booking us tickets to Disney on Ice: Dare to Dream.  After reading glowing reviews online and seeing by my 3 year olds reaction to the commercials for the show on Disney Junior, I knew we would all have a great time.  Continue reading “Disney On Ice: It Pays to Be Prepared”

Big Hands, Crafts, Gift Ideas, Little Hands

Easy DIY Handprint Snowman Christmas Cards

SONY DSC

Between my two children, we have 6 different teachers to buy Christmas gifts for this Holiday season.  My kids both love school and I think the teachers and aides play a big part in that so I wanted a small gift each to thank them for their efforts. Continue reading “Easy DIY Handprint Snowman Christmas Cards”

Everyday Life, Two Legged Fun

Giving Back Without Breaking The Bank: Operation Christmas Child

This week we are focusing our charitable efforts on a more global scale with the Operation Christmas Child Shoe Box program run by Samaritan’s Purse International Relief.  The church my daughter’s preschool is run out of collects these boxes every year, so it was very easy for me to grab two boxes to fill and bring back.  Annual collection week for all shoeboxes runs next week from November 16-22 so there is still time for you to fill a box and help make a huge difference in a child’s life.

The boxes are meant to be filled with a variety of toys, school supplies and toiletries.   They are shipped all across the world to children in third world countries who might not otherwise receive anything for Christmas.  The Operation Christmas Child site has great instructions on How To Pack a Shoebox, and I really love this expanded list of box-filling ideas from Passionate Penny Pincher.

Operation Christmas Child Labels and Boxes

Continue reading “Giving Back Without Breaking The Bank: Operation Christmas Child”

Celebrations, Parties

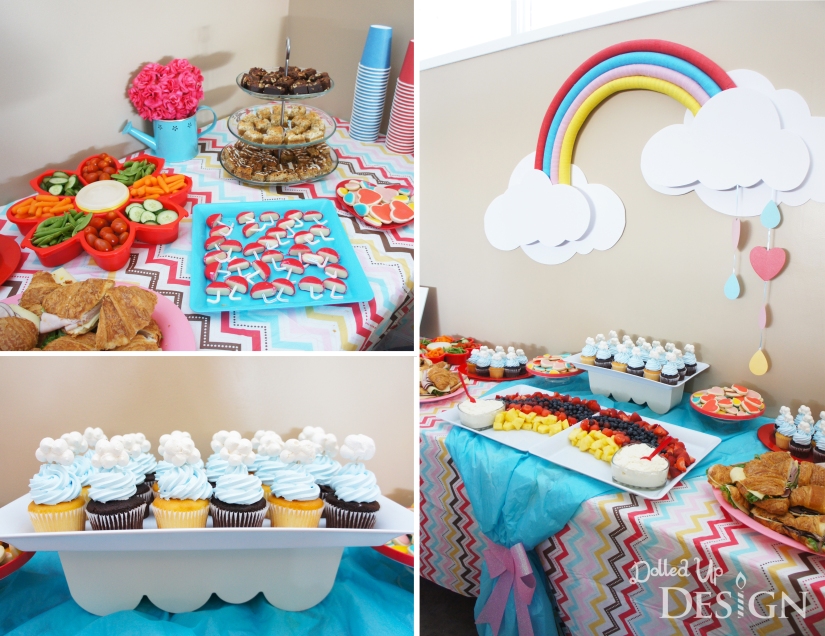
Drops of Love Baby Shower

SONY DSC

When my good friend asked me to help with her daughter’s baby shower it was an easy yes.  I knew she would be undergoing back surgery just a few weeks before the shower so it was a good way for me to lend a hand during her recovery period.  She also gave me plenty of months notice which always makes it that much easier to agree to.

It was nice to be able to help out a friend by doing something I love, and lucky for me she trusted me enough to pass full creative control over.  I had attended the gender reveal party so I knew the baby was going to be a girl and spent a lot of time perusing pinterest to try and come up with the perfect girly theme.  I had seen these chevron printed tablecloths at Target that I loved, so I decided to pick a couple of them up to use for the food table.  The baby is due in April so my mind went to April Showers which helped me settle on a rainbow theme using the color scheme from the tablecloths.

SONY DSC

SONY DSC

My main decoration was a large rainbow and clouds I crafted to hang on the wall.  The clouds were simply cut from white foamcore and I created the rainbow by winding colored streamers around tubes of foam plumbing insulation.   I was able to find the foamcore at the dollar store and the insulation tubes were reused from the Olympic Rings I had crafted for my sons birthday party last year, making it a very inexpensive party decoration.

SONY DSC

Guests were greeted into the hall with a simple sign I designed to match my rainbow decoration.  Inside, they were invited to make their mark on a fingerprint guestbook and help create a lasting reminder of the day for the sweet momma-to-be.  I have always loved the idea of a fingerprint guestbook and I thought fingerprints lent well to becoming little raindrops under my rainbow and cloud graphic.

SONY DSC

Alongside the guestbook were cards where everyone could write their wishes for baby, and then place them into an adorable pink mailbox I found on clearance after Valentine’s day.

The guest of honor’s best friend also set up a Guess Mommy’s Tummy game where guests cut a piece of yarn to the size they thought would fit around the mommy’s waist.  Her sweet 4 year old niece ended up being the closest and the consensus was that it was a direct result of how much time she spends hugging the little cousin growing in auntie’s tummy.  🙂

SONY DSC

I found some cute watering cans at the Dollar Store and filled them with a fake rose arrangement to use on the food table.  The baby’s name will include “Rose” so it seemed fitting.  I also did some quick subway art with the phrase “Love makes good things grow”.

SONY DSC

The heart and raindrop shaped sugar cookies were baked and decorated by myself.  They were a bit time consuming, but I was really happy with the way they looked piled on the small platters throughout the table.

The cupcakes were ordered through Walmart and finished off with cloud shaped toppers I baked out of meringue.  They fit perfectly with the theme and I was pleasantly surprised just how darn tasty those Walmart cupcakes were!  I normally bake my own, but I might have to keep them in mind for my next party.

SONY DSC

SONY DSC

The fruit was displayed as a rainbow and served with clouds of white chocolate creamcheese dip from heart shaped bowls I bought at Dollar Tree.  I tried to keep to my color scheme and used strawberries, blueberries, red grapes, watermelon balls and fresh pineapple.

SONY DSC

One other fun detail I “borrowed” from Pinterest were these tiny umbrella’s from half a round of Babybel cheese and a plastic bendy straw.  I had the straws trimmed down ahead of time so it was easy to cut the cheese in half and assemble them right before the party.

SONY DSC

I always find shower games tricky so I decided to reuse one of the ideas from my sister’s Elephant themed baby shower.  Everyone there seemed to enjoy the baby version of Price is Right, so I decided to revamp my artwork and use it again at this shower.

SONY DSC

The printables were designed with the color scheme in mind and I think the best part of the game was watching the momma-to-be try to match the price tags to the right products.  She did fairly well, only mixing up a couple of the prices.

SONY DSC

It turned out to be a lovely afternoon and I loved the way all my details came together to give a bright pop of color and remind us that Spring and other good things are on the way!

SONY DSC

Momma-to-be was beyond spoiled by all her close family and friends and should now be more then ready to welcome that sweet baby girl into the world in the upcoming weeks.  I can’t wait to meet her!


Celebrations, Parties

A Super Mario 5th Birthday

SONY DSC

My little guy’s love of all things Mario has not faded in the past few months, so when it came time to start planning his 5th birthday he was very confident in what he wanted for his party theme.  I grew up playing Mario on original NES and knew it was something I could have a lot of fun with so I was more then happy to go along with his request.

SONY DSC

The invite was a simple 5″X7″ single sided card that incorporated a picture of the birthday boy in his Mario costume and the bright graphics seen in the Super Mario video games.

Mario Invite

The party ended up being just 4 days after we returned from our Disneyland trip so I had to be organized and do a lot of the decorating and DIY projects before we left.

To try and keep costs down after the trip, we ended up hosting his party in our home this year.  I still wanted it to be special so I used it as my motivation to complete some of the half finished projects in the basement and create a fun space for the kids to play during the party.

One big project was the painting of the racetrack on the cement floor.  Our house is plenty big enough that we don’t need to finish the basement as another living area, but I did want to make it a fun spot for the kids.  I still have touch-ups to complete, but the painted floor makes the basement feel so much more inviting and finished.

SONY DSC

The kids each got a Plasma Car for Christmas and they just happened to be red and green so I decided to add on the red Mario “M” and a green “L” for Luigi so the kids could have Kart races during the party.  These work great on the cement floor and I will admit to even have taken one for a spin around the newly painted track.

SONY DSC

The basement walls were also a blank canvas so I also decided to paint two of them with blue and green and then cut some bush shapes and printed Mario themed figures out of paper to stick overtop.  The final additions were large white clouds cut from sheets of foam core and the Mario item boxes I constructed to hang on the wall.  It turned out better then I pictured and I love that our basement now looks like something straight out of a video game!

SONY DSC

The brick and item boxes on the wall read out “Camden is 5”.  These were built from foamcore and contained a fun activity and surprise for the party.  I made each box as a separate box with tissue paper access for our guests to punch through and their loot bag items to spill out of.

SONY DSC

The loot bag items included K’nex Mario figure mystery bags, Mario themed fruit snacks, chocolate coins, bubble gum tape, finger lasers and some other small Mario candies I found in the Valentine’s section at Dollar Tree.  I also gave each guest a card game set as they were leaving.

To collect all the items that spilled out of their punch box, the kids each received one of these mushroom bags I made by gluing a paper mushroom top and eyes to a small paper bag.

SONY DSC

For the food table, I used a pre-printed tablecloth and partyware ordered from Birthday Express.  The centerpiece block was created from foamcore and I made piranha plants by inserting cut-out paper images into flower pots I picked up at Ikea.

SONY DSC

SONY DSC

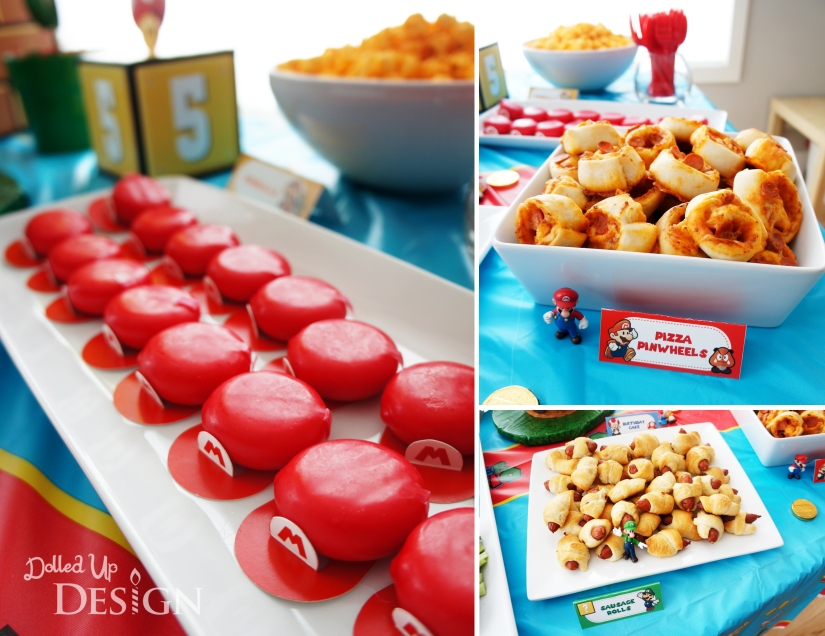
The party started at 1pm so I wanted some light snacks, rather then a full meal.  I decided on pizza rolls, pigs in a blanket and other simple kid-friendly finger foods.

One of my favorite food details was the idea I came up with to turn the Babybel cheese into Mario hats.
SONY DSC

The firepower veggie platter was easy to put together and a fun way to get some veggies into the kids.  Mine included yellow bell pepper, baby carrots, grape tomatoes, celery, broccoli and cucumber.  Having now planned quite a few kids parties, I have learned that the cucumber always is the first to go and I make sure to include it in any kind of veggie platter I might be making for kids.

SONY DSC

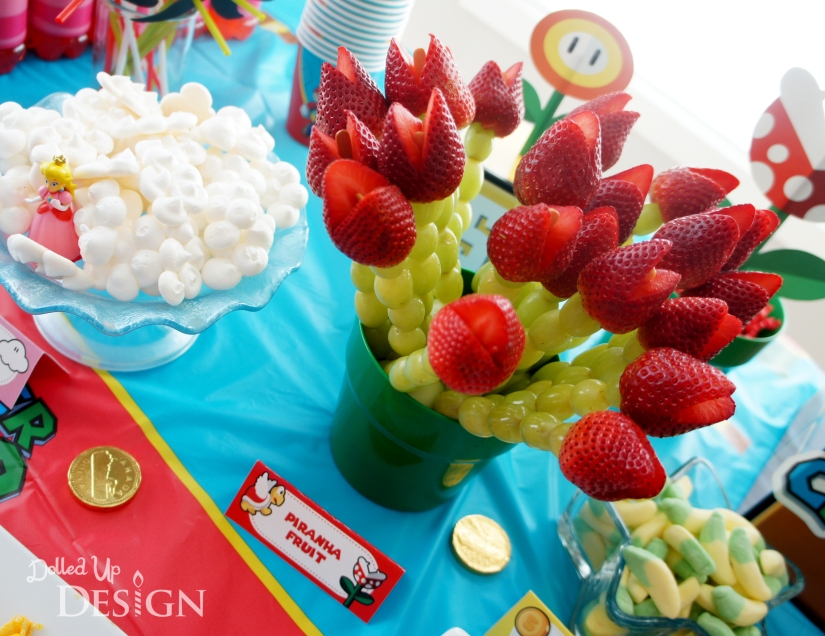
The piranha plant fruit skewers were simple to make and went over well with the kids.  I filled my flower pot with honey dew melon balls to stick the skewers into and threaded the grapes and strawberries onto wooden coffee stir sticks so there were no sharp points for the kids to hurt themselves with.
SONY DSC

For sweet treats, I had originally intended to make star shaped sugar cookies, but the Rice Krispie treats were easier and still turned out pretty cute once I piped on melted chocolate eyes.

I have become obsessed with meringue cookies and included them on the food table for my last few parties.  They are easy to whip up with just a few ingredients and can be piped into a variety of shapes like the clouds I made here.

SONY DSC

Chocolate Cadbury Mini Eggs labelled as Yoshi Eggs and gummy bananas with a Donkey Kong label also made for some quick and easy Nintendo themed treats on the table.

For your own printable copy of my food labels, click here: mariopartyfoodlabels_dolledupdesign

SONY DSC

And, of course there was birthday cake!  For the cake, I decided to use my giant cupcake pan and try to make a mushroom.  I was intending to make the top red, but the birthday boy requested his favorite color green and I didn’t see any good reason to convince him otherwise.  To make the white spots on the mushroom top, I simply took my rolling pin to some large marshmallows.  It is not perfect, but I was pretty happy with the end result.

SONY DSC

One final fun detail were the Hawaiian Punch drink bottles I transformed into Mario, Luigi and Princess Peach with paper labels.  They were a hit sipped up through moustache and crown drinking straws.  To see more pictures and print your own free bottle labels, please visit my Mario Party Drinks guest post over on Moms and Munchkins.

SONY DSC

SONY DSC

This was a fun party to plan and I love how excited my boy got over seeing all the small details.  I am afraid I am creating a bit of a party monster, though, because as we were food shopping for the party he began picking out items and telling me how I could transform them to fit the theme.  “Just add a Luigi hat and me and my friends can have these yogurt drinks at my party!”  I absolutely love his enthusiasm and it definitely makes all the planning, painting, crafting and baking worthwhile.

Happy Birthday Camden!

SONY DSC

Celebrations, Gift Ideas

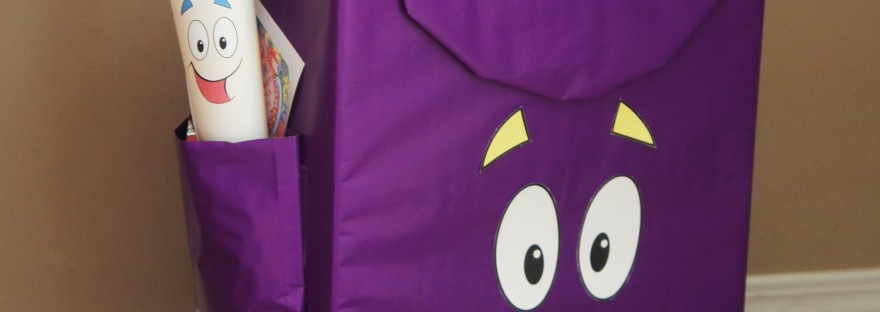
Backpack! Backpack! Dora Themed Gift Wrap

SONY DSC

Over the past year, I have been lucky to meet some very lovely ladies and their adorable children through our playgroup.  I had been in other mommy groups and classes and haven’t really clicked with anyone so I am thankful to have found these ladies and get to spend time with them on a weekly basis.  Our friendship has grown outside of the regularly scheduled playgroup now and I am so excited that we have now started to be invited to some of the kids birthday parties.

The first party we have been invited to was a Dora themed party so I wanted to find the perfect gift.  There is a lot of cheap Dora themed stuff out there so I ended up settling on a cute Disney princess dress and tea party set.  I decided I could make it Dora themed through the wrapping, so I bought a roll of purple wrapping paper and set to work!

Part 1 – “Backpack” wrapping

This idea came from purple paper bag backpack themed treat bags I have seen on the internet.  The gift I bought was a nice rectangular shape so I decided to wrap it and make it look like backpack.  I simply started by wrapping the gift as normal with purple paper.  The pockets, top flap and back straps were just folded out of the same gift wrap and taped on.  The finishing touch was Backpack’s face which I found on the internet and printed on my home computer.  It was cut out and attached with double sided tape.

SONY DSC

The pockets on the backpack were stuffed with Dora fruit snacks and a Dora themed activity book I found from the dollar store.  When I showed the final backpack to my 3 year old, his first questions was “where’s Map?”  With all the other stuff I had for the pockets I didn’t even think to add him, but I am so glad my 3 year old suggested it!  To make Map, all I did was print the same face I used for backpack and rolled up the sheet of paper.

SONY DSC

Part 2 – Helium Balloon Star

If you have been “lucky” enough to have seen an episode of Dora, you have probably seen the happy faced stars floating around.  When looking for Dora gift ideas on the internet I came across pictures of these stars and they reminded me of the star shaped helium balloons I have seen at Dollar Tree.  I know how much my 3 year old loves helium balloons so I thought this would be a nice little addition to the gift.  Unfortunately my Dollar Tree was out of the big star shaped balloons so my idea to have stars floating above backpack had to be modified to be a small star shaped balloon coming out of Backpack’s pocket.

SONY DSC

The balloons are cute on their own, but I figured they could use an extra Dora touch by adding faces to them.  To do this, I simply painted eyes on in whiteout and used a sharpie to draw in the mouth and eyeballs.  And then I found cute “Happy Birthday” helium balloon with Dora on it at Dollarama so I was still able to have a balloon floating above backpack!

SONY DSC

I love the way it turned out and was so excited to give it to the birthday girl.  She didn’t even notice the gift inside wasn’t Dora related, and her mom tells me she was asking for a princess dress anyway, so it ended up being a perfect gift all around.

Now my problem will be to come up with something equally awesome for the next party!  I think I may have set the expectations a little high.

Friday Favorites, Recipes, Sweet

Friday Favorites: Vanilla Cupcakes with Raspberry Buttercream

FridayFavoritesTitle

I decided to bake up some quick cupcakes earlier this week for the human members of our family to enjoy on the dog’s birthday.   They weren’t supposed to be anything spectacular, but they turned out so tasty I just had to share.

SONY DSC

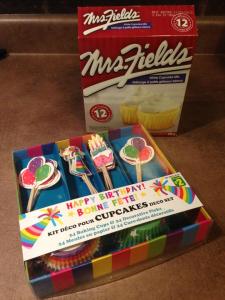
For the cake part, I just used a Mrs.Fields boxed cupcake mix from Dollar Tree.  I absolutely love these mixes and try to keep one chocolate and one vanilla on hand at all times.  They make one dozen cupcakes versus the 24 cupcakes you usually get from a standard boxed cake mix – perfect for our family of four.  The liners and cupcake toppers were a kit I found at Dollarama and had sitting around in the pantry.  The multicolored sprinkles were my 3 year old son’s addition.

995183_10153150395950497_1626957816_n

Because we had just gone berry picking the day before and I had a bunch of fresh raspberries, I thought why not add them to the buttercream icing.  After a quick google search I came up with this frosting recipe from myrecipes.com.  It whipped up quickly and tasted amazing!  It was just the right amount of sweet and tart, with a pretty pink hue.  I enjoyed it so much I may just have to make it again for my birthday in a few weeks!

SONY DSC

Raspberry Buttercream Frosting

Ingredients

  • 1/2 cup butter, softened
  • 1/2 cup fresh raspberries
  • 1 teaspoon vanilla extract (almond would be delicious too!)
  • 1/8 teaspoon salt
  • 1 (16-oz.) package icing sugar

Directions

1. Beat butter, raspberries, vanilla and salt with electric mixer (medium) until smooth and creamy.

2. Gradually add the icing sugar, blending in slowly after each addition.

BONUS FAVORITE  Since we are on the topic of Dollar stores and cupcakes, I thought I would share one more favorite – these awesome cupcake carriers I have found at both Dollarama and Dollar Tree.  I always struggle to find a way to store my cupcakes at home or take them to events so these are perfect.  At only a couple dollars each they are a lot cheaper then a lot of other versions, and I feel like I could afford to lose or leave them behind without being too heartbroken.  I only wish they had them for mini cupcakes!

cupcakeholder

(I was going to take a picture with cupcakes in it but by the time I thought of it, the cupcakes were long gone!  They were that good.)