My daughter has begun collecting Our Generation doll’s and I love the wide variety of accessories and playsets available for them. Everything is just that much cuter in doll size! Continue reading “Christmas Holiday DIY Playset for 18 Inch Dolls”

My daughter has begun collecting Our Generation doll’s and I love the wide variety of accessories and playsets available for them. Everything is just that much cuter in doll size! Continue reading “Christmas Holiday DIY Playset for 18 Inch Dolls”
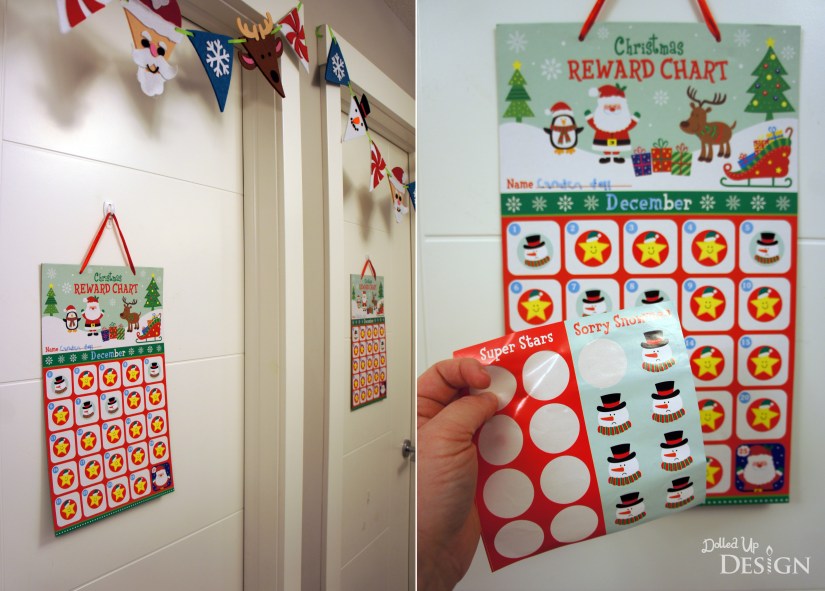
About a month before Christmas I came across these behaviour sticker charts at Dollarama. I had actually looked over them on previous trips to the store, but after a week of trying behaviour from both my children I grabbed two out of desperation.
This week we are focusing our charitable efforts on a more global scale with the Operation Christmas Child Shoe Box program run by Samaritan’s Purse International Relief. The church my daughter’s preschool is run out of collects these boxes every year, so it was very easy for me to grab two boxes to fill and bring back. Annual collection week for all shoeboxes runs next week from November 16-22 so there is still time for you to fill a box and help make a huge difference in a child’s life.
The boxes are meant to be filled with a variety of toys, school supplies and toiletries. They are shipped all across the world to children in third world countries who might not otherwise receive anything for Christmas. The Operation Christmas Child site has great instructions on How To Pack a Shoebox, and I really love this expanded list of box-filling ideas from Passionate Penny Pincher.

Continue reading “Giving Back Without Breaking The Bank: Operation Christmas Child”

It’s no secret that I like to shop at the Dollar Store, especially around this time of year when I am looking for inexpensive and easy Christmas gifts. The Dollar Store is my go-to for most of the kids stocking stuffers, gift basket fillers, and when I am looking for a little something extra to finish off a gift.
When I came across this Snowman Accessories Kit in the Christmas section at Dollarama, I knew immediately that it would make the perfect friend or neighbour gift. I had bought a similar kit for $10 last year, so I was excited to see these were only $2 each.

I’ve been subjected to a lot of Frozen watching lately, so the first thought that came to my head when I saw the kit was “Do You Wanna Build a Snowman?”. I decided to repackage the kits and personalize with my own topper featuring everyone’s favorite talking snowman.
To tie in my Olaf concept, I dressed my graphic of him up in some of the included accessories from the kit. Once happy with the design, I simply sent the toppers to print at Staples, then cut them out and stapled them on. I even decided to keep the kits in the clear plastic bags the kits were already in and just switched out the cardboard topper.

With the Dollar Store packaging removed, I am excited to give them out as gifts and am willing to bet most people would never even guess how little my finished kits cost. They are great little gift to make and have on hand for the Christmas season, and I love that it makes for a fun family activity that will work for a wide range of ages.

These would also make great favors if you are having a Frozen themed or Christmas party. If you are looking to DIY there are some great tutorials on Pinterest to show how to make your own snowman building kit, but I don’t think I would be able to make them for less then the $2 I paid per kit.
FREE PRINTABLE: To make your own toppers, simply click the artwork below to save and send to print. I have sized the artwork to 7.75″ wide to fit perfectly over the Dollarama kits.


We celebrated my husband’s birthday over the weekend. He says he doesn’t really care whether or not I do anything for it, but I do like to try and make it special. It is especially hard since I go all out for the kids birthdays and that leaves them expecting something spectacular every time there is a birthday in the house to celebrate.
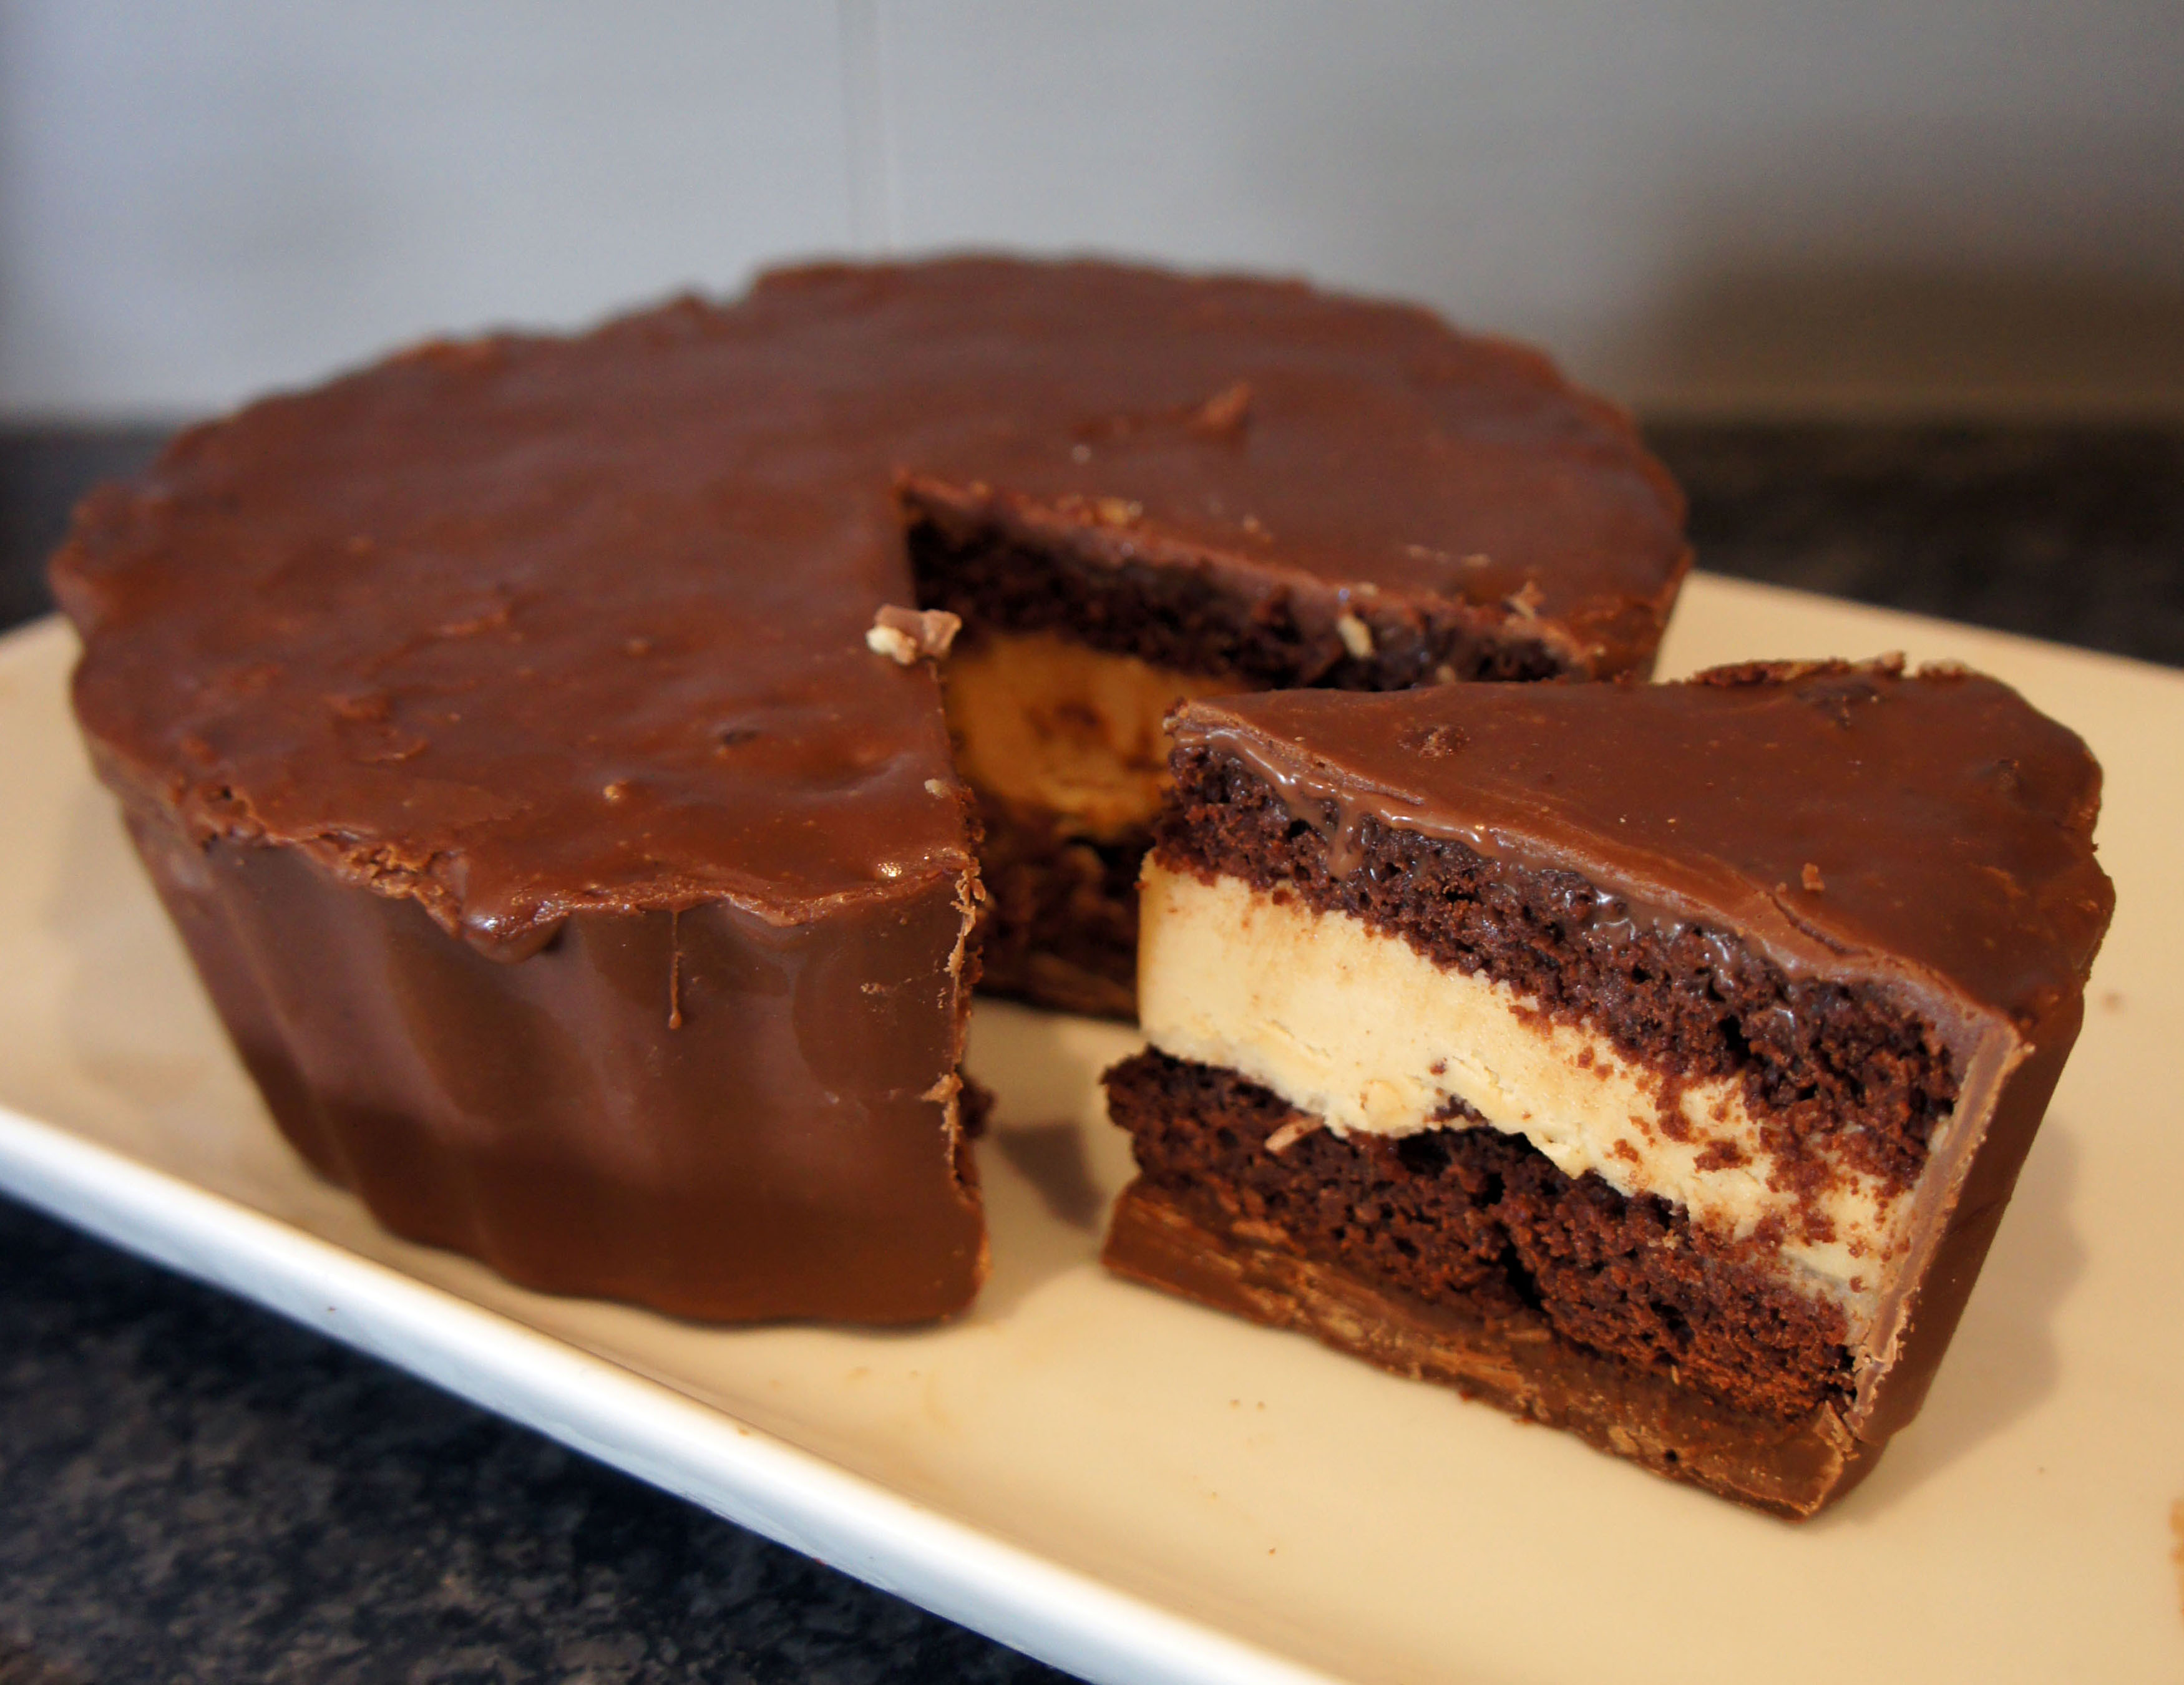
I have tried planning parties/get togethers for him in the past and it has always been a big bust. This year it was just our family of four and my brother and new sister in law who joined us for one final dinner before they head off across the country for school in Halifax. My original plan was to try go-karting, but the weather wasn’t very cooperative and my silly husband preferred to spend the day hauling rock, raking out sand and laying the patio in our backyard. We ended up just having a really nice barbeque dinner and I surprised him by making a giant cake version of his favorite chocolate bar:

Inside the chocolate shell of his giant peanut butter cups were layers of chocolate cake, peanut butter buttercream frosting and chocolate ganache. With that combo I knew it was going to be good, but I was still surprised how delicious the final result actually was!
I didn’t really follow a recipe.
The cake layer was a boxed mix, baked in the bottom section of my giant cupcake pan to give me the right shape.
The peanut butter frosting was actually some leftover buttercream I had frozen from doing my brother’s wedding cake at the beginning of the month. Once thawed, I whipped it in my stand mixer with a couple giant spoonfuls of peanut butter.
The outer shells were simply melted milk chocolate chips I spread with a spatula into the cupcake base section of the same giant cupcake tin. I did it in two layers and once hardened in the fridge they were fairly easy to pop out of the pan in one solid piece. This is a method I had done before for my daughters giant cupcake birthday cake so I was fairly confident it would work out.
The chocolate ganache layer on top was a basic ganache recipe made by melting the same milk chocolate chips with some whipping cream. I did mine in the microwave to keep it easy.
I had the basic idea in my head and was very happy to discover this great instructional video on youtube. I could post a recipe and directions, but MyCupcakeAddiction does such a great job that you might as well just check out her Make a GIANT Reese’s Peanut Butter Cup video! Hers is prettier then mine, but in the end I was pretty happy with my results.

I don’t decorate for my husband’s birthday as I would for the kids, but I do like to throw up a birthday banner to recognize the day and add a festive feel to the house for the kids. I ended up finding some baseball themed paper plates and napkins at Michaels, so my 4 year old and I decided to go with a bit of a baseball theme since lately daddy has been really into watching the Toronto Blue Jays play.

Do you recognize the letters in the birthday banner? It is repurposed from Keira’s Snow White Picnic Party we had back in May.
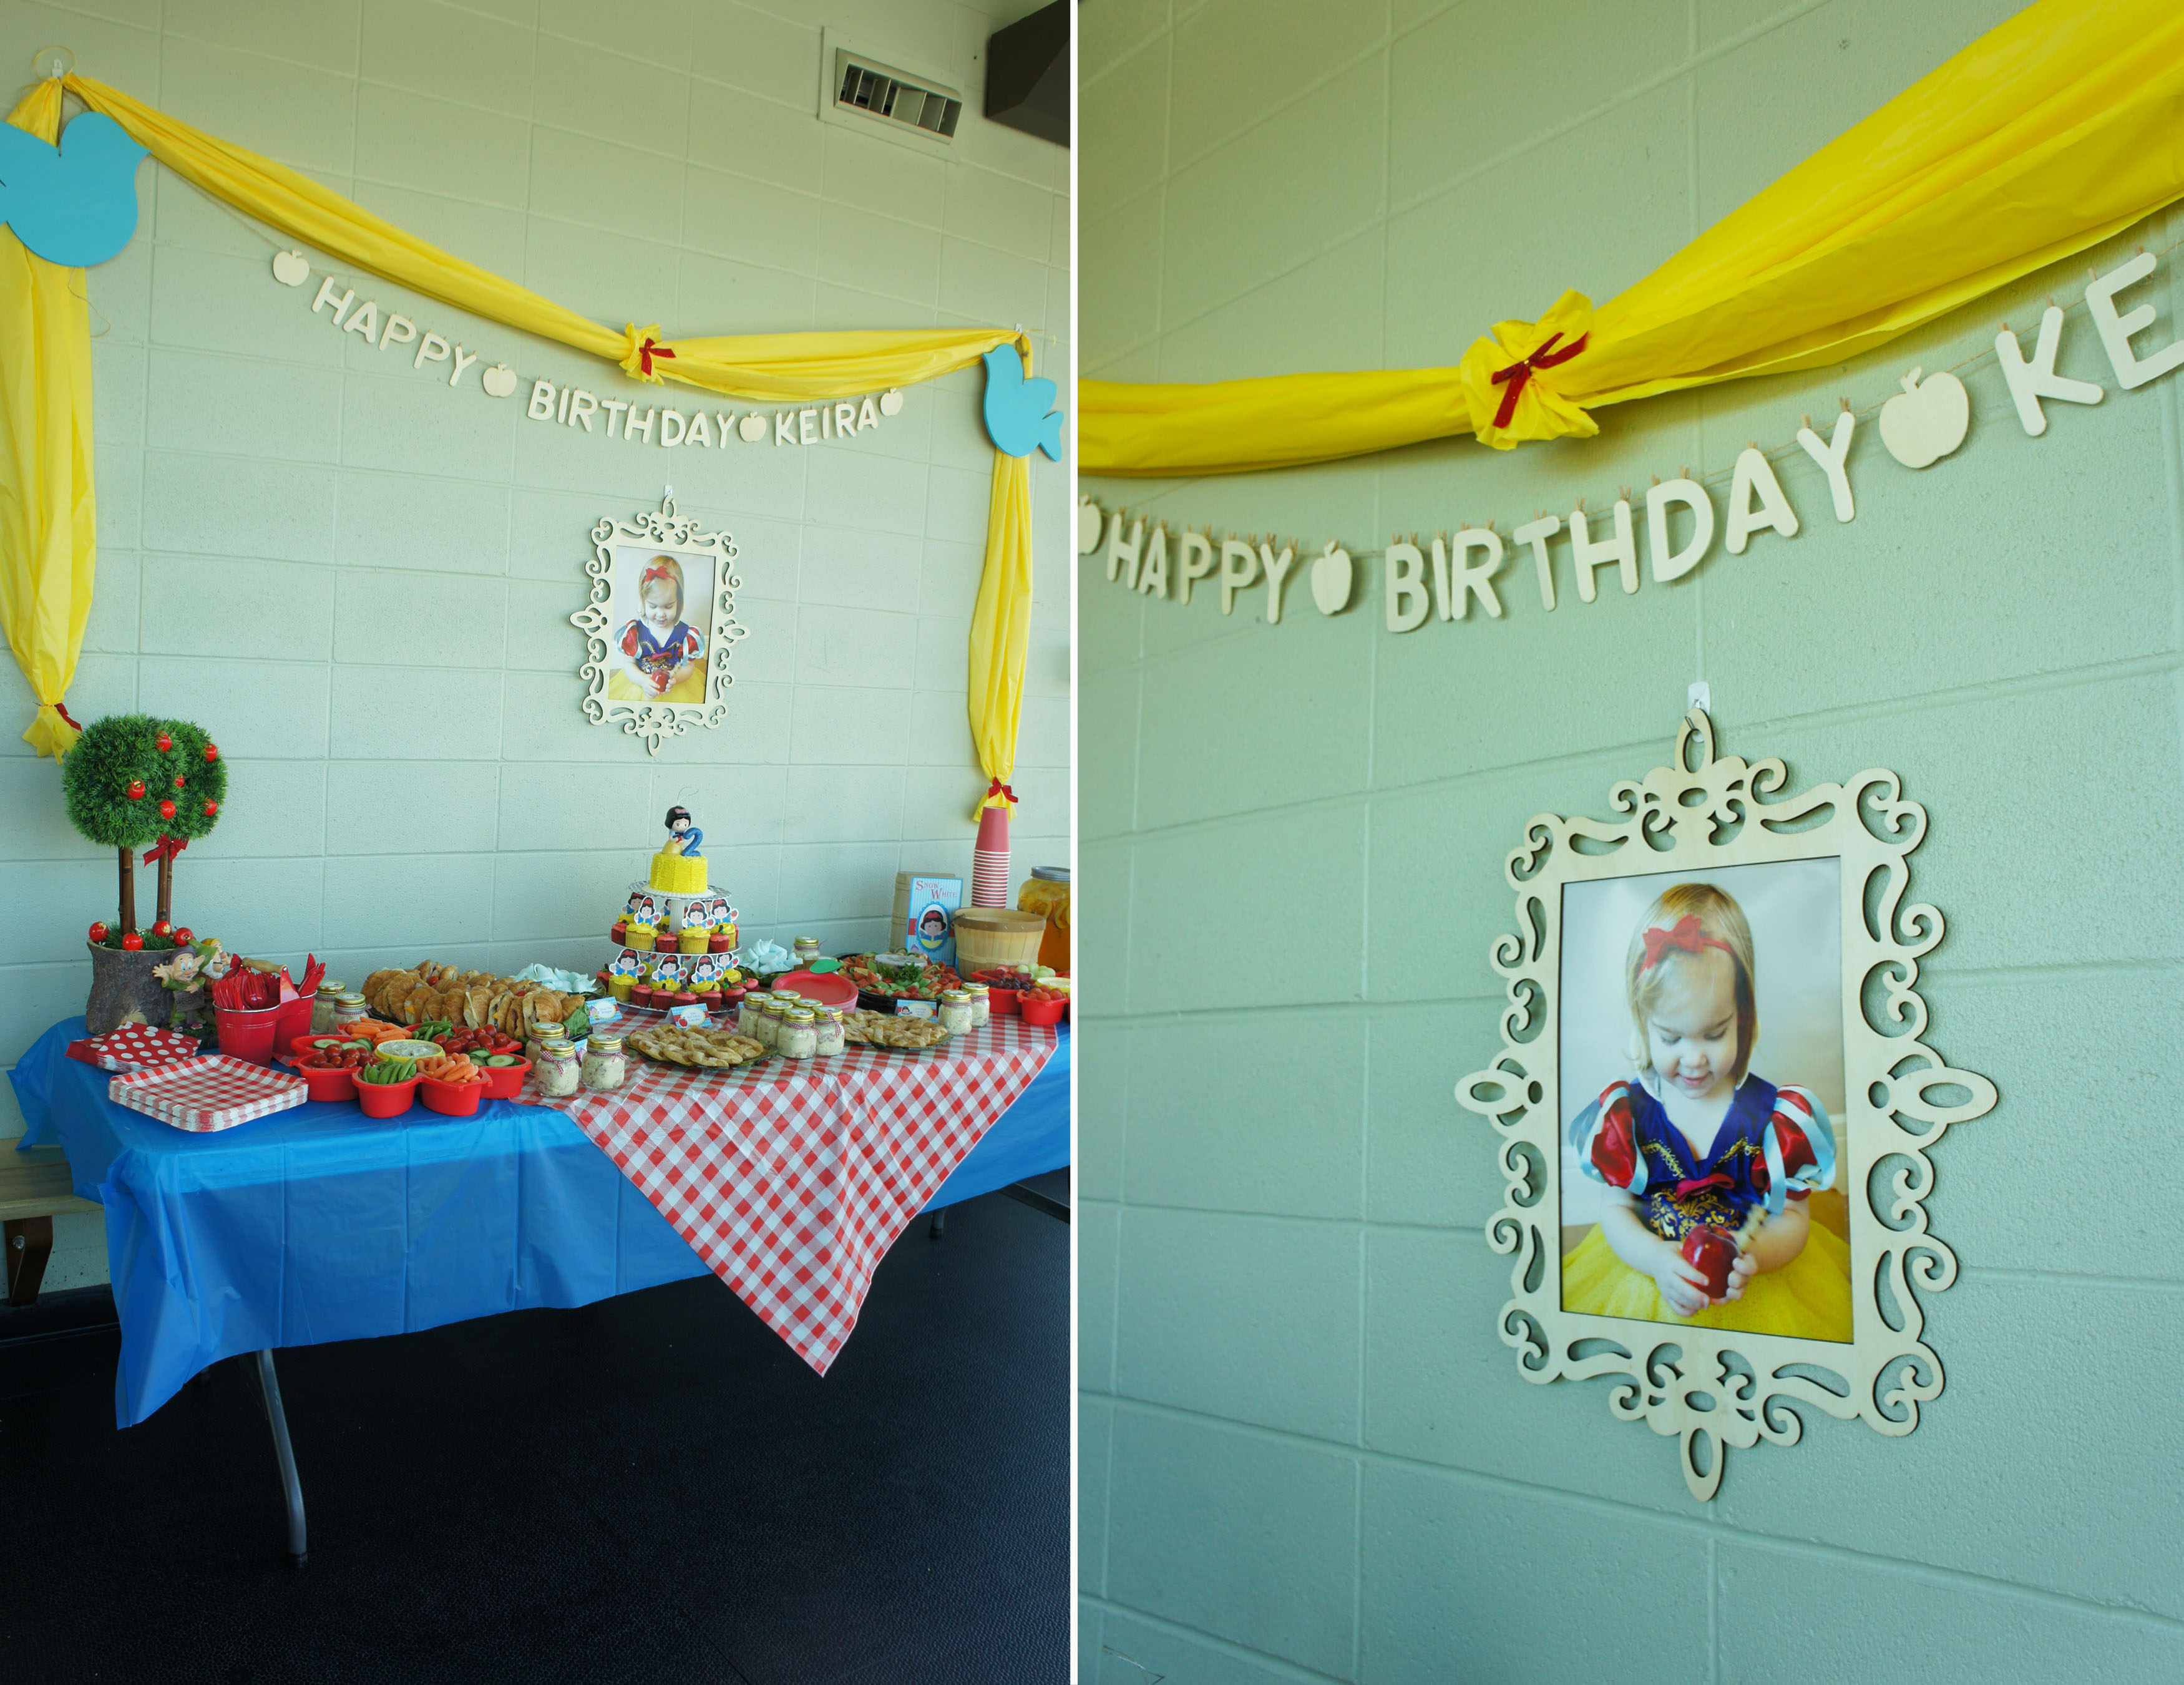
I loved the simplicity of this birch birthday banner I came across from scoutmob.com and was looking for an easy, inexpensive way to replicate it for her party.
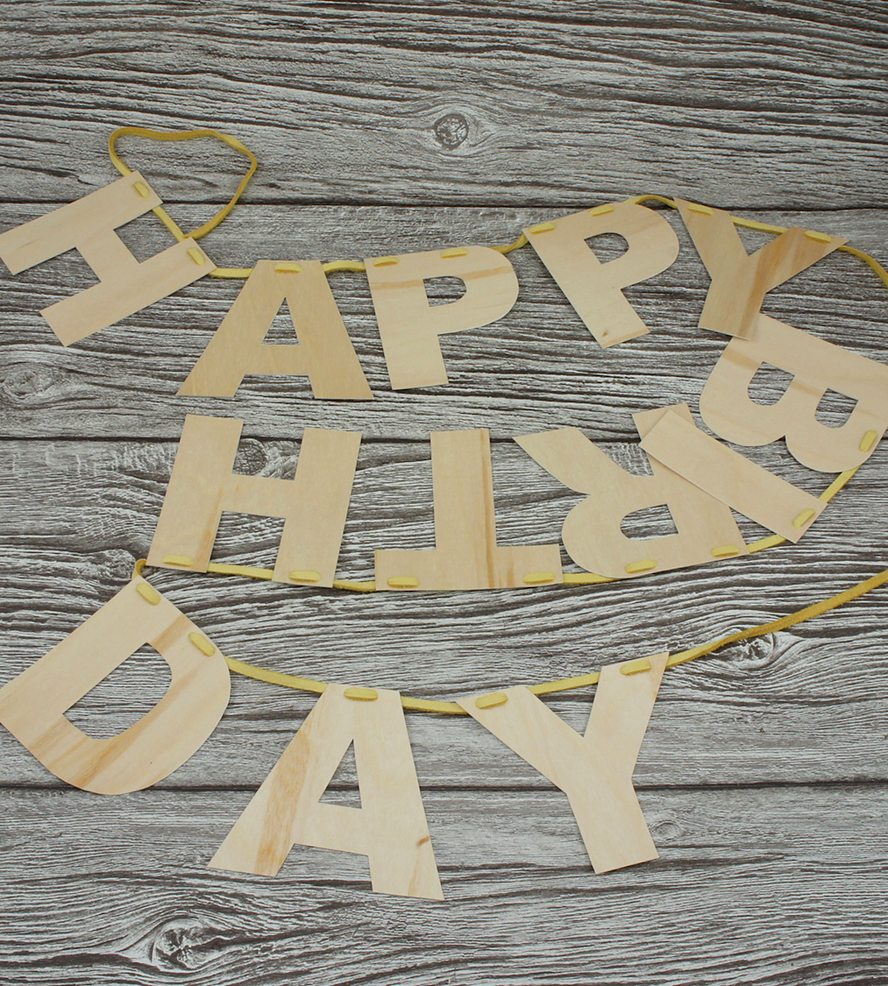
As with most of my projects, the solution was found within the aisles of Dollarama. I came across these wooden letters in the craft section and grabbed a few bags to give me the letters I needed to spell out “Happy Birthday Keira”. I needed a way to attach the letters to my twine, so I picked up a bag of mini clothespins at Michaels and decided to hot glue those to each of the letters. As I was doing this I had a bit of an AHA! moment and realized that the clothespins would make the letters totally reuseable and reconfigurable.
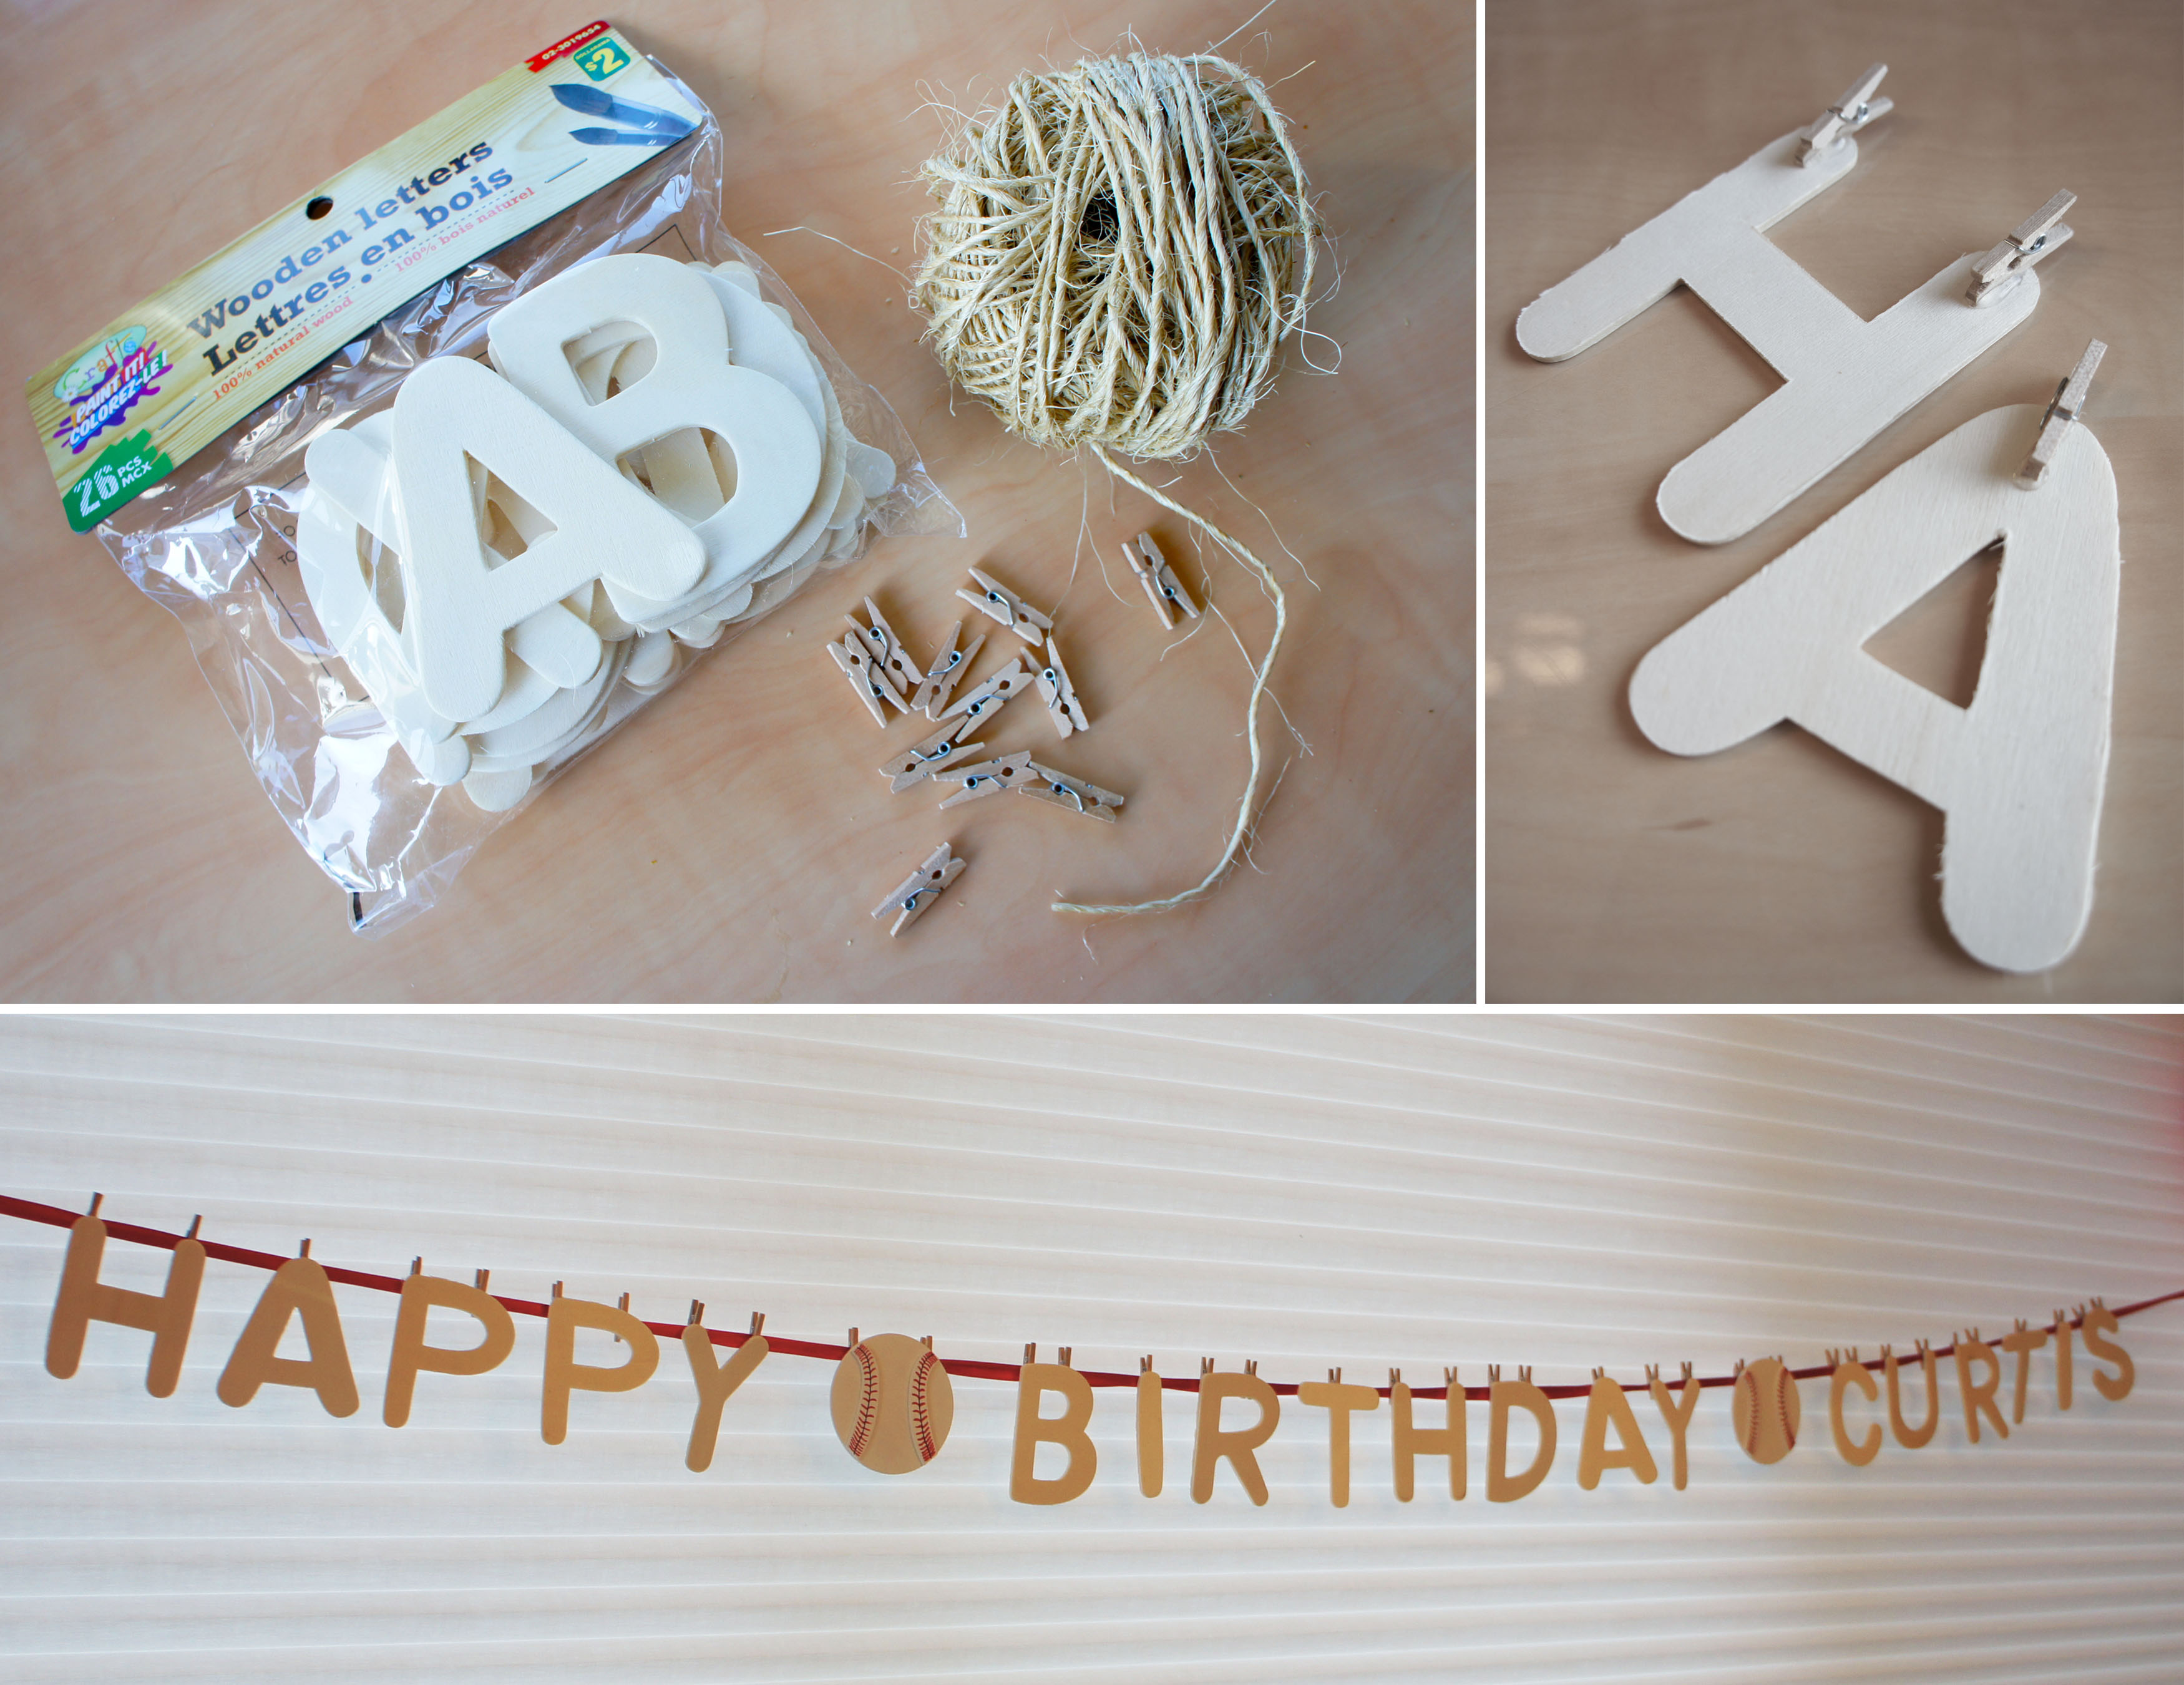
For the Snow White themed banner I picked up some apple wooden shapes at Micheals to fit in between the words. I loved the little extra touch they added so I decided to add baseball’s to daddy’s birthday banner. They have all kinds of great painted and unpainted wooden shapes at Michaels (pirate ships, puppies, lady bugs, cupcakes) so it wasn’t hard to find something that worked with my theme. To attach them, I hot glued the same mini clothespins on that I had used for the letters.
And just to show how versatile this idea is, here are the same letters strung across the cake table I did at my brother’s wedding. (Which I still need to do a full post on!)
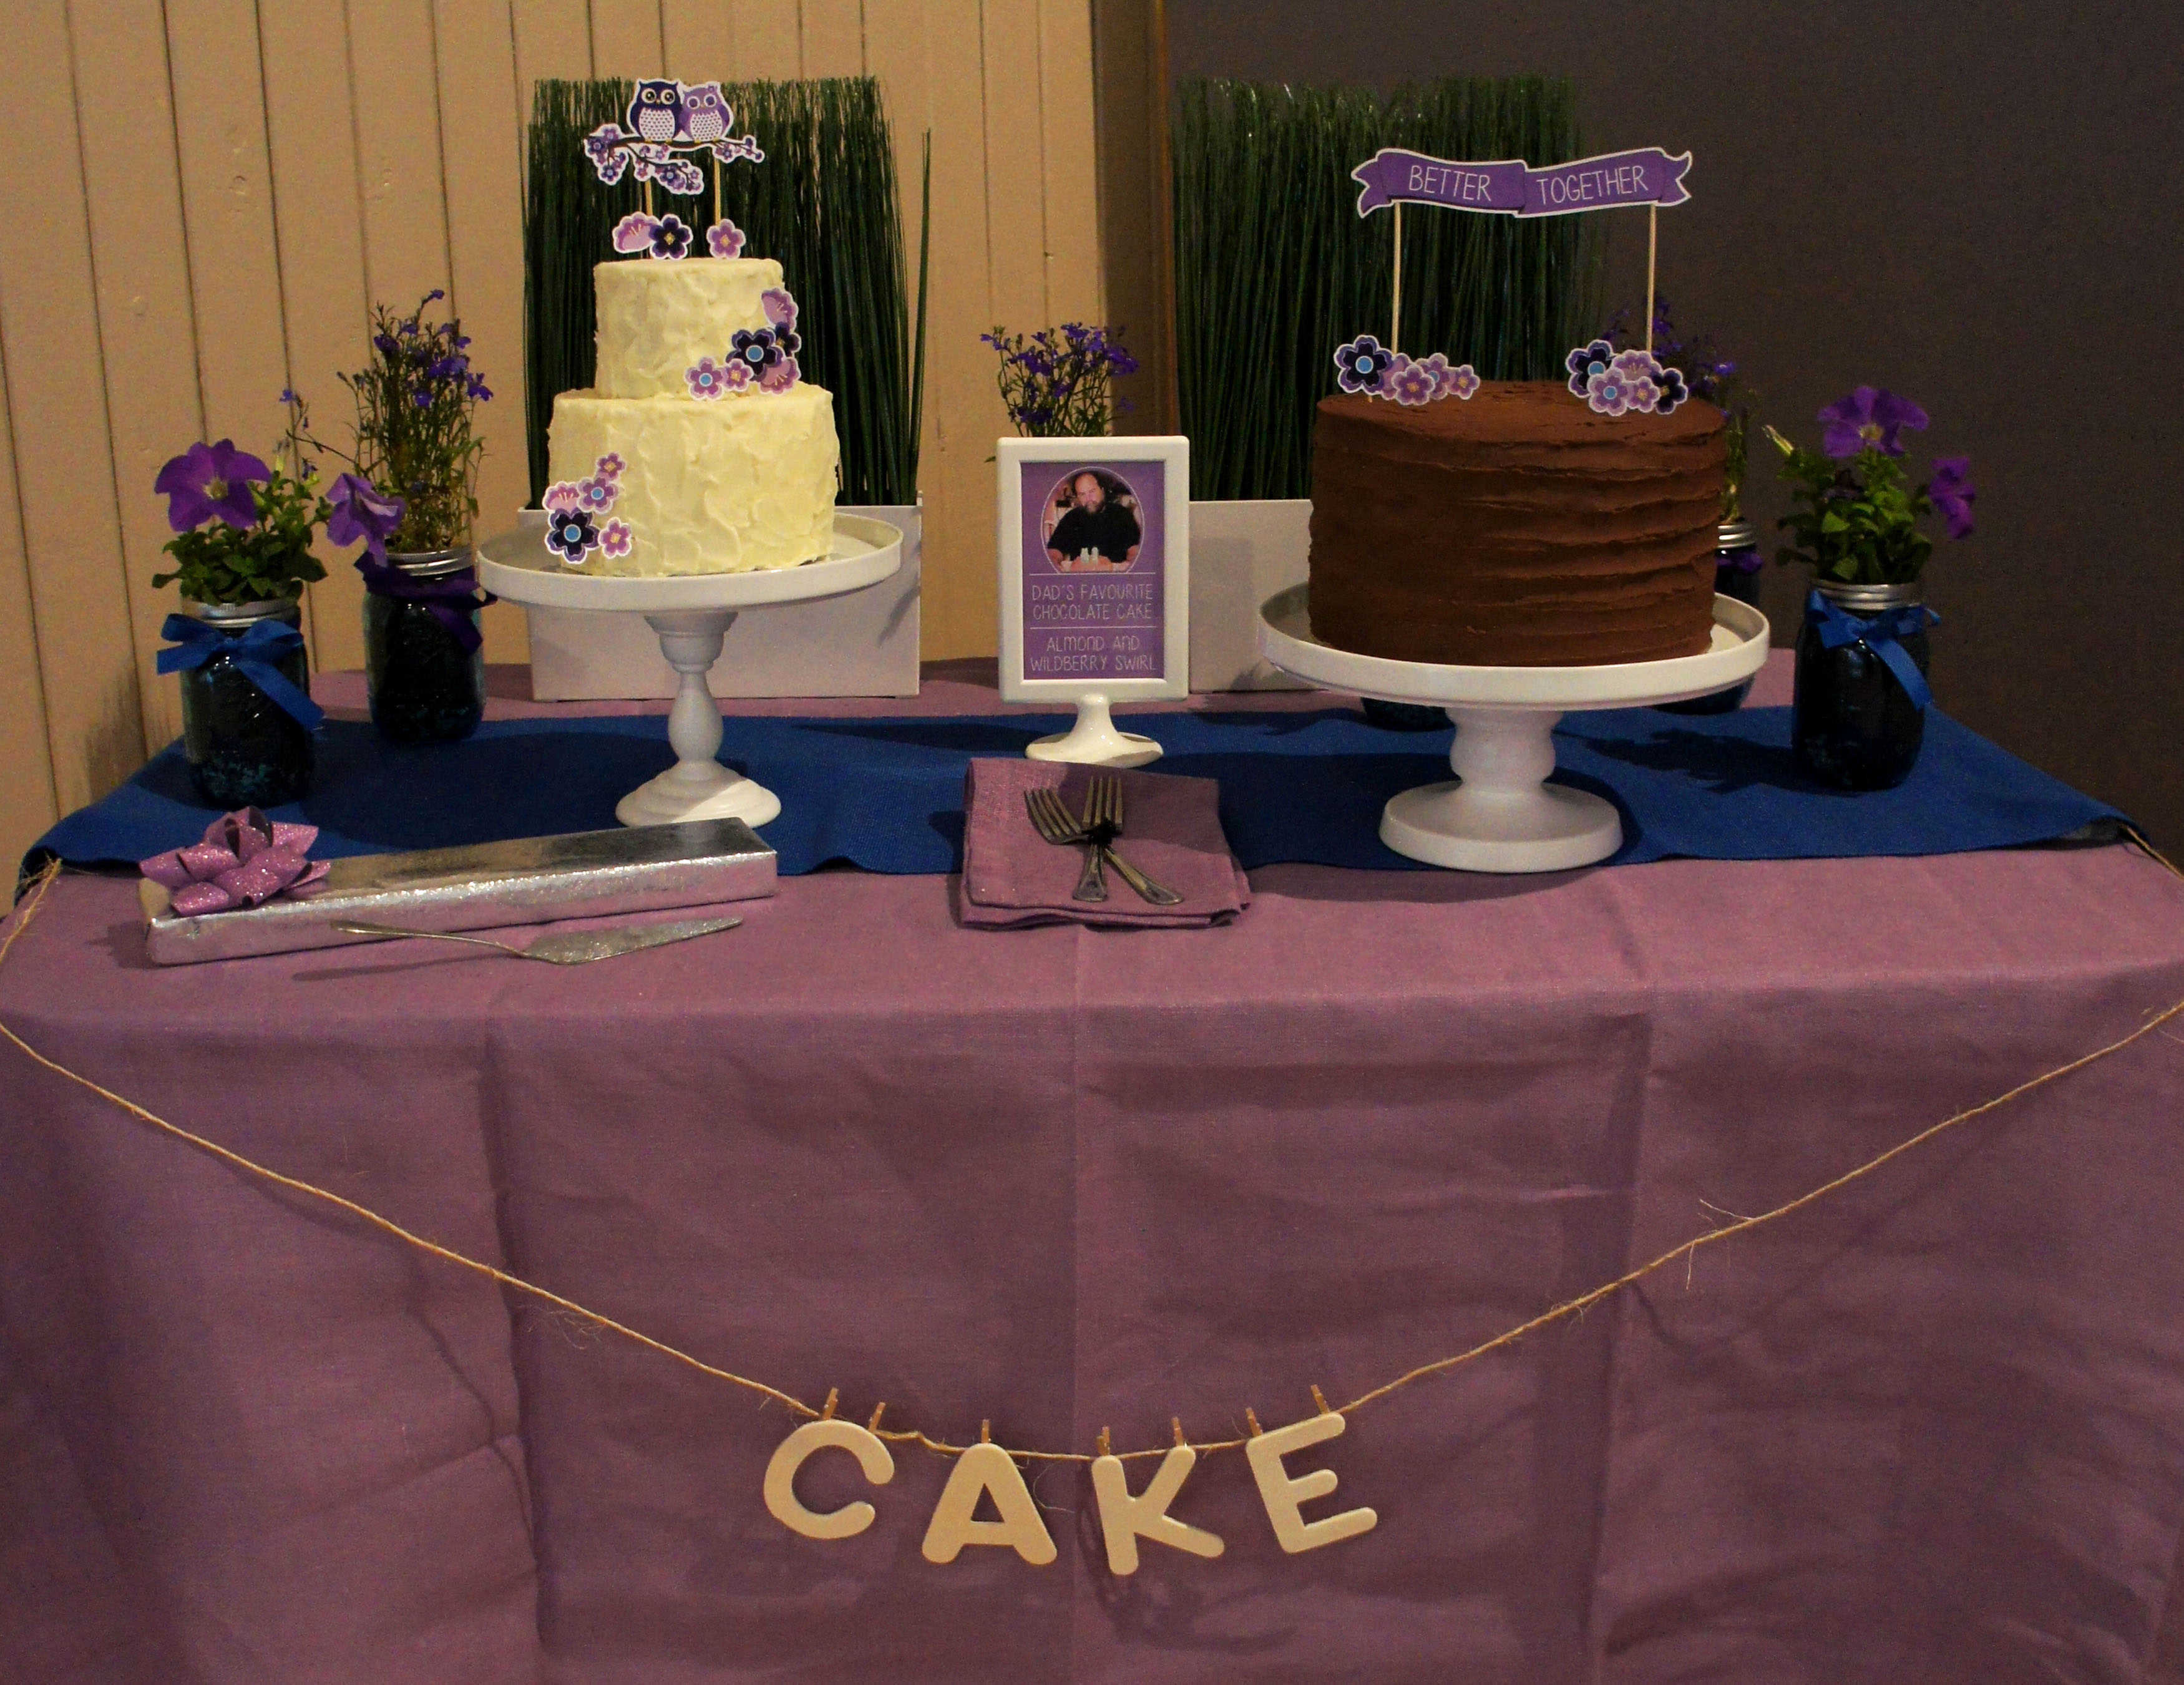
The possibilities really are endless for spelling out everything from Happy Birthday to Merry Christmas or Happy Easter. The ribbon or twine can easily be switched out to match your party theme and the inexpensive wooden shapes help add that little extra touch. This is a great item to have in the party cupboard and mine has already gotten great use just in the two months since I made them.


Over the past year, I have been lucky to meet some very lovely ladies and their adorable children through our playgroup. I had been in other mommy groups and classes and haven’t really clicked with anyone so I am thankful to have found these ladies and get to spend time with them on a weekly basis. Our friendship has grown outside of the regularly scheduled playgroup now and I am so excited that we have now started to be invited to some of the kids birthday parties.
The first party we have been invited to was a Dora themed party so I wanted to find the perfect gift. There is a lot of cheap Dora themed stuff out there so I ended up settling on a cute Disney princess dress and tea party set. I decided I could make it Dora themed through the wrapping, so I bought a roll of purple wrapping paper and set to work!
Part 1 – “Backpack” wrapping
This idea came from purple paper bag backpack themed treat bags I have seen on the internet. The gift I bought was a nice rectangular shape so I decided to wrap it and make it look like backpack. I simply started by wrapping the gift as normal with purple paper. The pockets, top flap and back straps were just folded out of the same gift wrap and taped on. The finishing touch was Backpack’s face which I found on the internet and printed on my home computer. It was cut out and attached with double sided tape.

The pockets on the backpack were stuffed with Dora fruit snacks and a Dora themed activity book I found from the dollar store. When I showed the final backpack to my 3 year old, his first questions was “where’s Map?” With all the other stuff I had for the pockets I didn’t even think to add him, but I am so glad my 3 year old suggested it! To make Map, all I did was print the same face I used for backpack and rolled up the sheet of paper.

Part 2 – Helium Balloon Star
If you have been “lucky” enough to have seen an episode of Dora, you have probably seen the happy faced stars floating around. When looking for Dora gift ideas on the internet I came across pictures of these stars and they reminded me of the star shaped helium balloons I have seen at Dollar Tree. I know how much my 3 year old loves helium balloons so I thought this would be a nice little addition to the gift. Unfortunately my Dollar Tree was out of the big star shaped balloons so my idea to have stars floating above backpack had to be modified to be a small star shaped balloon coming out of Backpack’s pocket.
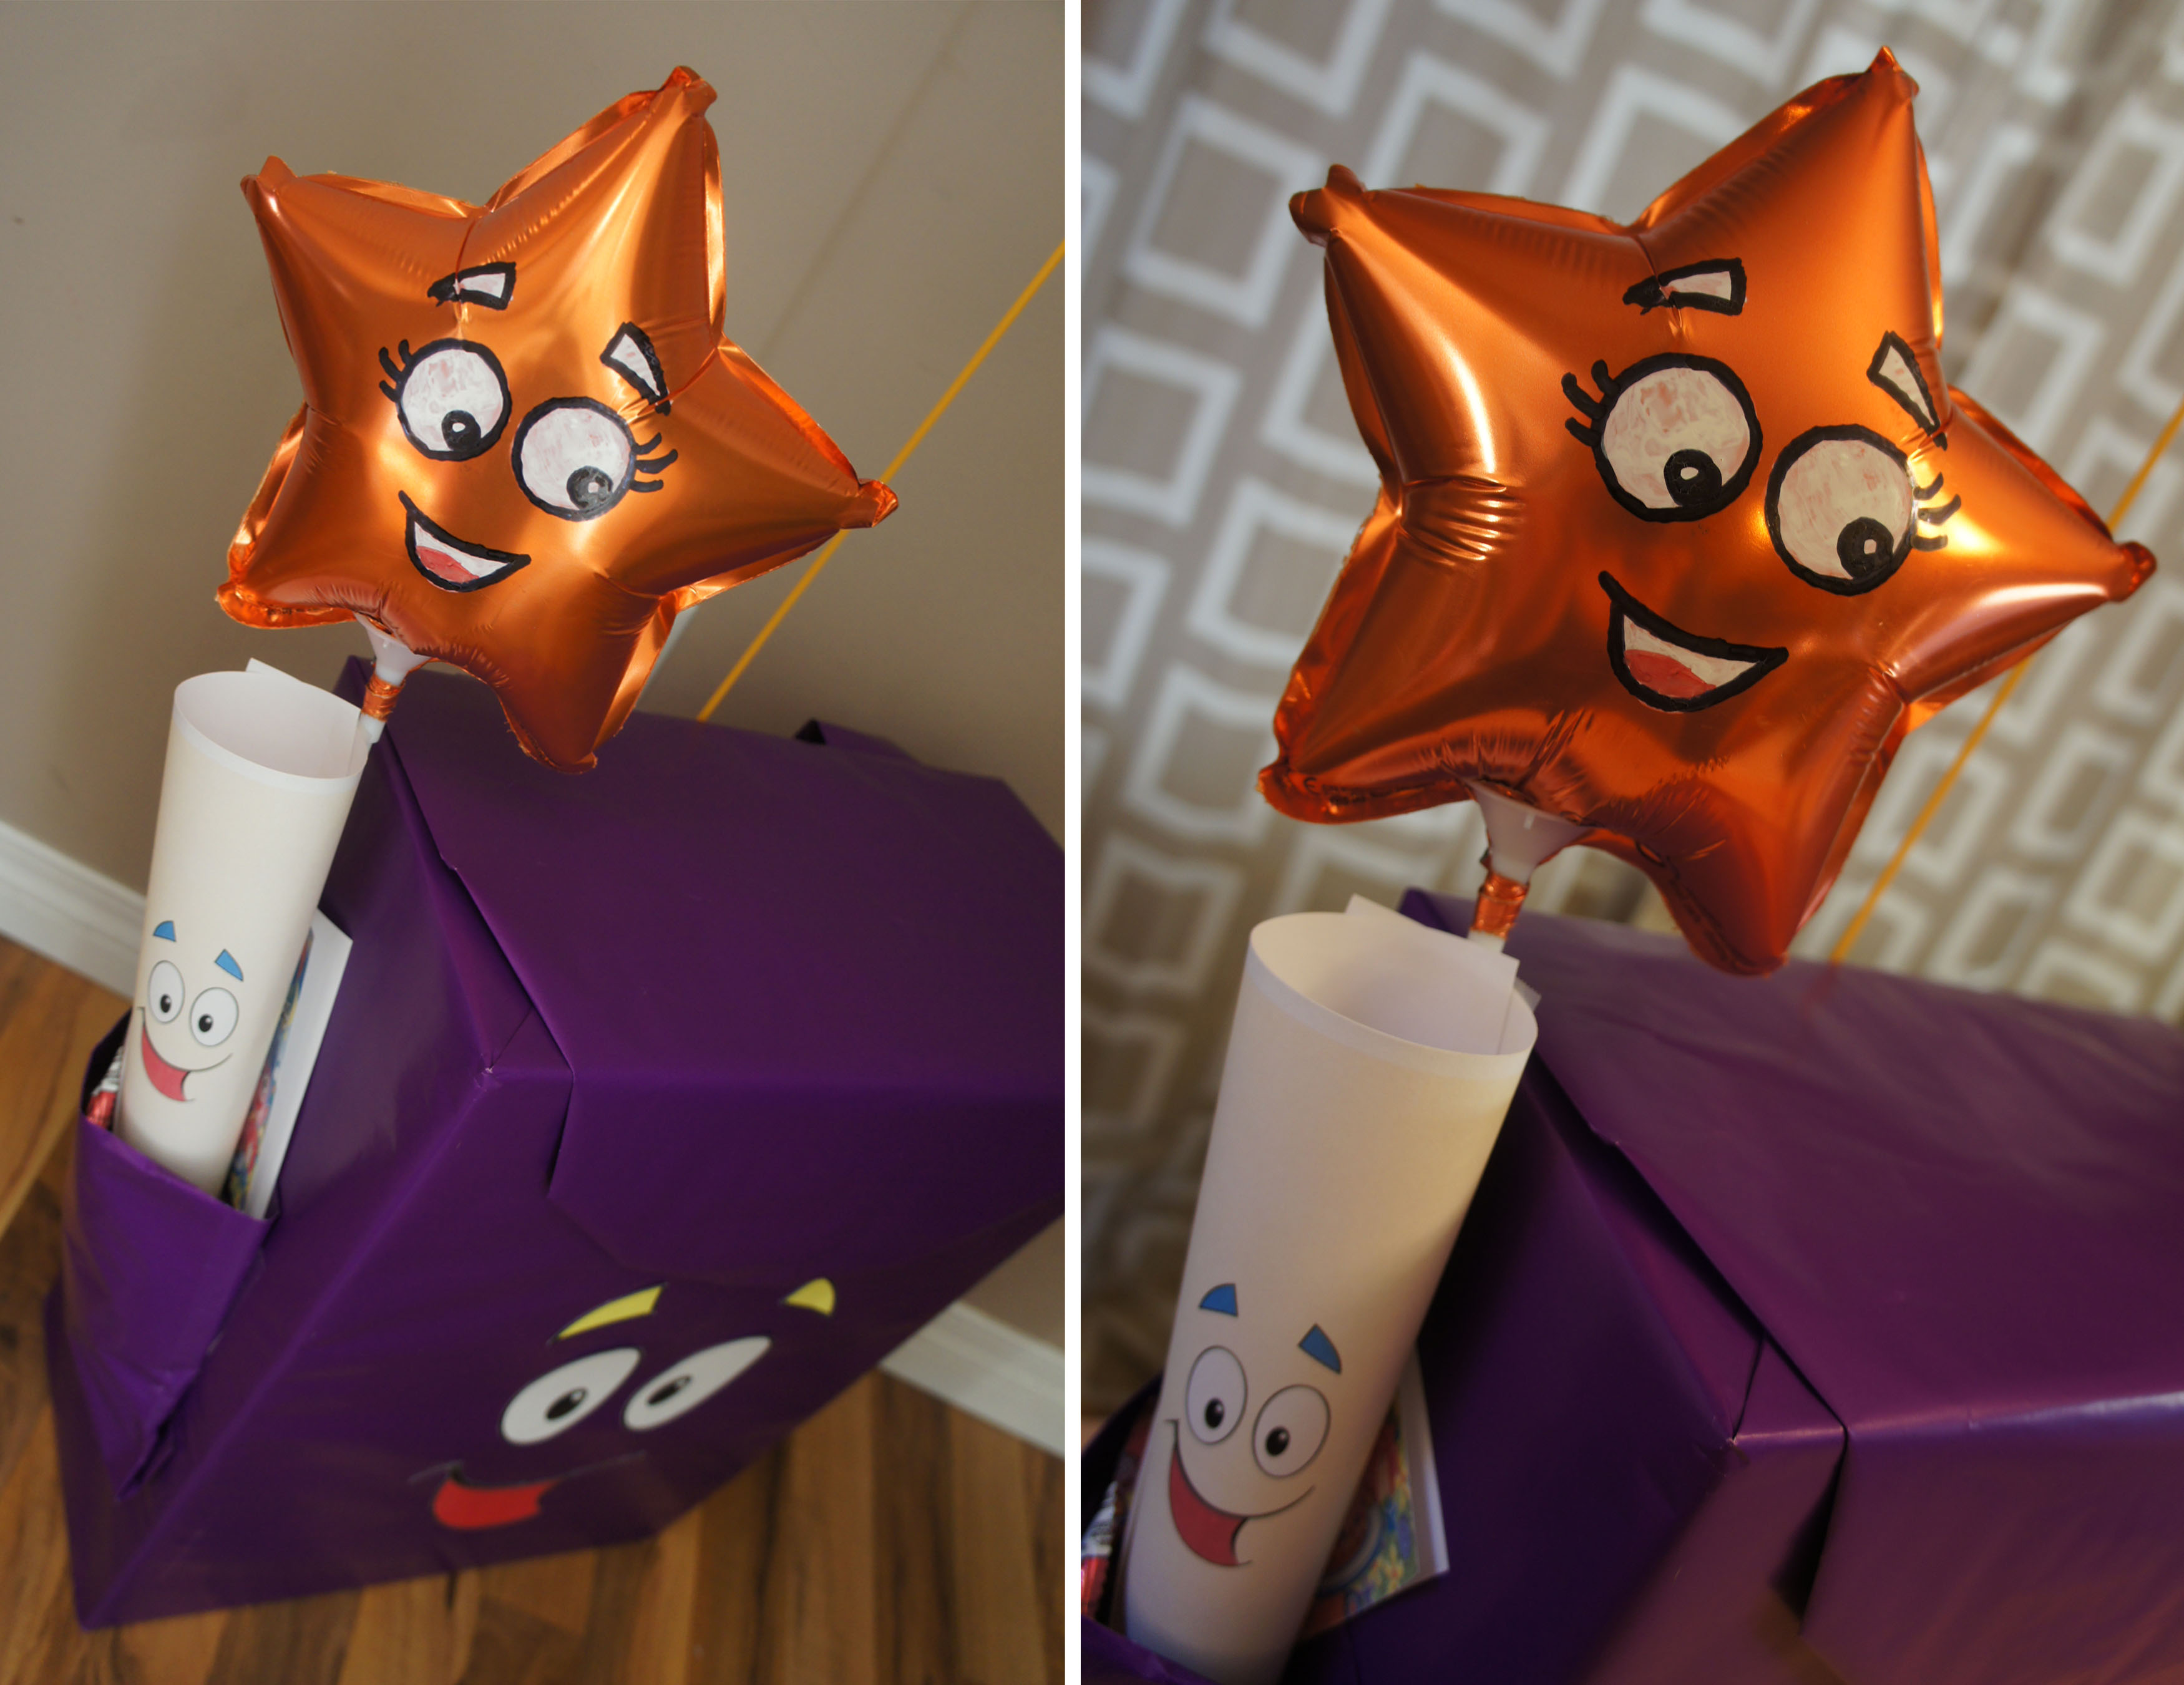
The balloons are cute on their own, but I figured they could use an extra Dora touch by adding faces to them. To do this, I simply painted eyes on in whiteout and used a sharpie to draw in the mouth and eyeballs. And then I found cute “Happy Birthday” helium balloon with Dora on it at Dollarama so I was still able to have a balloon floating above backpack!

I love the way it turned out and was so excited to give it to the birthday girl. She didn’t even notice the gift inside wasn’t Dora related, and her mom tells me she was asking for a princess dress anyway, so it ended up being a perfect gift all around.
Now my problem will be to come up with something equally awesome for the next party! I think I may have set the expectations a little high.


I decided to bake up some quick cupcakes earlier this week for the human members of our family to enjoy on the dog’s birthday. They weren’t supposed to be anything spectacular, but they turned out so tasty I just had to share.
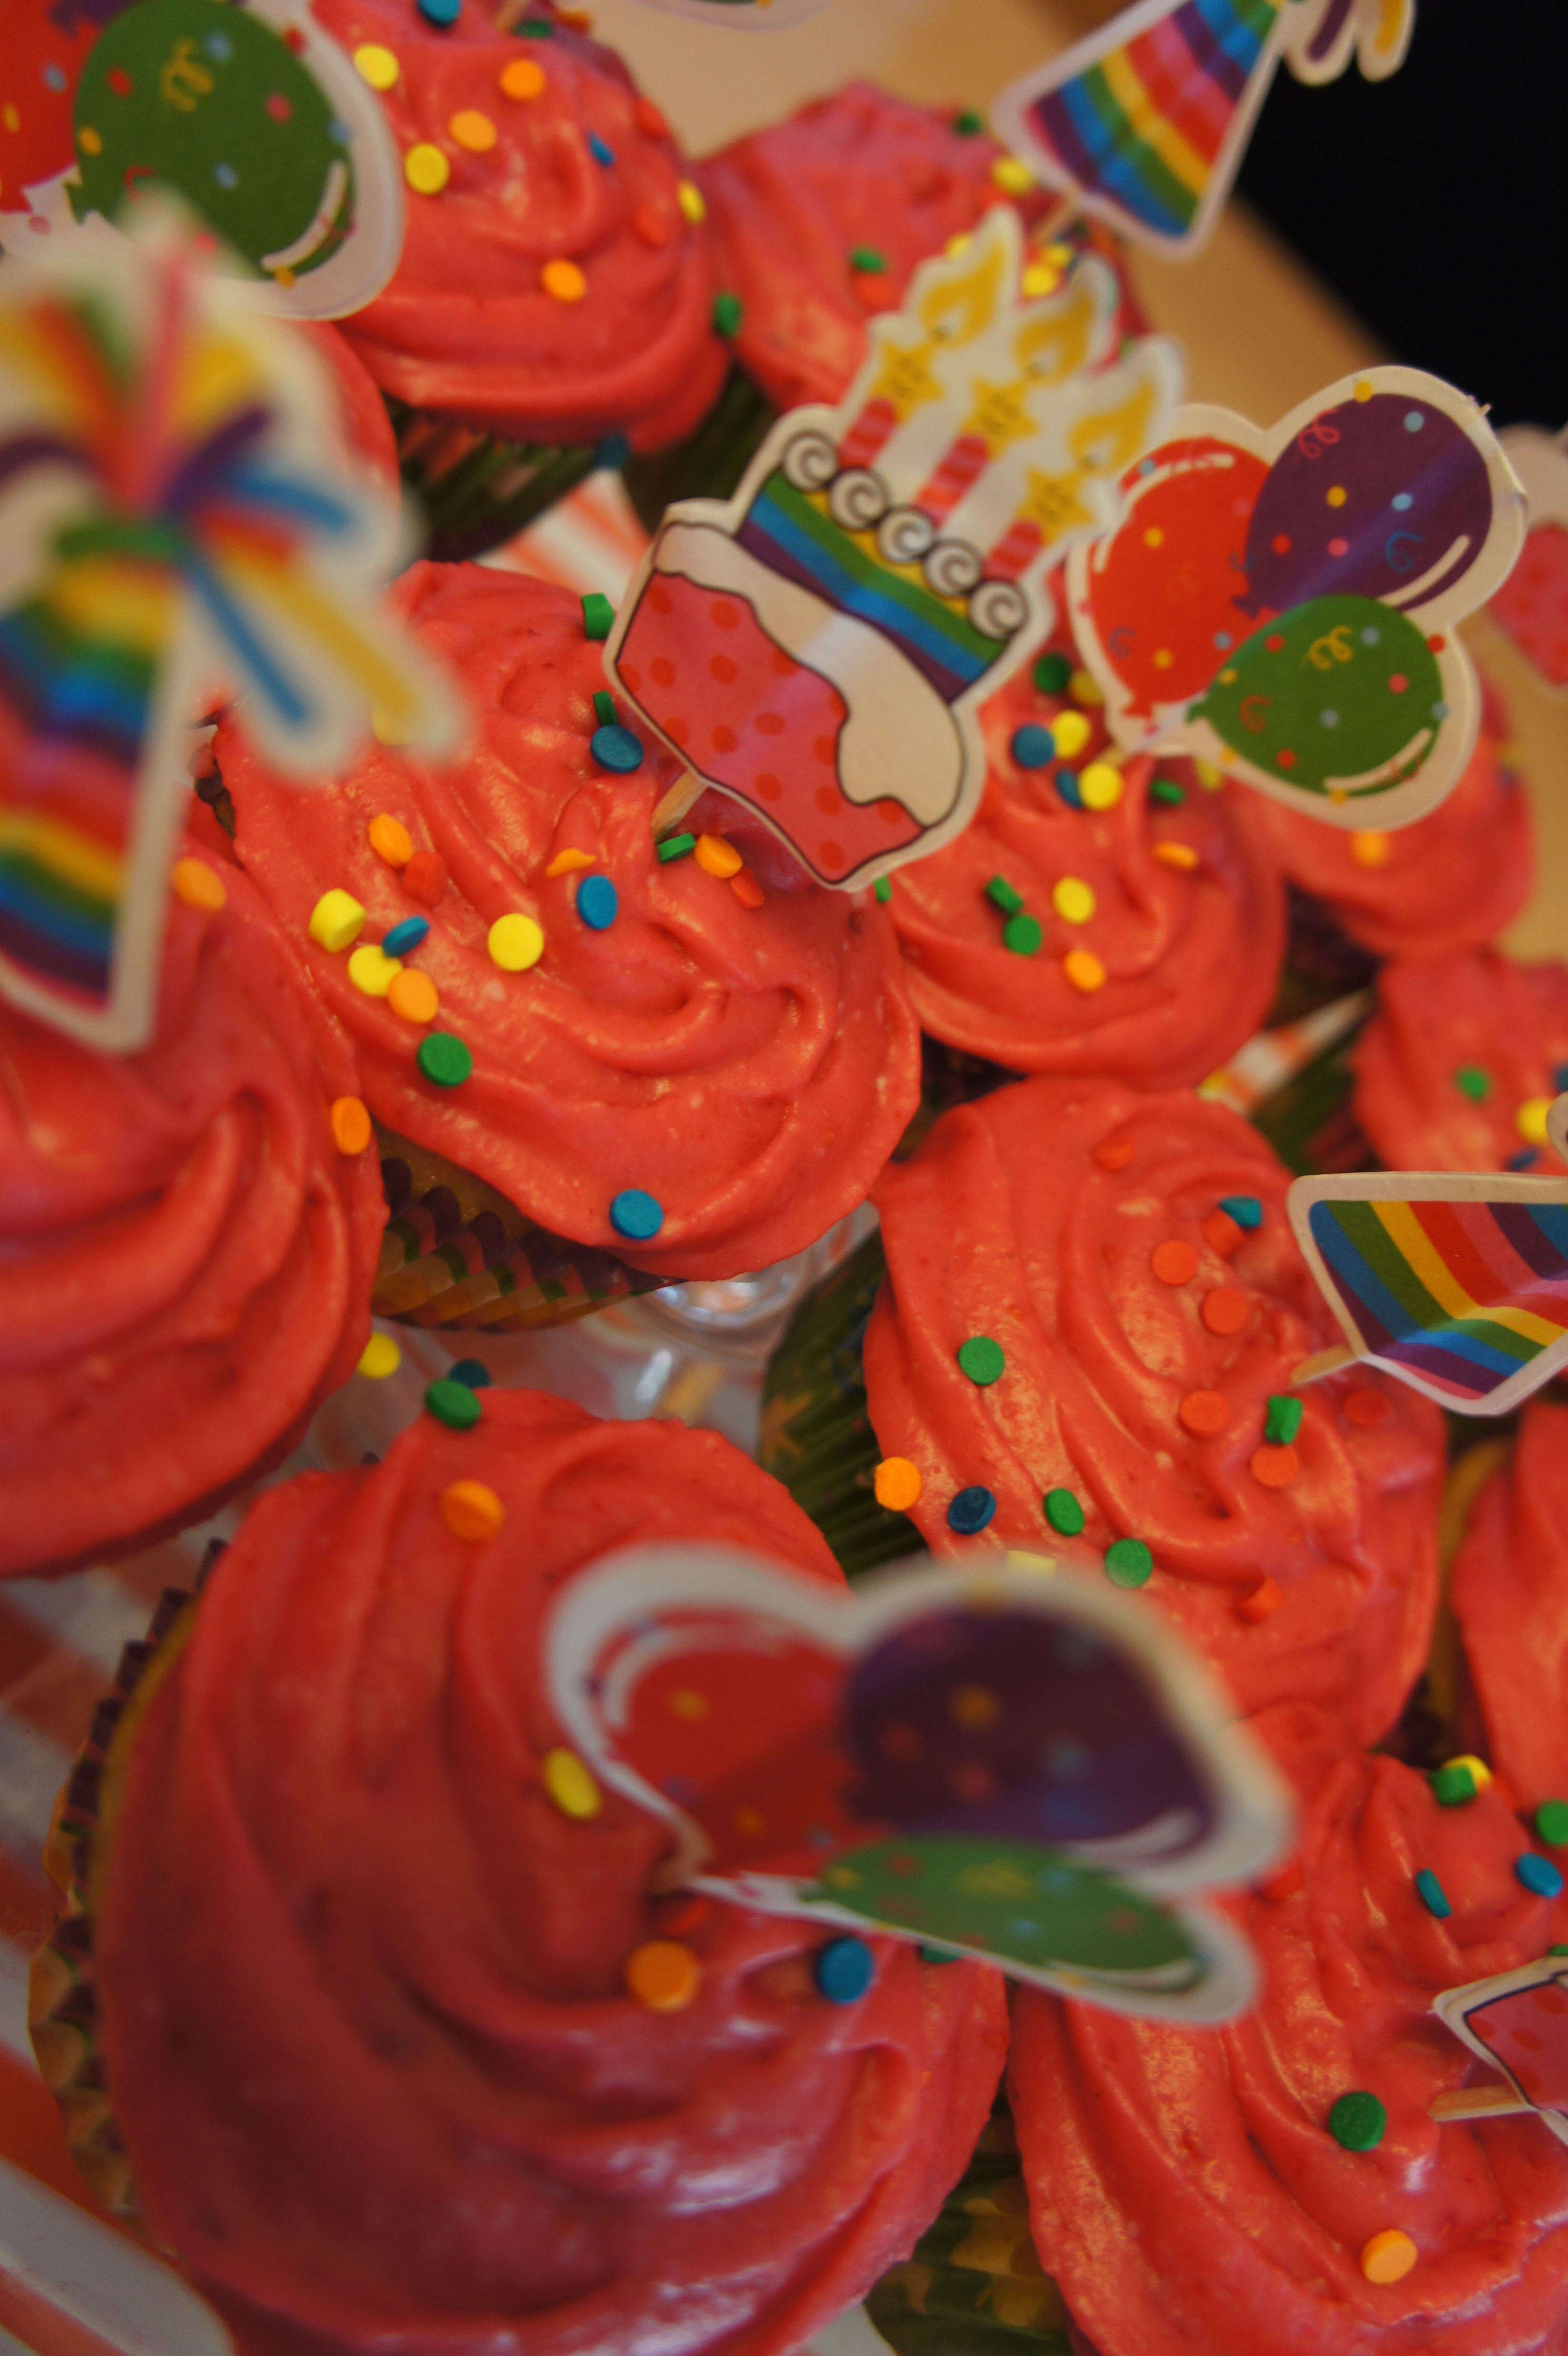
For the cake part, I just used a Mrs.Fields boxed cupcake mix from Dollar Tree. I absolutely love these mixes and try to keep one chocolate and one vanilla on hand at all times. They make one dozen cupcakes versus the 24 cupcakes you usually get from a standard boxed cake mix – perfect for our family of four. The liners and cupcake toppers were a kit I found at Dollarama and had sitting around in the pantry. The multicolored sprinkles were my 3 year old son’s addition.

Because we had just gone berry picking the day before and I had a bunch of fresh raspberries, I thought why not add them to the buttercream icing. After a quick google search I came up with this frosting recipe from myrecipes.com. It whipped up quickly and tasted amazing! It was just the right amount of sweet and tart, with a pretty pink hue. I enjoyed it so much I may just have to make it again for my birthday in a few weeks!

Raspberry Buttercream Frosting
Ingredients
Directions
1. Beat butter, raspberries, vanilla and salt with electric mixer (medium) until smooth and creamy.
2. Gradually add the icing sugar, blending in slowly after each addition.
BONUS FAVORITE Since we are on the topic of Dollar stores and cupcakes, I thought I would share one more favorite – these awesome cupcake carriers I have found at both Dollarama and Dollar Tree. I always struggle to find a way to store my cupcakes at home or take them to events so these are perfect. At only a couple dollars each they are a lot cheaper then a lot of other versions, and I feel like I could afford to lose or leave them behind without being too heartbroken. I only wish they had them for mini cupcakes!

(I was going to take a picture with cupcakes in it but by the time I thought of it, the cupcakes were long gone! They were that good.)