Crafts, Little Hands

Waiting for Jesus “Good Deeds” Manger

I am very excited to share my first guest post today!  And it is written by none other then my lovely mom, Christine Wolzl.  She brings a wealth of knowledge in kids activities and education after spending a good part of her life in the classroom teaching grade one.  She is now retired, which means we get to benefit from all the lovely cards and paper creations she enjoys crafting in her spare time.  I can’t wait to see what she has come up with for our Christmas cards this year!

StrawMangerActivity_Title

We are one week away from Christmas!  The week before Christmas can be a tough time for little ones, often leading to tears and other less desirable behavior.  It is also a tough time for moms, busy getting ready for the big day, and needing help from their children, or time to do the extra things needed to prepare for Christmas.  It becomes the perfect time to make the “Good Deeds” Manger!  This project was inspired by the Straw For the Manger Christmas Story and Activity found on the blog small fine print.

The creation of the manger brings children back to the main reason for Christmas – the birth of Christ and focuses on what each child can do to welcome Jesus to the world.  With every good deed the child does, they place a piece of straw (yarn) in the manger.  They can see the fruits of all their good deeds in the growing soft straw placed in the manger.  The manger filled with soft straw becomes their gift to the Christ child.  A good place for the manger could be under the Christmas tree, easy for them to add their good deeds into!

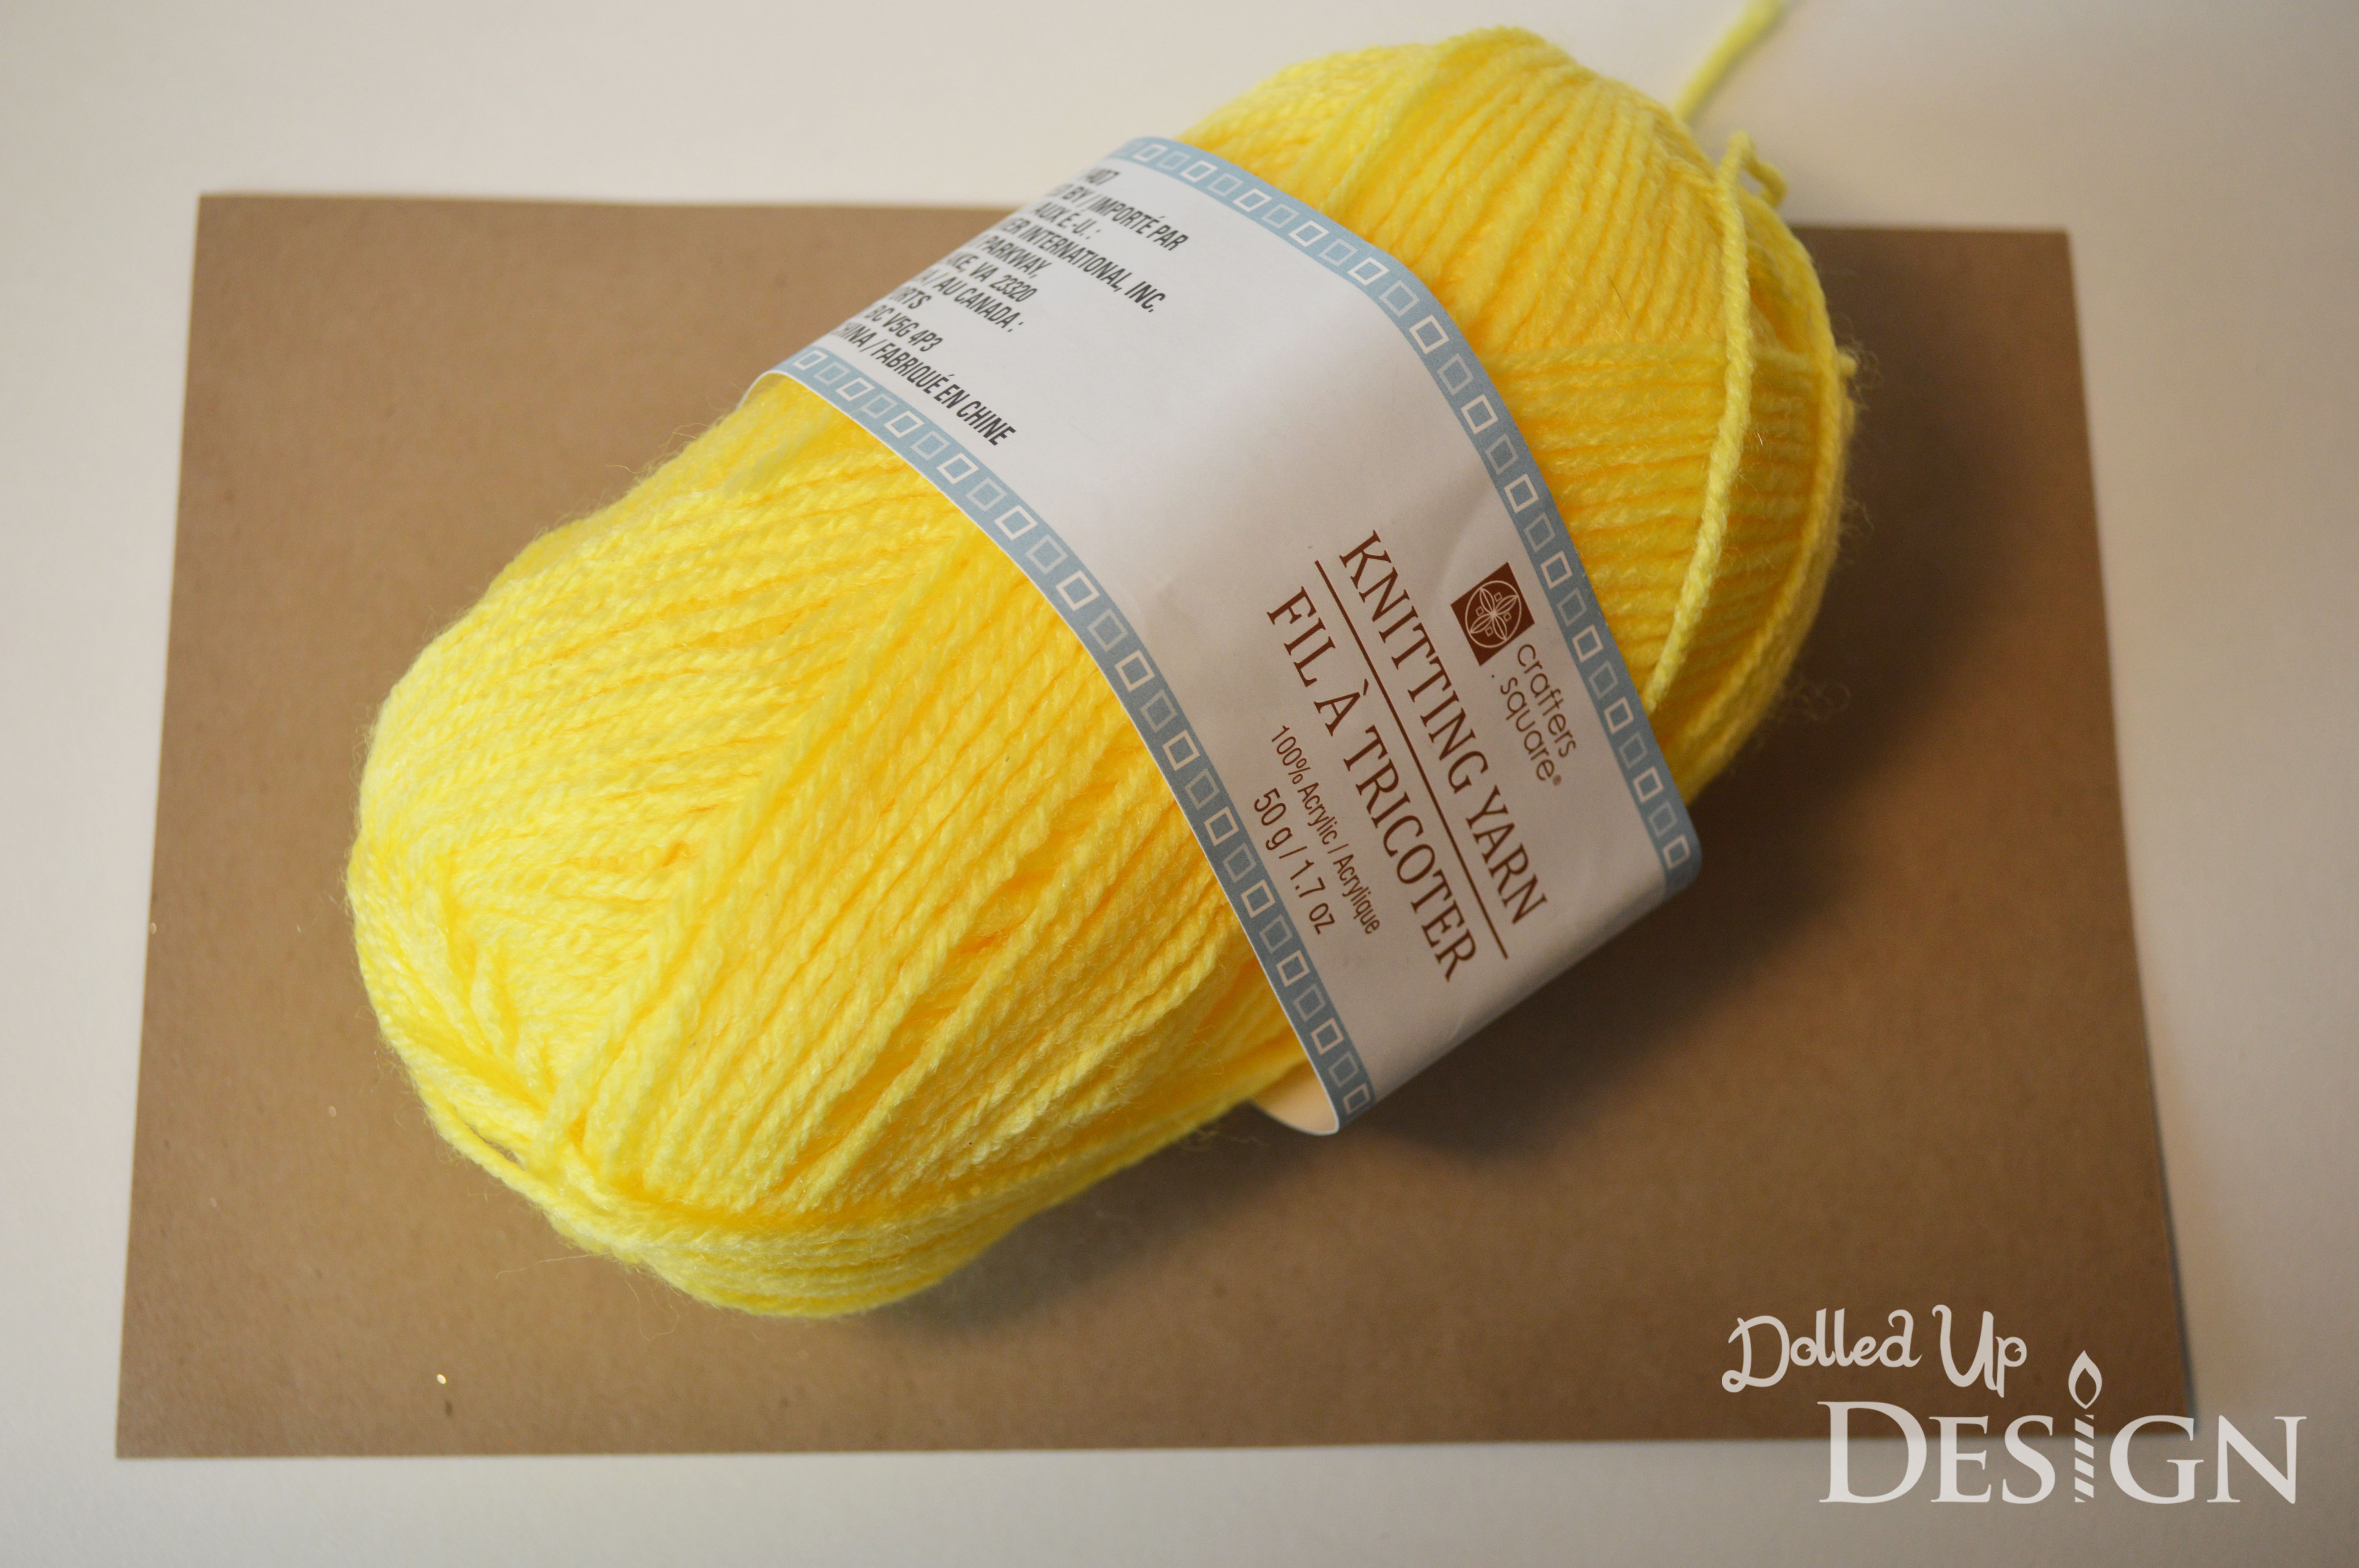
The supplies needed are very simple and economical – a ball of yellow (or straw coloured) yarn and 1/2 of a sheet of brown card stock, construction paper or thin cardboard.
StrawMangerActivity_Supplies

Use the link for the pdf pattern to make the manger: StrawMangerActivity_PrintableTemplate

StrawMangerActivity_PrintableTemplate

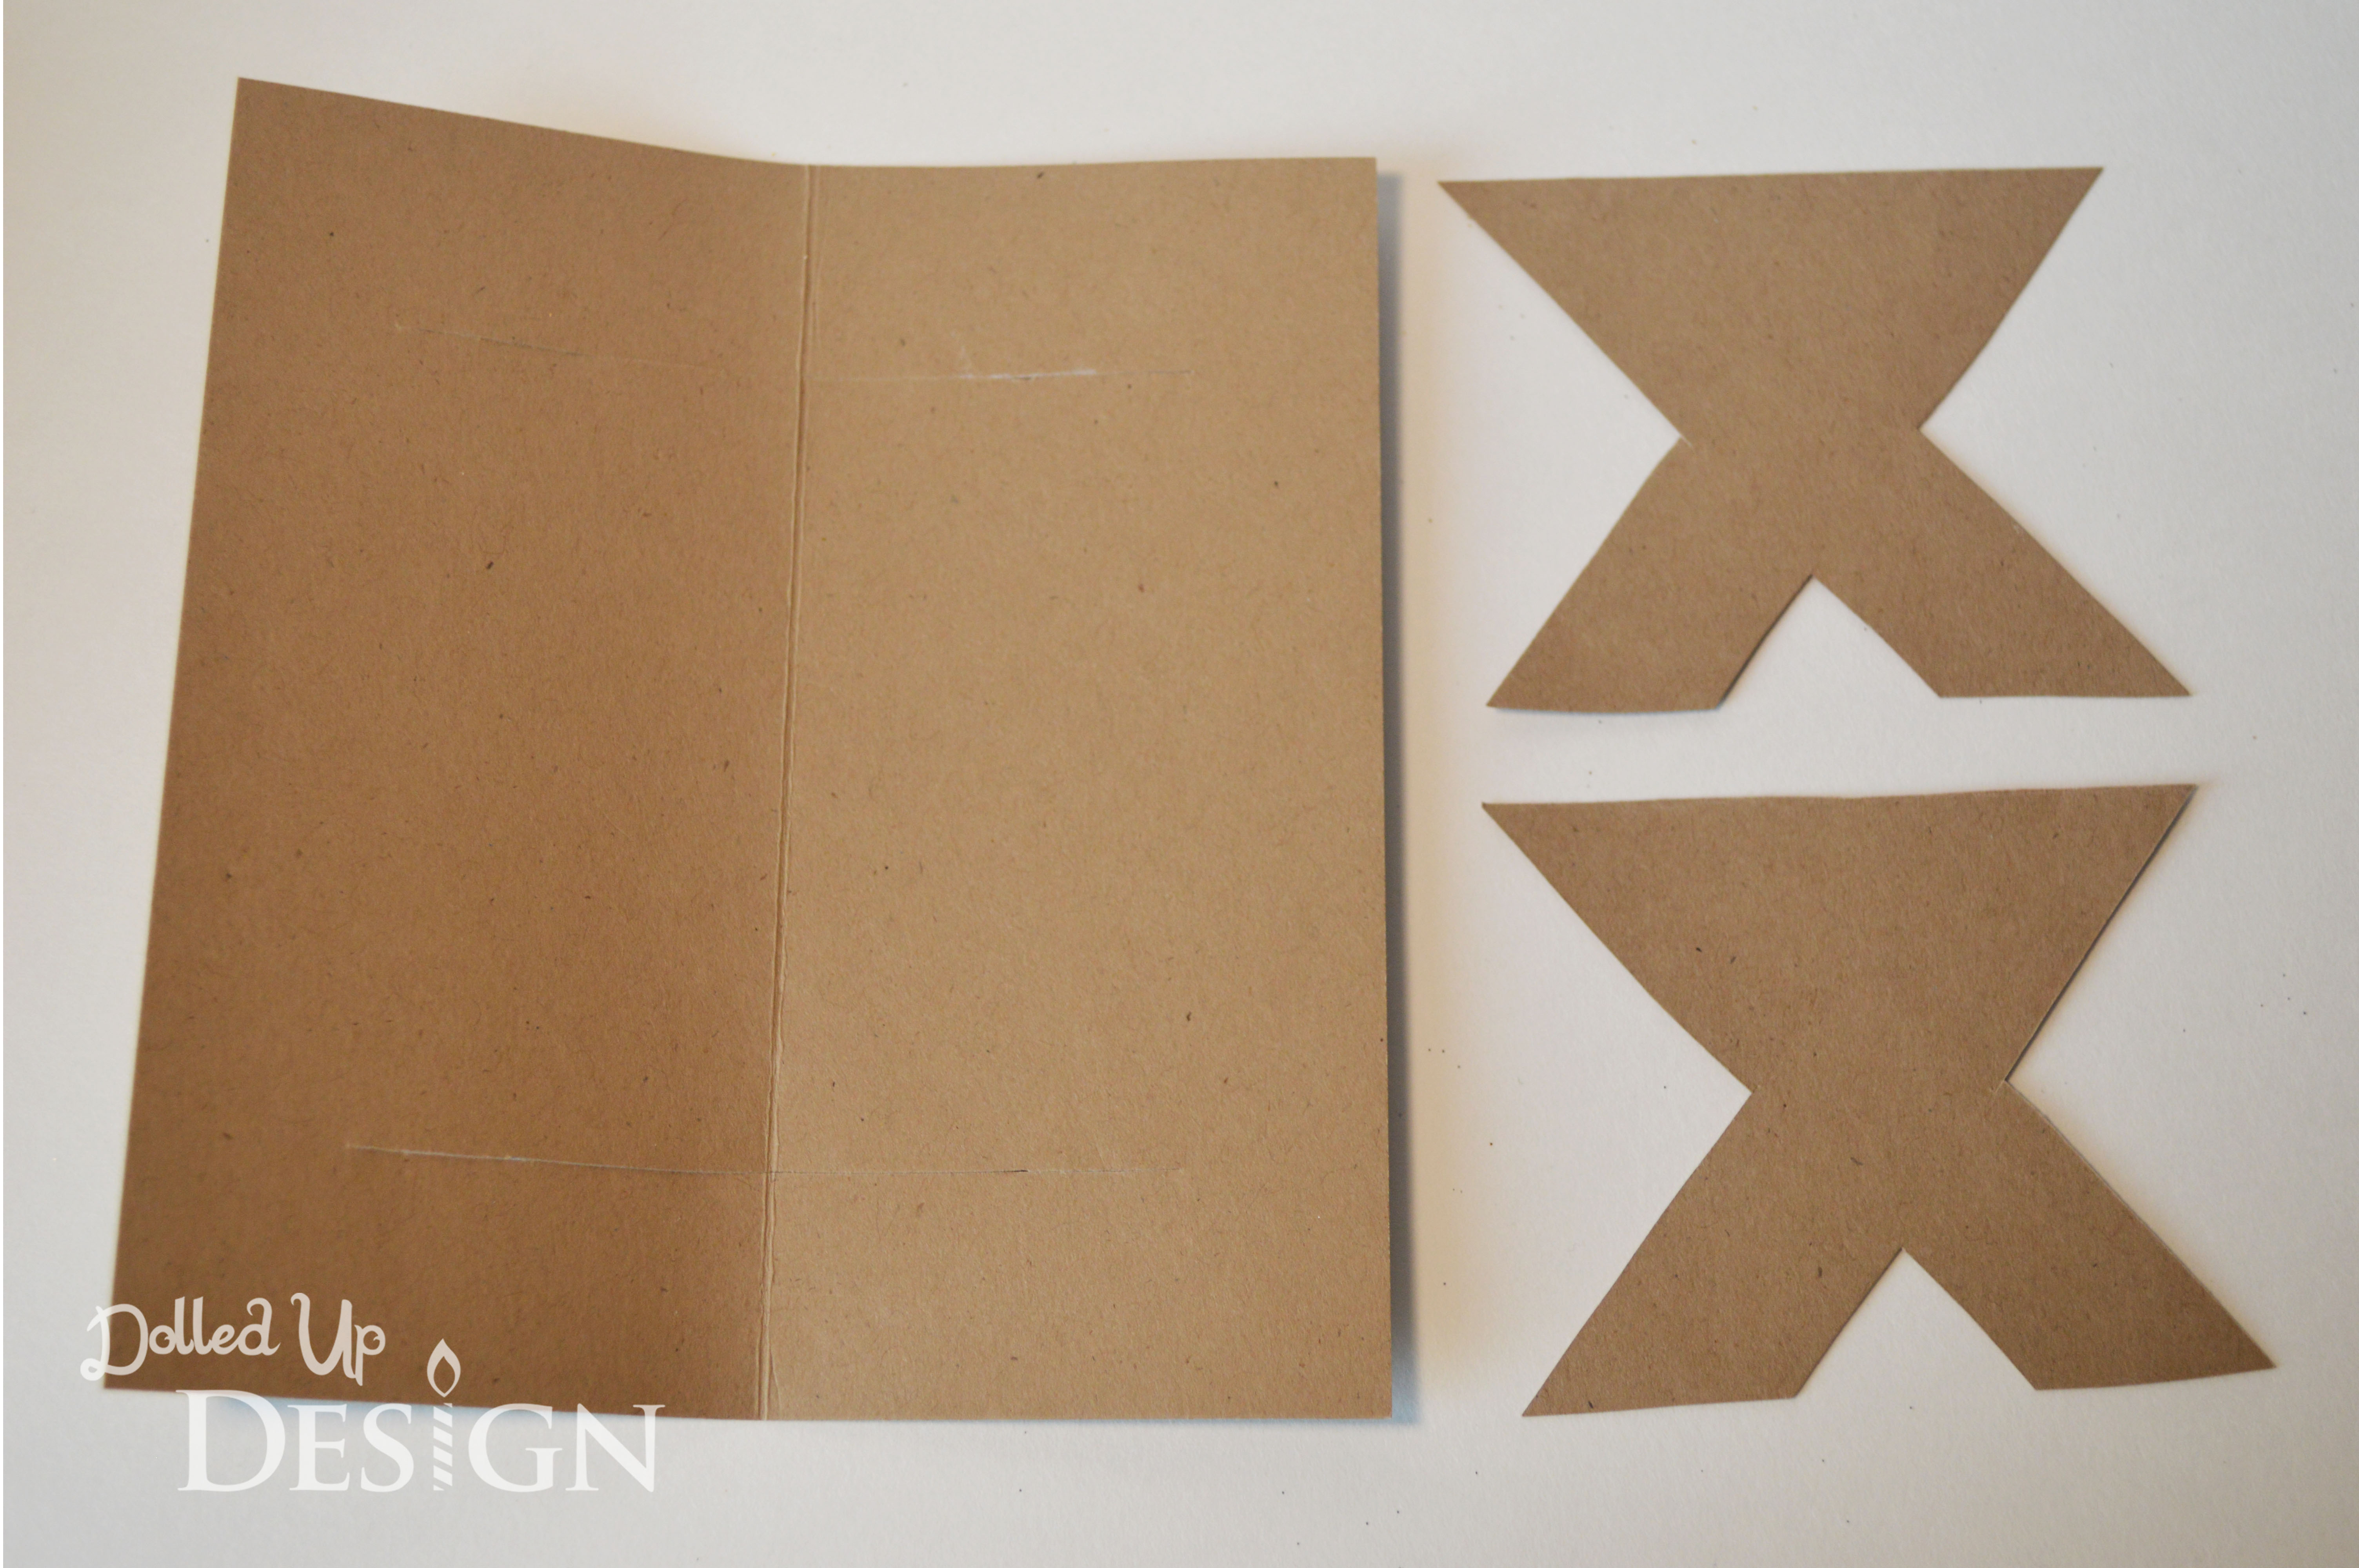
The bed of the manger is 5 1/2 inches (the width of 1/2 sheet of the card stock) by 5 inches.  Score at 2 1/2 inches and fold.

StrawMangerActivity_Template

With the manger bed folded, cut a slit 1 3/4 inches long, 1 inch in from the edges – on both sides.
Cut out the two manger supports.

StrawMangerActivity_CutOut

Slide the supports into the manger bed and open the bed wide.

Snip little pieces of the yarn (about 2 inches long) for the straw.

StrawMangerActivity_FInal

Take time to share the story of the birth of Jesus and teach your children how their good deeds – helping others, being kind, sharing etc – are the gifts they can give.  For a super poem (and printout!) and a story that tells about the Good Deeds Manger go to: http://smallfineprint.com/straw-for-the-manger/

I wish you a peaceful week leading up to Christmas, and a joyous Christmas Day!

Thank you again for sharing, mom! 

Celebrations, Crafts, Little Hands, Our Forever Home

How We Are Putting the Happy in our Holidays

The Holiday season is upon us and I want to try and make the most of it with the kids.  There are many things we did last year that the kids enjoyed and I want to attempt again, plus a few new things (weather permitting!).

We started things off yesterday with a little “Gingerbread” House decorating.  My two year old was drawn to these little wooden piggy bank houses at Dollarama and as I was fighting her to put it back on the shelf, I realized they would make adorable little gingerbread houses for the kids to paint and decorate.  After a coat of brown paint, the kids went to town with the glitter glue, foam shapes and pom poms.

SONY DSC

They look great and my 4 year old loves the little lock and keys the house came with so he can lock any small treasures inside!  Perhaps Santa needs to sneak something inside on Christmas Eve…

SONY DSC

Today was bitterly cold so we decided to stay in and decorate the Christmas tree.  It is our first time putting up an artificial tree instead of a real one so having it up this early still feels a little strange to me.  It is also our first Christmas in this house so there was a bit of debate over where the tree should go.   In the end I am happy with it up in our second floor bonus room.

SONY DSC

Our Christmas Countdown activity list:

  • Countdown the Nights Before Christmas by unwrapping a new bedtime story each night in December
  • Write a Letter to Santa (See my great printable template)
  • Decorate the Christmas Tree 
  • Visit and take photos with Santa
  • Take our annual Holiday Photo of the kids
  • Decorate the kids bedroom doors like snowmen
  • Go to the Zoo’s Festival of Lights
  • Decorate a Gingerbread House
  • Do some Christmas baking
  • Host a Rudolph themed holiday party
  • Spend a night watching Christmas movies and have a sleepover in the Bonus Room
  • Spend an evening looking at Christmas lights
  • Go for a Sleigh Ride

Hopefully this is enough to help keep us busy for the next little while.  I will try to post a full photo tour of all our decorations once they are all up.  I have some popsicle stick snowflakes up on my living room walls I can’t wait to share!

What is on your Christmas countdown activity list?


Crafts, Everyday Life, Little Hands, Two Legged Fun, Uncategorized

Home Depot Kids Workshop

SONY DSC

Okay, technically it is no longer summer, but we did manage to finish one more item from our summer bucket list over the weekend: attending a Home Depot Kids Workshop.

Since getting possession of our new house, we have spent more then our fair share of time (and money) at Home Depot and Lowes.  We always have the kids in tow and while they are generally pretty agreeable, they have made it known that visiting the hardware store is not the most exciting activity for them.  And who can blame them, really?  Riding in the racecar cart is only exciting for so long!

SONY DSC

On one of our many trips to Home Depot this winter, we just happened to be in the lumber section towards the back of the store and my son noticed that there was a crowd of kids painting and building.  He desperately wanted in on the action, but I was pretty sure it that you needed to have registered for it and I quickly steered him away.  Expressing his disappointment, I promised it was something I would look into and that he could attend the next time.  It took me a few months, but I finally make true to my promise.

The Home Depot Kids Workshops take place on this first Saturday of every month.  The project details are always available on their website ahead of time and I was able to register for the class online via their simple form.  I admit that when I have looked before the projects haven’t always appealed to me, but I was excited to see this month’s was something my 4 year old could build and actually play with.

We arrived at the store right at 10am.  Once there,  Camden was welcomed warmly by the Home Depot staff and given his official orange Home Depot apron with his name on it!

SONY DSC

Our project for the day was building an Emergency Service vehicle.  At each spot at the table was a complete packaged kit with instructions, stickers, wood, wheels and the nails needed to put the project together.  The instructions were clear to follow and the wood all had pre-drilled holes that made it easy to get the nails started and in the right locations.  It all came together fairly quickly and my son was quite proud that he was able to wield the hammer and actually help put the vehicle together.

SONY DSC

Once assembled, they had a table full of paint for the kids to customize their creations.  Camden stuck to his favorite color, green!

SONY DSC

Instead of waiting in store for the paint to dry, we decided to bring everything home and finish putting the stickers on there.  We were given a friendly good-bye from the staff and a cute little certificate of completion that Camden proudly held the entire drive home.

SONY DSC

The kids were also each given a project pin that I assume are meant to be collected and added to their apron as they attend more of these clinics.

It was a fun activity for my son and made for a great little “date” for he and I to do without his little sister tagging along.  And the best part is that it was all completely FREE!

We had it on our Summer Bucket List, but this is something you can definitely do in those upcoming winter months when you are all going stir crazy and need a reason to get out of the house.  Yes, it means yet another trip to the hardware store for the kids, but trust me they won’t be complaining this time around!

Similarily, Lowes offers FREE Build and Grow Clinics for children aged 5 and up.  There is a great looking haunted house coming up on October 18th and I have seen other movie themed projects such as Turbo or How to Train Your Dragon in the past.  This is something I will definitely be checking later in the year after my son turns 5.

SONY DSC

Have you attended one of these workshops in the past?  Please describe your favorite project in the comments below!

Print

Big Hands, Crafts, Little Hands

Foam Ball Teddy Bear Craft

It is Teddy Bear week in our neck of the woods!

My son has started preschool this fall and Thursday is their first themed day – a Teddy Bear Picnic.  Plus, on Tuesdays, my little girl and I attend a Salsa Tots class and it just so happened that their theme for this weeks class is also a Teddy Bears Picnic.

Because of this happy coincidence, I decided to take the theme a bit further and am hosting a Teddy Bear Picnic lunch and playdate at our house on Thursday after preschool.

Print

A handful of my son’s class are all friends he has known from attending playgroup for the past two years and there are also a couple younger siblings Keira’s age.  Because of scheduling we decided against joining playgroup again this year, so I am hoping to plan a few playdates at our house to keep connected to this wonderful group of ladies and their kids throughout the fall and winter.

I am trying to keep things simple for the playdate, but that is hard when there are so many cute teddy bear themed decoration and food ideas out there!  Luckily I have a big party supply closet to draw on to create my tablescape, plus a few simple DIY projects I have come up with.

SONY DSC

These foam ball teddies occurred to me when I was in the craft aisle of the Dollar store and saw the bags of various sized small foam balls.  At first I thought two small balls glued onto a bigger ball would make a cute teddy head.  Then, I decided to buy a couple more different sizes to see if I could somehow make a body and full teddy bear.

SONY DSC

For this project you will need 4 different sizes of foam balls, hot glue, acrylic paint and any embellishments you might want for your bears.  To create my bears, I used for of the smallest sized balls for the ears and arms, the next size up for the two legs, then a slightly larger head and the biggest ball for the body.  For the nose, I cut the smallest sized ball in half with a serrated kitchen knife to attach onto the head ball.

SONY DSC

To connect the balls, I used hot glue, but toothpicks would also be a good method since the Styrofoam makes it easy to stick them into.  The glue did require some holding as it set and my final bears were a bit messier then I would have liked.

Once assembled, I simply painted my bears with a couple coats of acrylic paint and added on small bows I made from blue ribbon.

SONY DSC

I chose to keep my bears pretty minimalist, but you could definitely draw on a face with a permanent marker and personalize yours as you see fit.

If you are hosting you own teddy themed party, these could be a cute, inexpensive craft to do with the kids.  As mentioned, toothpicks could be used to attach the bears together and then you could have the kids decorate the bears however they wanted using paint, markers, googly eyes, pompoms, pipecleaners and ribbon.

My kids enjoyed playing with the balls as I was working, and my son decided they make a great snowman so that will be one of our crafts to do together come winter.  We may even make more of these bears and just leave them white to be polar bears!


I can’t wait to show you what other Teddy Bear themed ideas I have come up with later this week!

Crafts, Everyday Life, Little Hands, Two Legged Fun

Our Happy Canada Day!

Print

Tuesday was our Nation’s holiday and we celebrated the hot summer day with a combination of activities.  The day before, Camden and I did a quick handprint craft so that he would have his very own flag for Canada Day.  It was quick and easy and he seemed quite proud of how it turned out.

SONY DSC

My husband has had the week off work to work on the yard.  He had been making good progress on the patio pad and retaining wall, so he went back to work first thing in the morning before the sun got too hot.  The kids and I “helped” by pulling out the camping chairs on the new patio pad to test out daddy’s hard work.

SONY DSC

Around noon we decided to make our way down to the private beach in our community to check out the Canada Day activities they had.  After waiting in line for some fun in the bouncy castle, Camden made a cute headband craft and we enjoyed a picnic lunch.  Then it was down to the sand so my little beach baby could enjoy some time in the water!  The beach wasn’t nearly as crowded as I expected and I love that we can be at the lake with just a quick drive down the road.  Camden is not a huge fan of the water, but Keira would spend all the day at the lake if we let her.

SONY DSC

To wrap up the day,  both  kids got the chance to see fireworks for the very first time.   Check one more item off our Summer Bucket List!  I wasn’t sure they’d hold out that late, but they were still awake at 10:30 so we got them into their jammies and loaded up them in the wagon to make our way back down to the beach.  To avoid crowds we didn’t actually go into the gated beach area this time, and found the perfect spot in an empty house lot directly across from where the fireworks were being set off.

SONY DSC

Both kids seemed to enjoy the fireworks (from the safety of mom and dad’s laps) and it was the perfect ending to our Canada Day.


Celebrations, Crafts, Little Hands, Parties

Juice Can Lid Olympic Medals

OlympicsPartyTitle

I have to admit I am a little conflicted over whether to share my party projects or to keep them all as a surprise for my party guests who follow the blog.  Lucky for those not coming to the party, I have decided to share my ideas right away and give you time to do it yourself before or during the Olympics.

Today I am sharing a simple Olympic medal craft I have planned for the kids coming to my son’s 4th birthday party.

SONY DSC

Supplies

  • Frozen juice can lids (1 per child)
  • Stickers for decorating
  • String or ribbon
  • Dried pasta with holes (rigatoni, penne, etc.)
  • Rubbing alcohol
  • Gel food coloring
  • Zipper seal bags

I came across the idea to use frozen juice concentrate lids as medals when I was searching Olympic ideas on the internet.  I could have just strung the medal on a thick ribbon, but I decided the craft needed a little more to it to help keep the kids busy.  I came across this Fantastic Fourth Olympic Party  from Put a Bow on It where she had pasta necklaces as an activity for the kids and decided to borrow the idea for the ribbon portion of my medals.

I have never made colored pasta before and was surprised at just how easy it is.  All it took was some rubbing alcohol, gel food coloring and dried pasta mixed up in a plastic bag and I had colored pasta.  For each color I used approximately 2 tablespoons of rubbing alcohol, about 1/4 teaspoon of gel color and 2 cups of pasta.  I double bagged the pasta, as was recommended by Mommy Testers in their How to Make the Best Dyed Pasta tutorial, and then laid the colored pasta out on paper towel lined baking sheets to dry.  I then repeated for each of the 5 Olympic ring colors.  Luckily I needed the gel colors anyway for the cake so I wasn’t buying too many extra supplies for this project.

SONY DSC

Once I had the pasta prepared, I had my husband help drill a hole through my juice can lid and prepared a sample medal for the party.  To decorate the medal juice can lid portion, I used star shaped stickers I found from Dollarama and then strung the pasta on a ribbon I strung through the drilled hole.

SONY DSC

Camden seemed pretty excited about the finished medal so I am hoping the little Olympians at our party have just as much fun creating their own to wear!

Crafts, Everyday Life, Little Hands, Two Legged Fun

Letter to Santa – Free Printable

SONY DSC

It is December 1st and the countdown to Christmas has begun!  We put our first cottonball on Santa’s beard this morning, hung our first ornament on our new Advent tree from Grandma, and then I decided it would be a good day to write and mail our letter to Santa.

SONY DSC

To keep things simple, I used the same template I created last year for my playgroup kids to use to write their letter’s to Santa.  They are all preschool aged, so this was a quick and easy way to get the letter’s written and let the kids have a bit of fun coloring a picture for Santa.

Letter_to_Santa

You can download pdf version of the Letter_to_Santa file here.  Enjoy!

Crafts, Little Hands

Kids Cottonball Christmas Countdown

SONY DSC

I am planning to do this craft with our playgroup at the beginning of December, but my 3 year old son saw me working on the digital file today and couldn’t wait to color his Santa.  He did such a good job coloring I decided we might as well finish off the project this afternoon and have it hung and ready to start adding the cotton balls December 1st.  I am sharing today so you can hopefully do the same with your kids.

I always had a chocolate advent calendar growing up, but have resisted the urge to buy the kids one this year. The chocolate is always pretty crappy in them and the last thing my kids really need is more treats. I loved the simplicity of this one when I found it on pinterest.  It is cheap, easy, and interactive for the little guys.  Plus, I am hoping it will help with counting as we work our way up to December 24th.

SONY DSC

Supplies

  • Printer
  • White Cardstock
  • Crayons
  • Scotch Tape or Stapler
  • 24 Cotton Balls (I used 12 and cut them in half)
  • Double sided tape or glue

1.  Open the CottonballChristmasCountdown_DolledUpDesign file and print both pages on white cardstock or heavy paper.  The original Santa image was found on kidsdomain.com.

2.  Have your child color the Santa image using crayons or felt markers.

3.  Fold the “Christmas Countdown” page along the fold line and staple or tape the sides shut to create a pocket.

4.  Staple or tape the pocket portion to the bottom of the Santa picture.

5.  Count out 24 cotton balls and put them in the pocket.

6.  Beginning December 1st, put one cotton ball each day on the circle’s on Santa’s beard using glue or double sided tape.

SONY DSC

SONY DSC

Crafts, Little Hands

Halloween Wall Hanging Kids Craft

Halloween Wall Hanging Kids Craft with Printable Templates I DolledUpDesign

Tuesday morning we celebrated Halloween at playgroup with snacks, costumes and a Halloween themed craft.  Leading craft time has been my duty for the last couple months and I have spent a lot of time on pinterest trying to find toddler appropriate crafts.  When I saw these Halloween Paper Plate Crafts through Tip Junkie, I knew right away they were what I wanted to make for our Halloween craft.  I love the cute, simple shapes and thought they were something nice enough for the mom’s to actually hang in their homes as a Halloween decoration. Continue reading “Halloween Wall Hanging Kids Craft”

Crafts, Little Hands

TMNT Pool Noodle Nunchuks

SONY DSC

They’re heroes in a half shell and they’re green!

We’ve been bitten by the Turtle bug.  I made the mistake of buying my 3.5 year some of the  old 1980’s Ninja Turtle Episodes from the $5 Walmart DVD bin and then Grandma was kind enough to pass on my younger brother’s collection of Ninja Turtle action figures to us.  Now it is all turtle talk, all the time.

When the theme song comes on, Camden likes to put on his backpack (AKA Turtle Shell) and run through the house showing off his ninja moves.  He kept asking for nunchuks so I made him a quick set of toilet paper tube nunchuks, but with a puppy and younger sister these just didn’t hold up.  I keep seeing the pool noodle light sabers floating around interest so I decided why not use a pool noodle to make a set of nunchuks.  They are soft enough that they won’t hurt, but are much more heavy duty then the cardboard toilet paper tube.

All it took was a pool noodle, some duct tape and a bit of rope.  To cut the pool noodle, I simply used a serrated kitchen knife.

SONY DSC

SONY DSC

It was a quick and cheap project and I came out looking like an awesome mom.  I even had enough pool noodle left over to craft up one of the aforementioned Light Sabres!  Win win!  I did search Pool Noodle Nunchuks on pinterest later to find out this wasn’t a completely original idea, but I still felt it was worthy of sharing.

SONY DSC

It has been a couple weeks now and they are still holding up after a lot of use.  If I were to make another set, I would probably try to find a black or grey noodle and add colored duct tape in one of the turtle colors – blue, orange, red or purple.

Our next Turtle project?  I have already told Camden we can try to make some turtle ooze like seen on this blog – I just need to pick up the ingredients.

Turtle Ooze

And for Halloween, Camden is insistent that he is going to be Raphael so I may just have to forgo the pumpkin and carve one of these watermelon’s to coordinate with his costume!

NinjaTurtleWatermelon