Celebrations, Parties

An Olympic 4th Birthday Party for Camden

OlympicsPartyTitle

SONY DSC

Even though he wasn’t due until March, Camden came as a bit of an early surprise in February of 2010, right during the Vancouver winter Olympics.  My water broke but things were slow to progress so we spent time during contractions in the hospital’s family lounge watching Olympic figure skating and skiing.  Right after he was born, I was lucky to get one of the hospital’s luxury theme rooms which meant a TV to watch Team Canada play hockey while snuggling our brand new baby boy.

Because of this association with the Olympics and my fond memories of that time, I made the decision right after Camden’s third birthday that his 4th birthday should be Winter Olympic themed.  His actual birthday ended up falling on the same Sunday of the Sochi Olympics closing ceremonies so we had a Sunday morning brunch to celebrate.

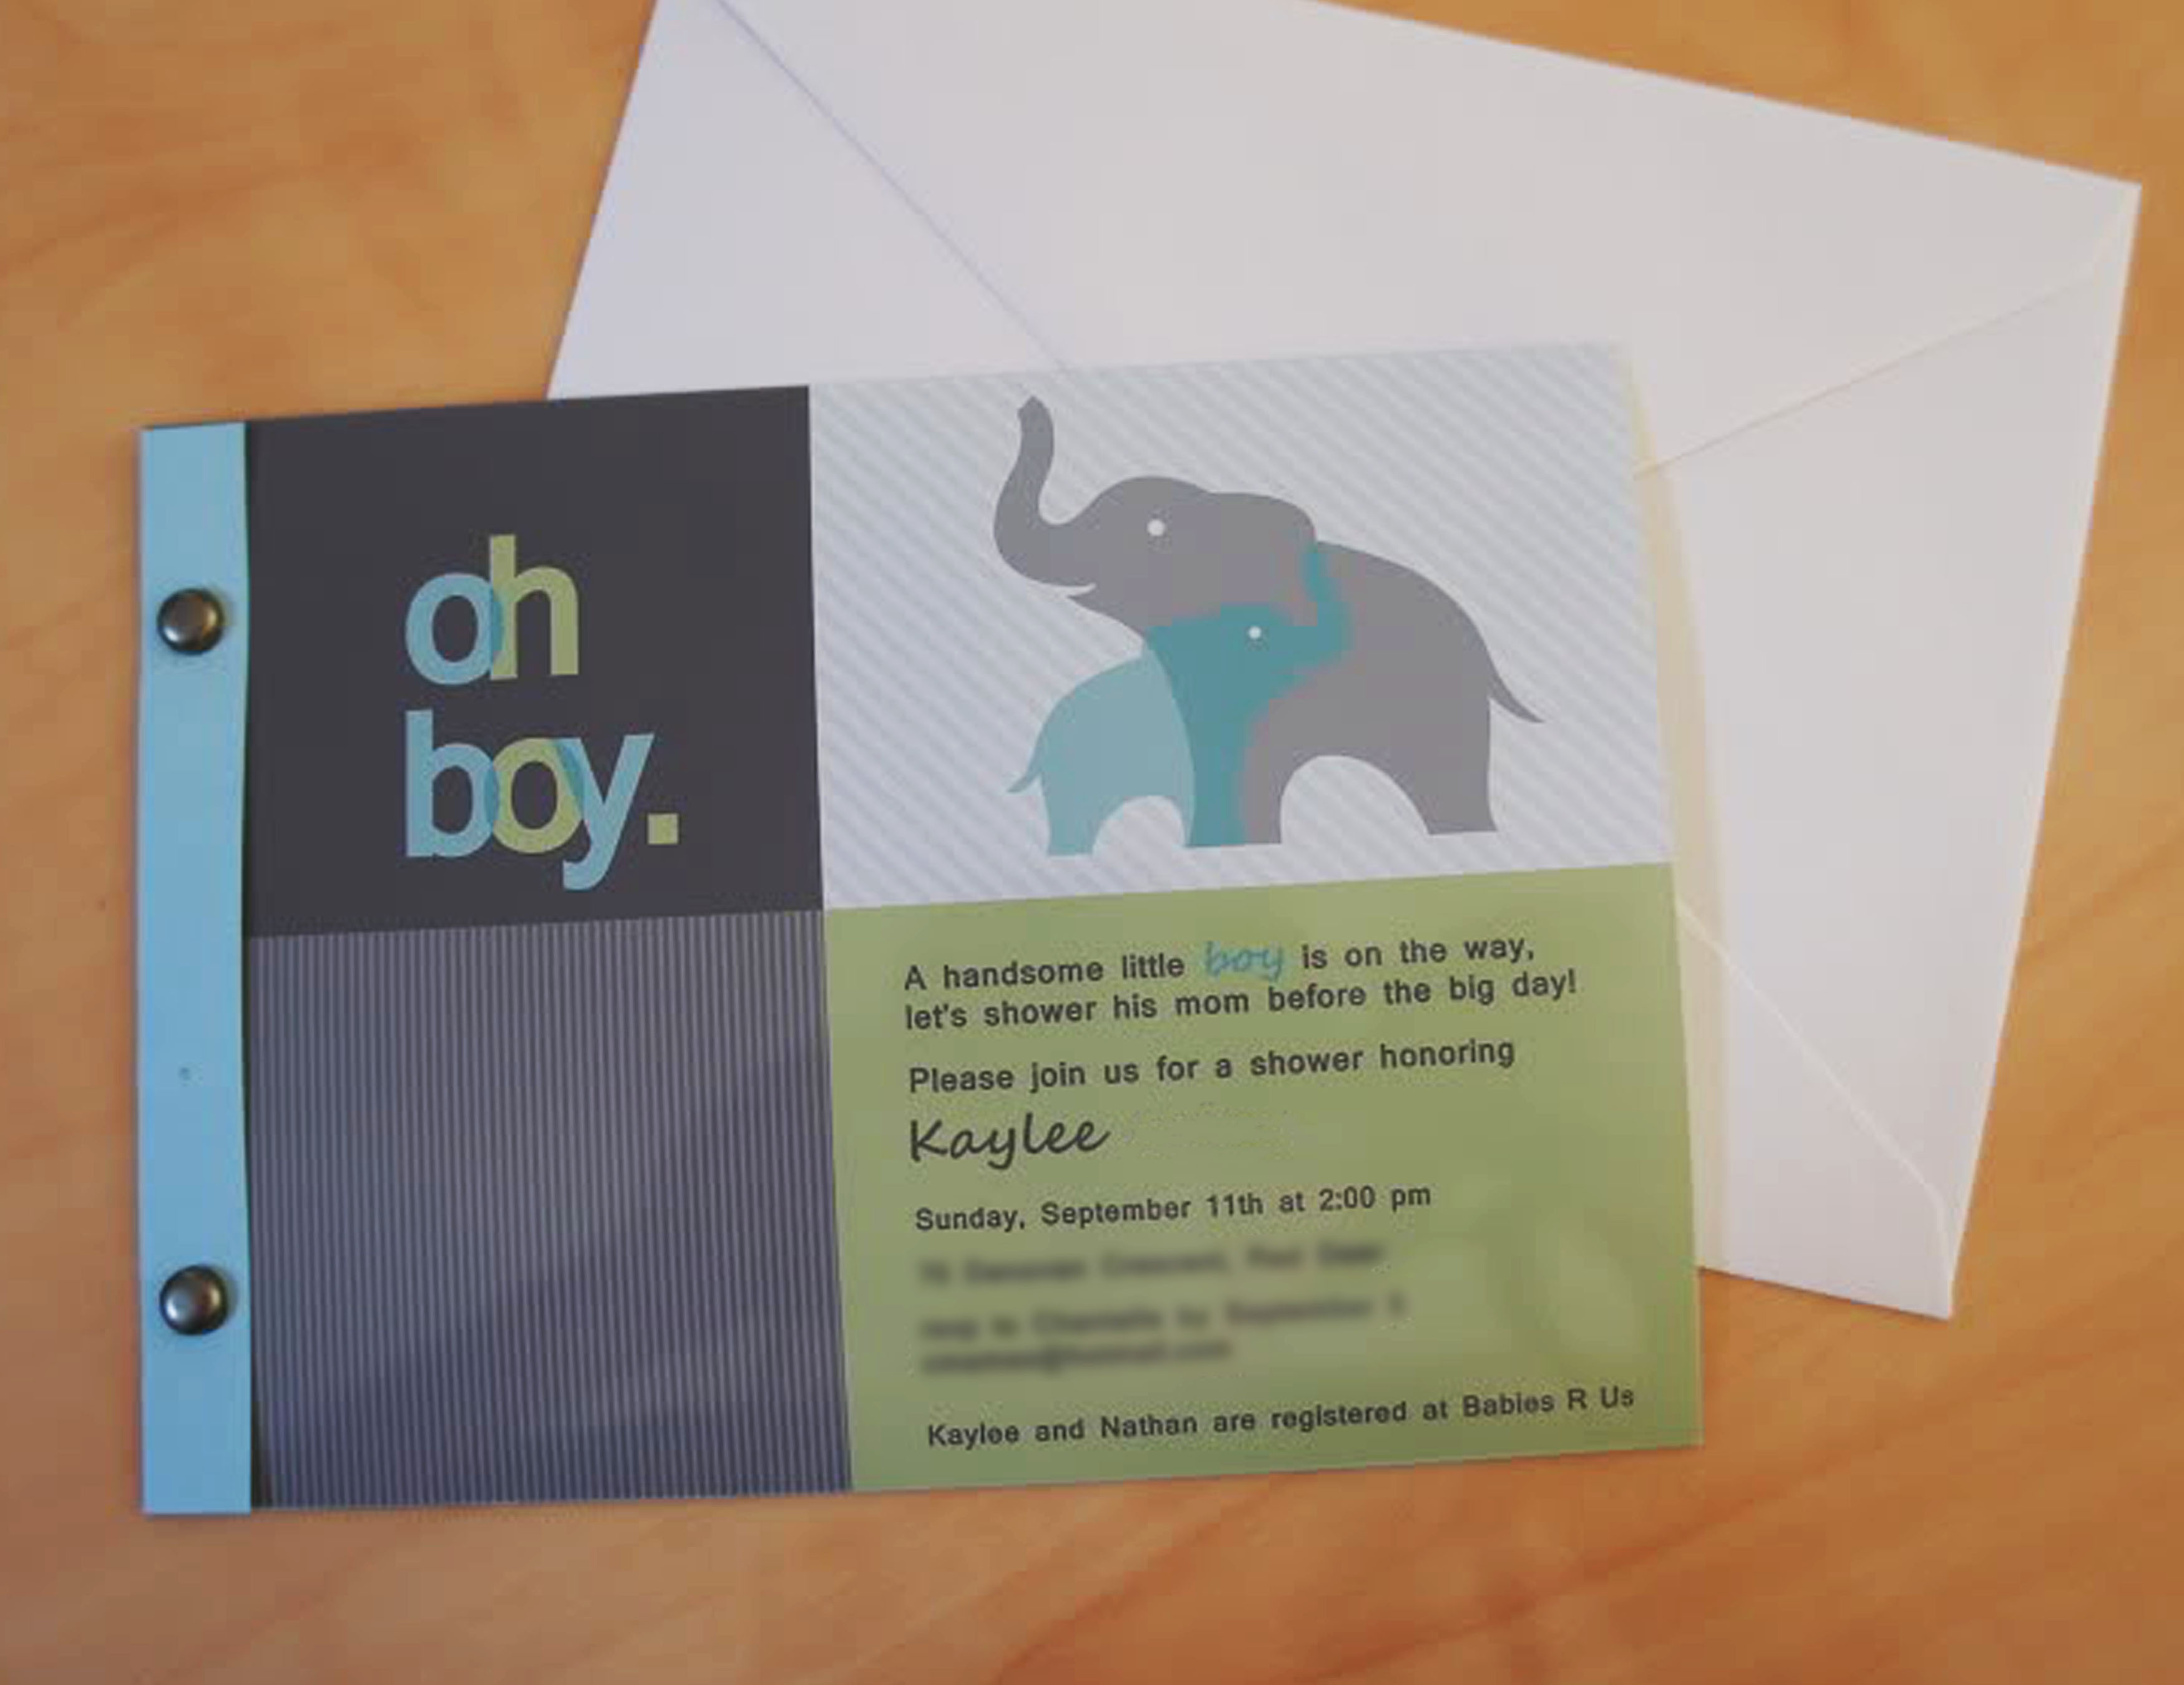
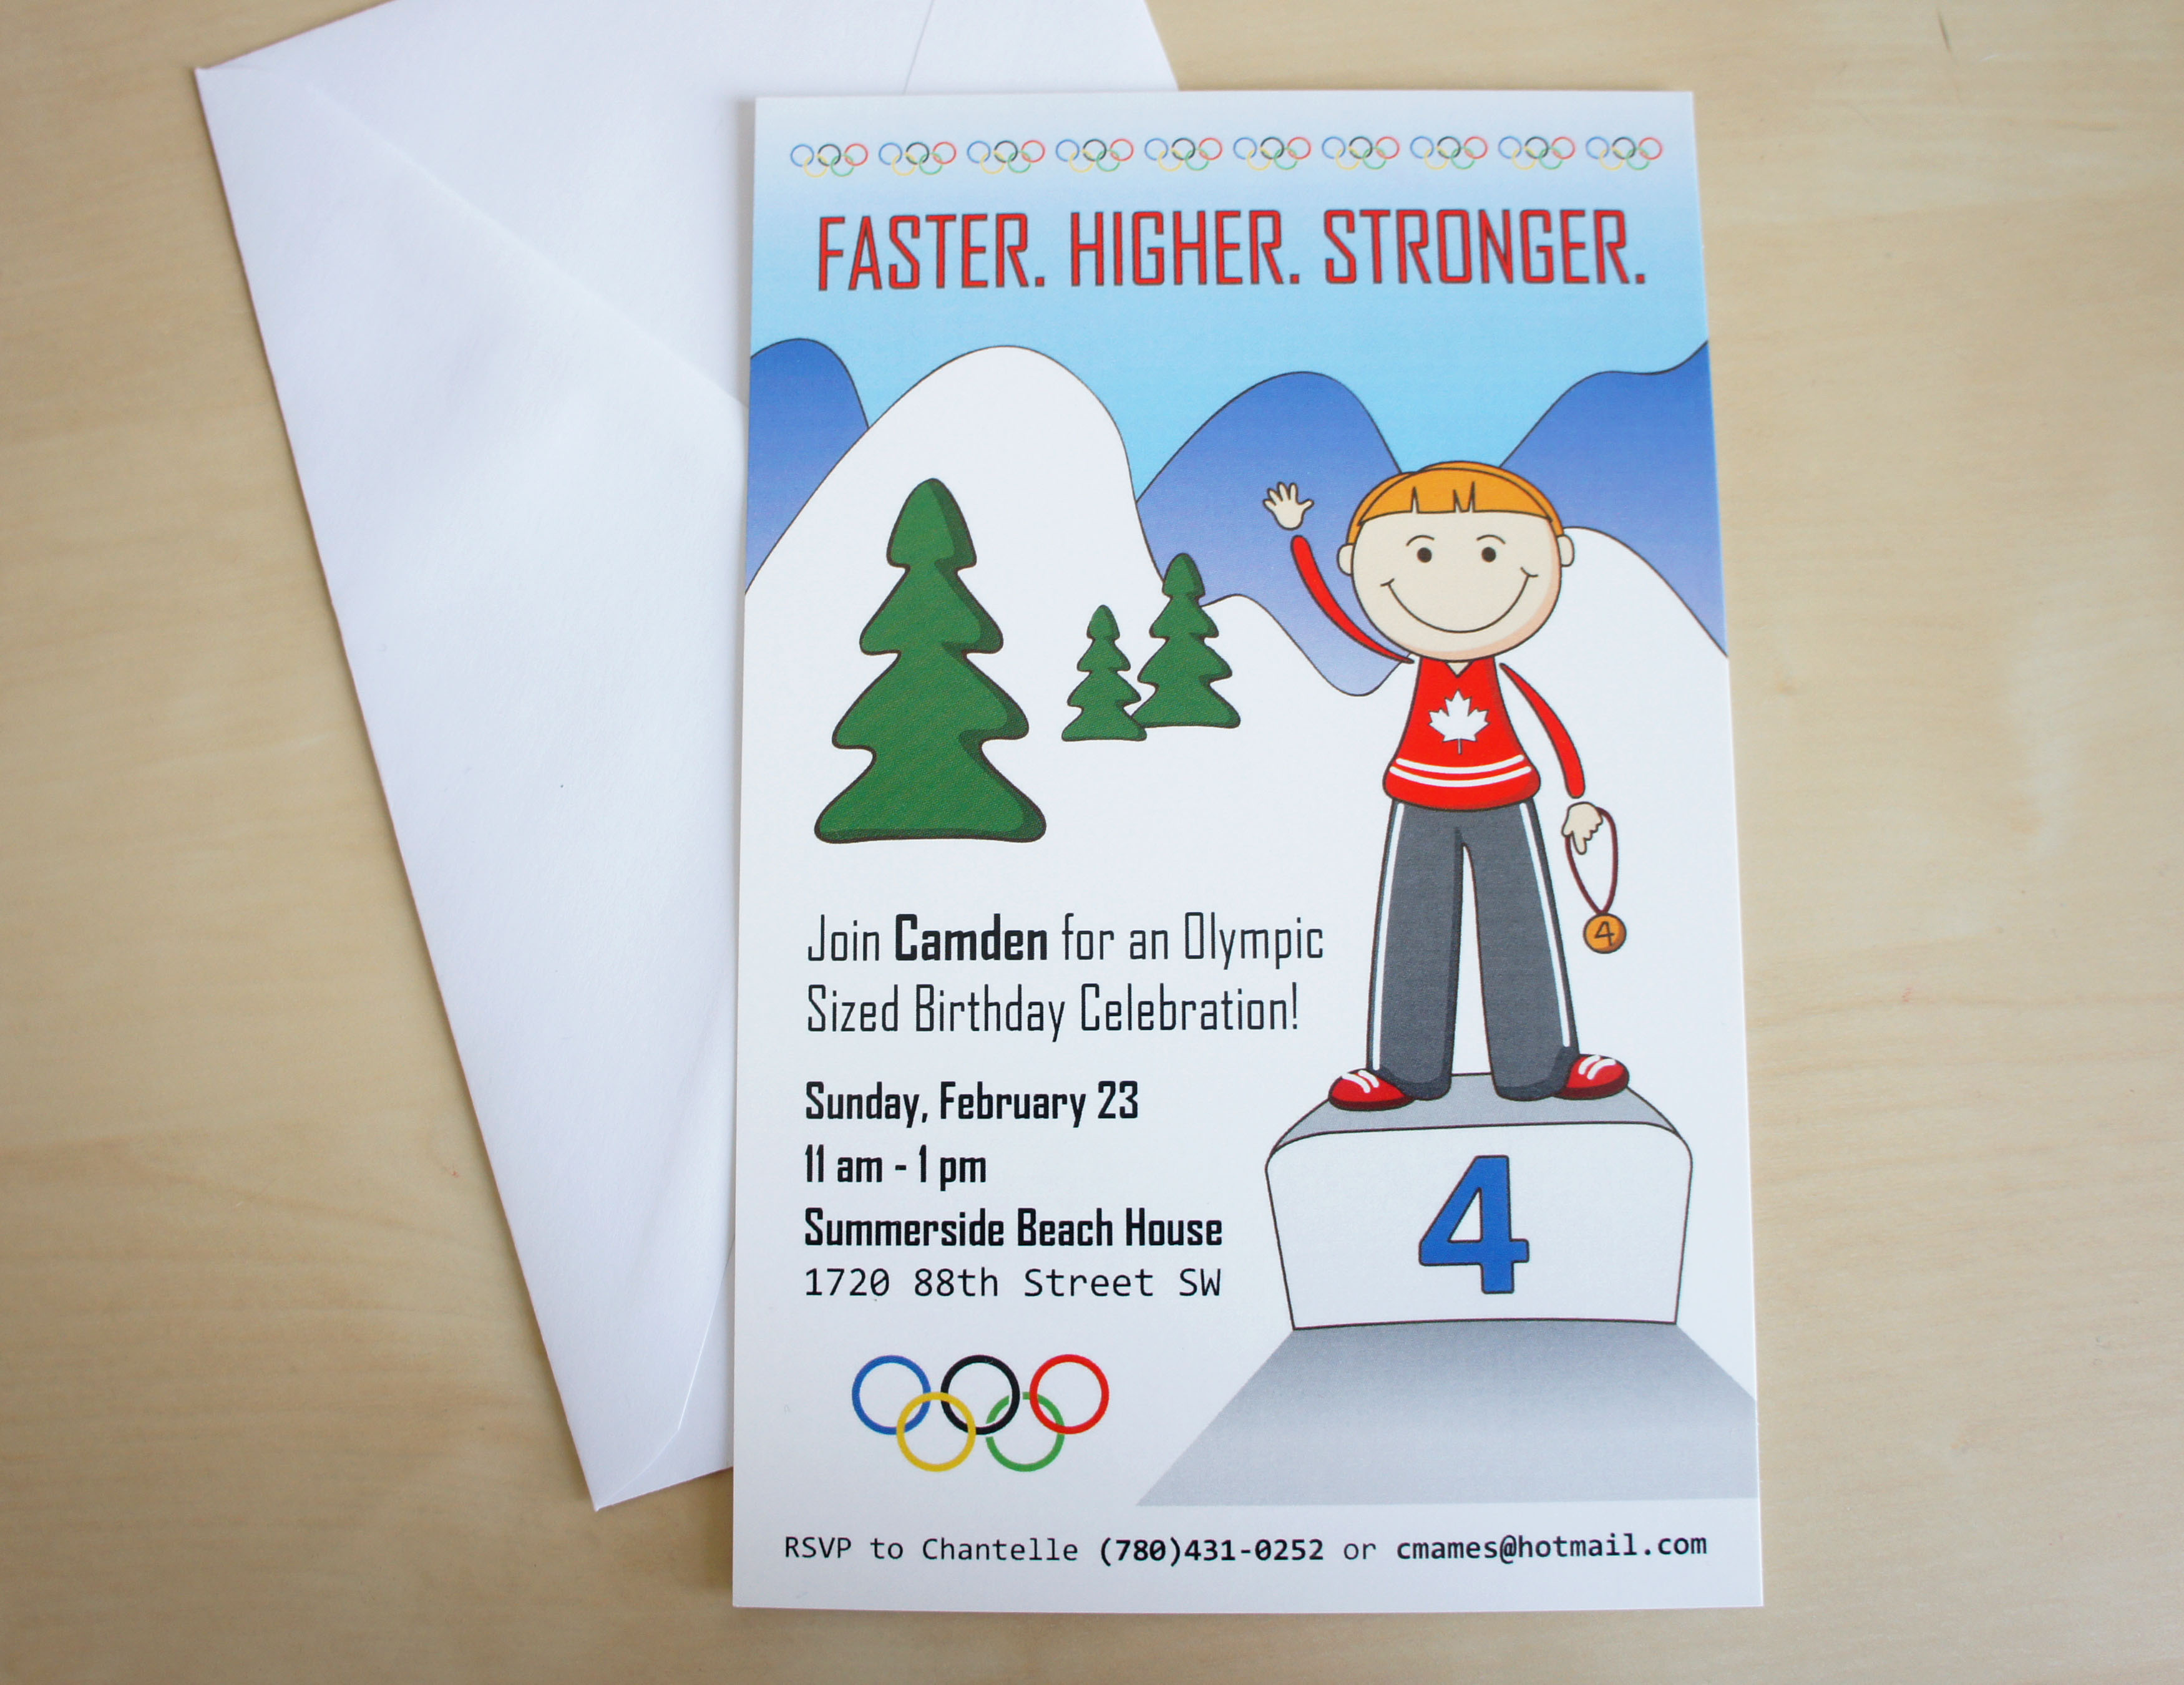
I started off by designing the invite.  I kept it simple with a flat card that included a graphic image of my birthday boy:

SONY DSC

This was the first kids birthday I hosted outside the house and it ended up working out pretty well.  We rented out a large hall just blocks from our new home and I brought in the decorations, food and activities to keep the kids busy.

SONY DSC

This was my first time having actual seating for everyone so I took the opportunity to make nice place settings at each table.  I found some flag runners and matching plates I layered with gold star shaped dinner plates, Canada flag shaped napkins and small medals I made from ribbons glued to chocolate coins.  At the center of each table and on the food tables were gold colored cardboard trees I found on clearance at Target after Christmas – it always pays to know your party theme well ahead of time and be on the watch for clearance items that might fit the décor.

SONY DSC

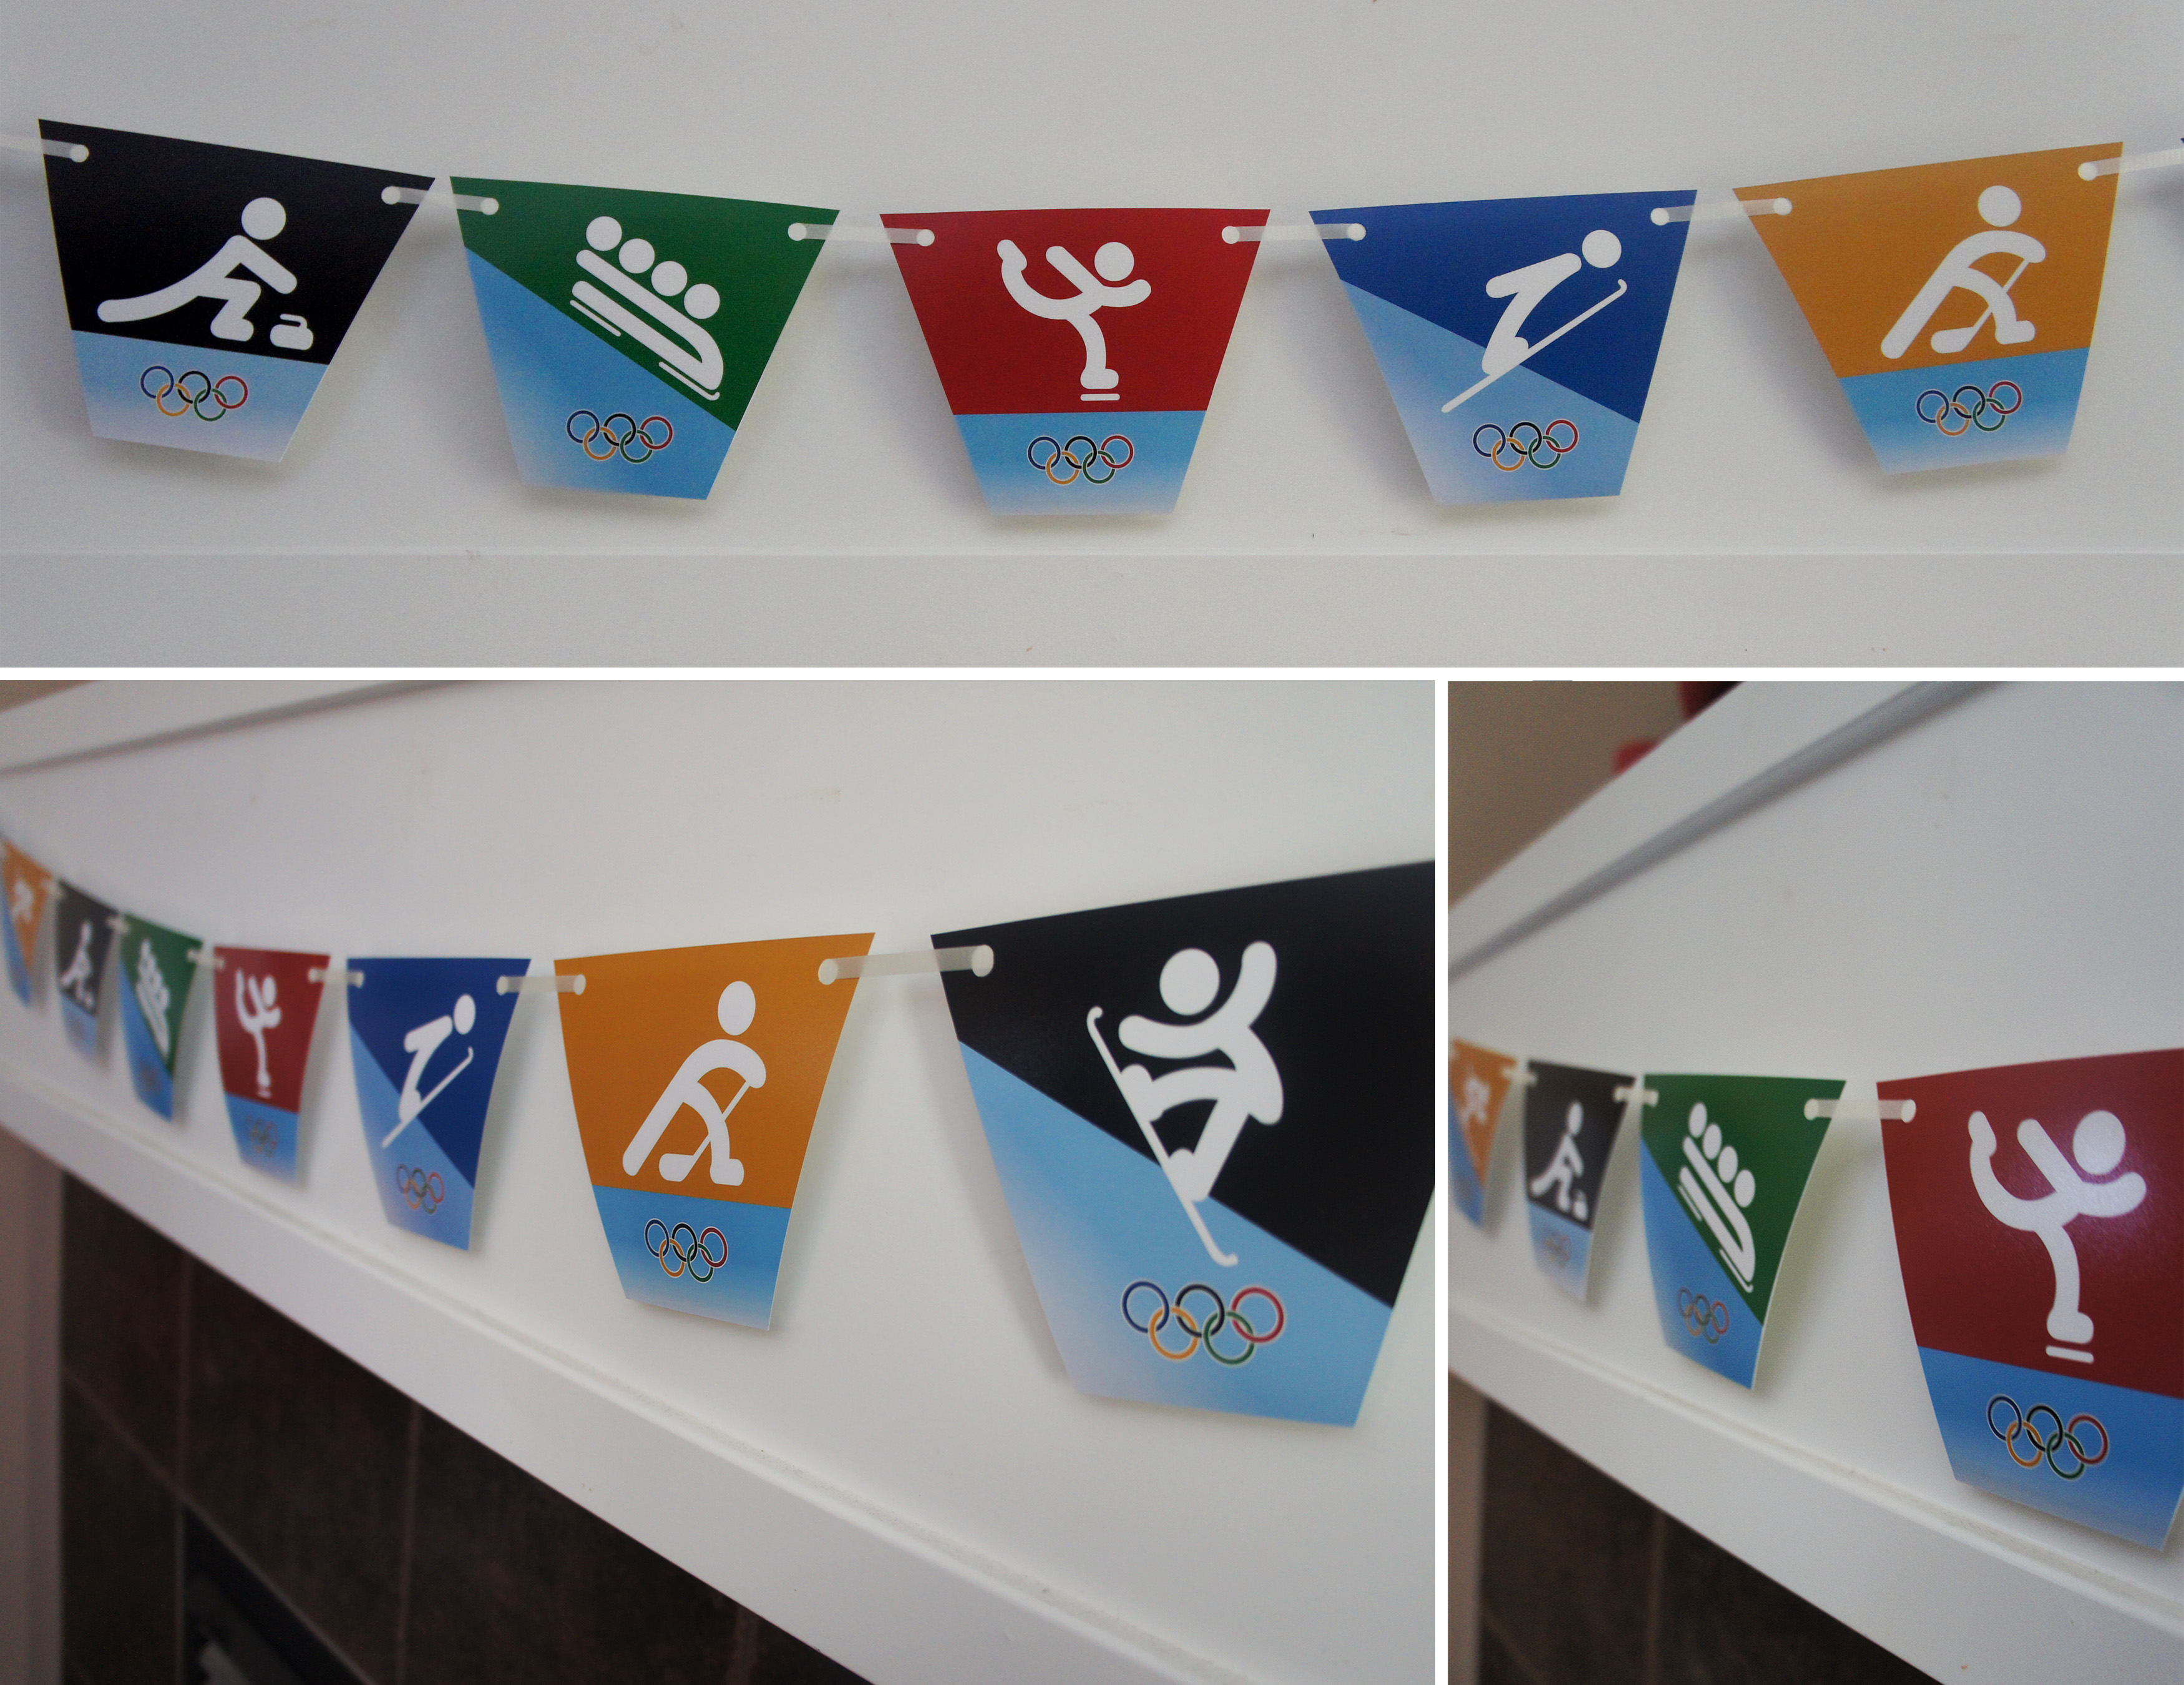
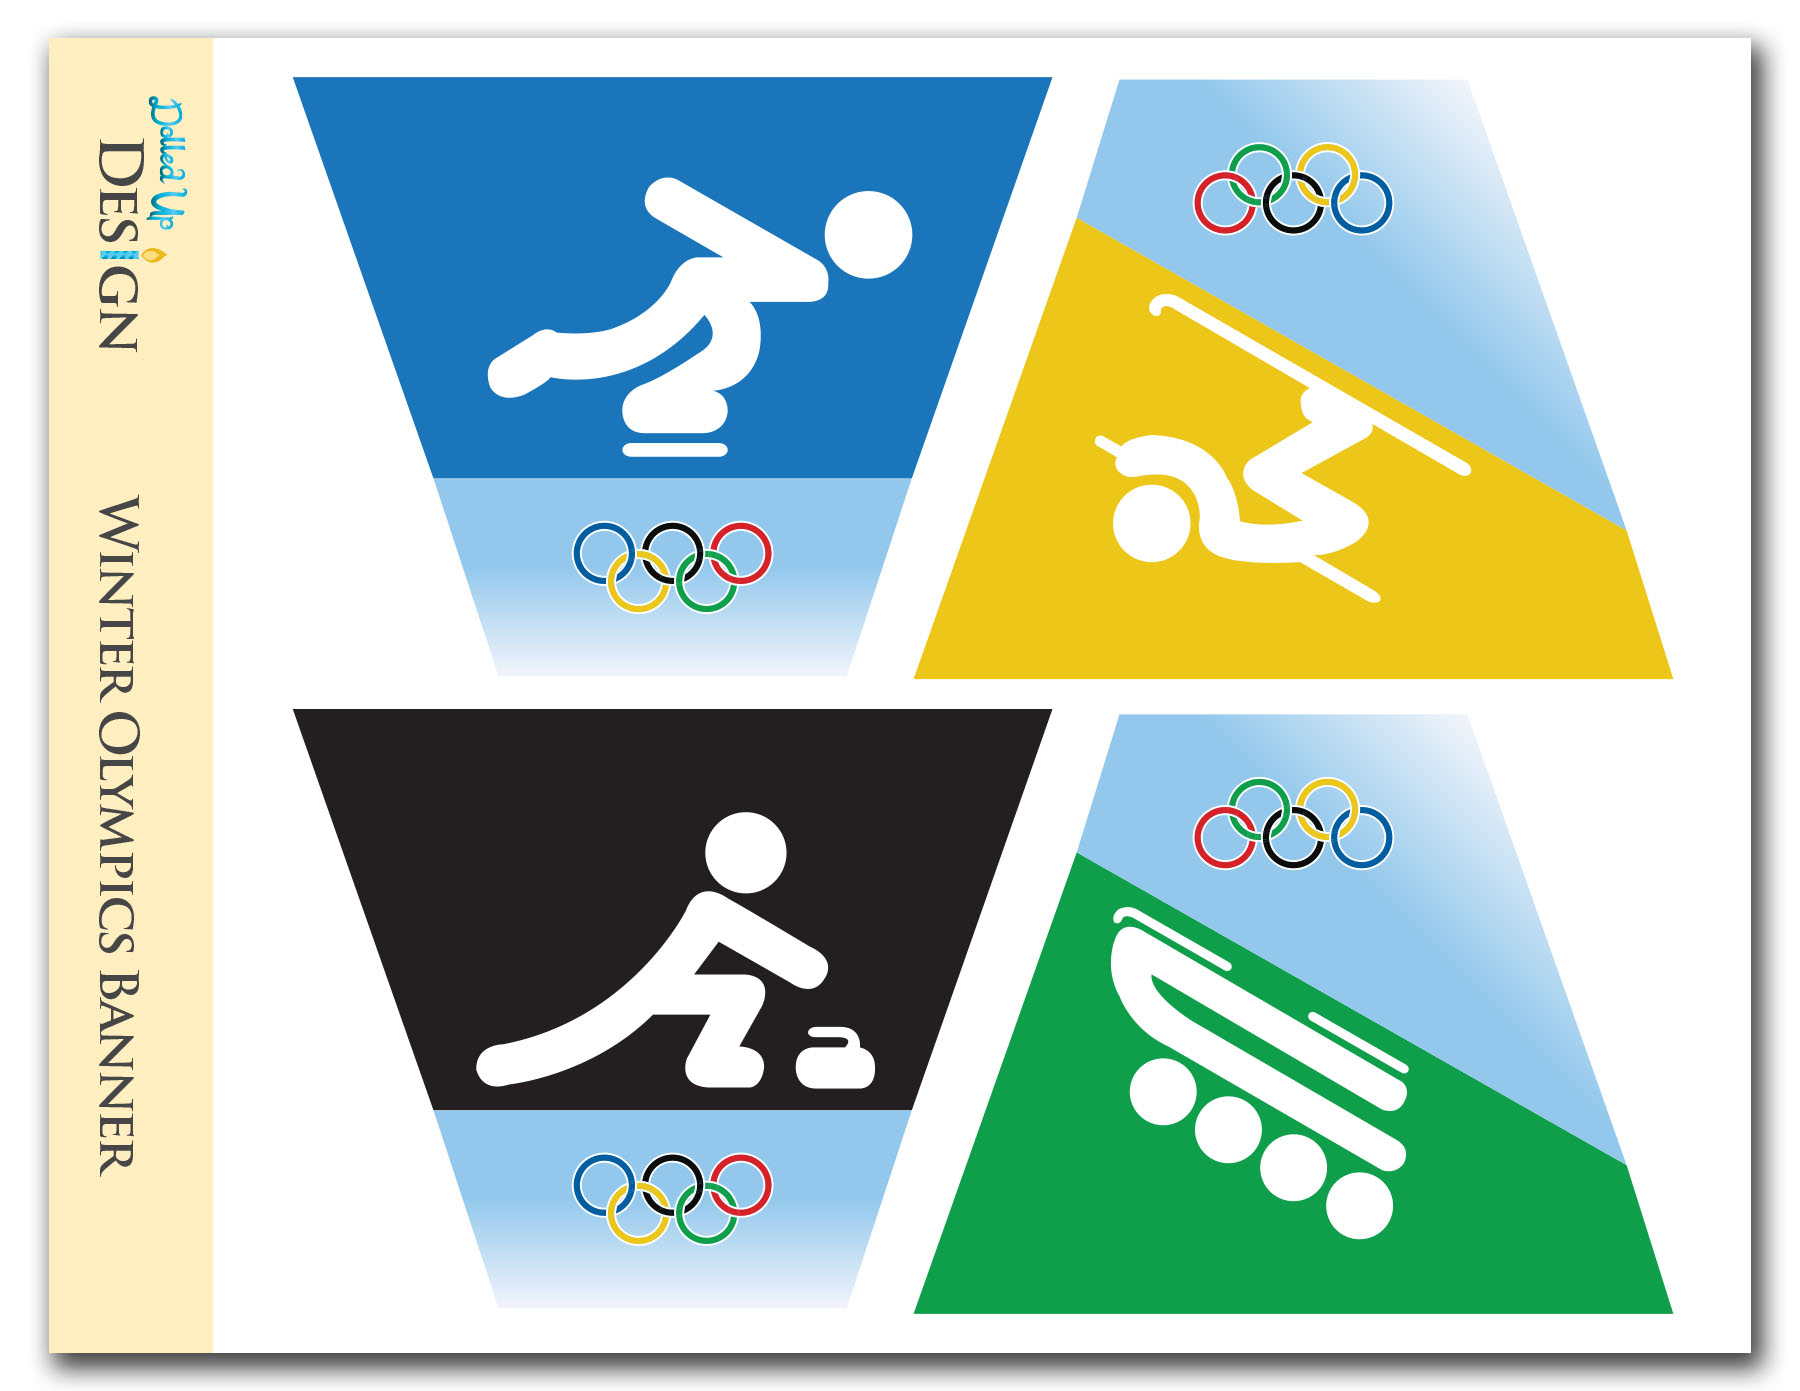
Above the cozy fireplace, I hung both the large Olympic Rings Display I crafted out of plumbing insulation tubes and streamers, and the Olympic party banner I designed.

SONY DSC

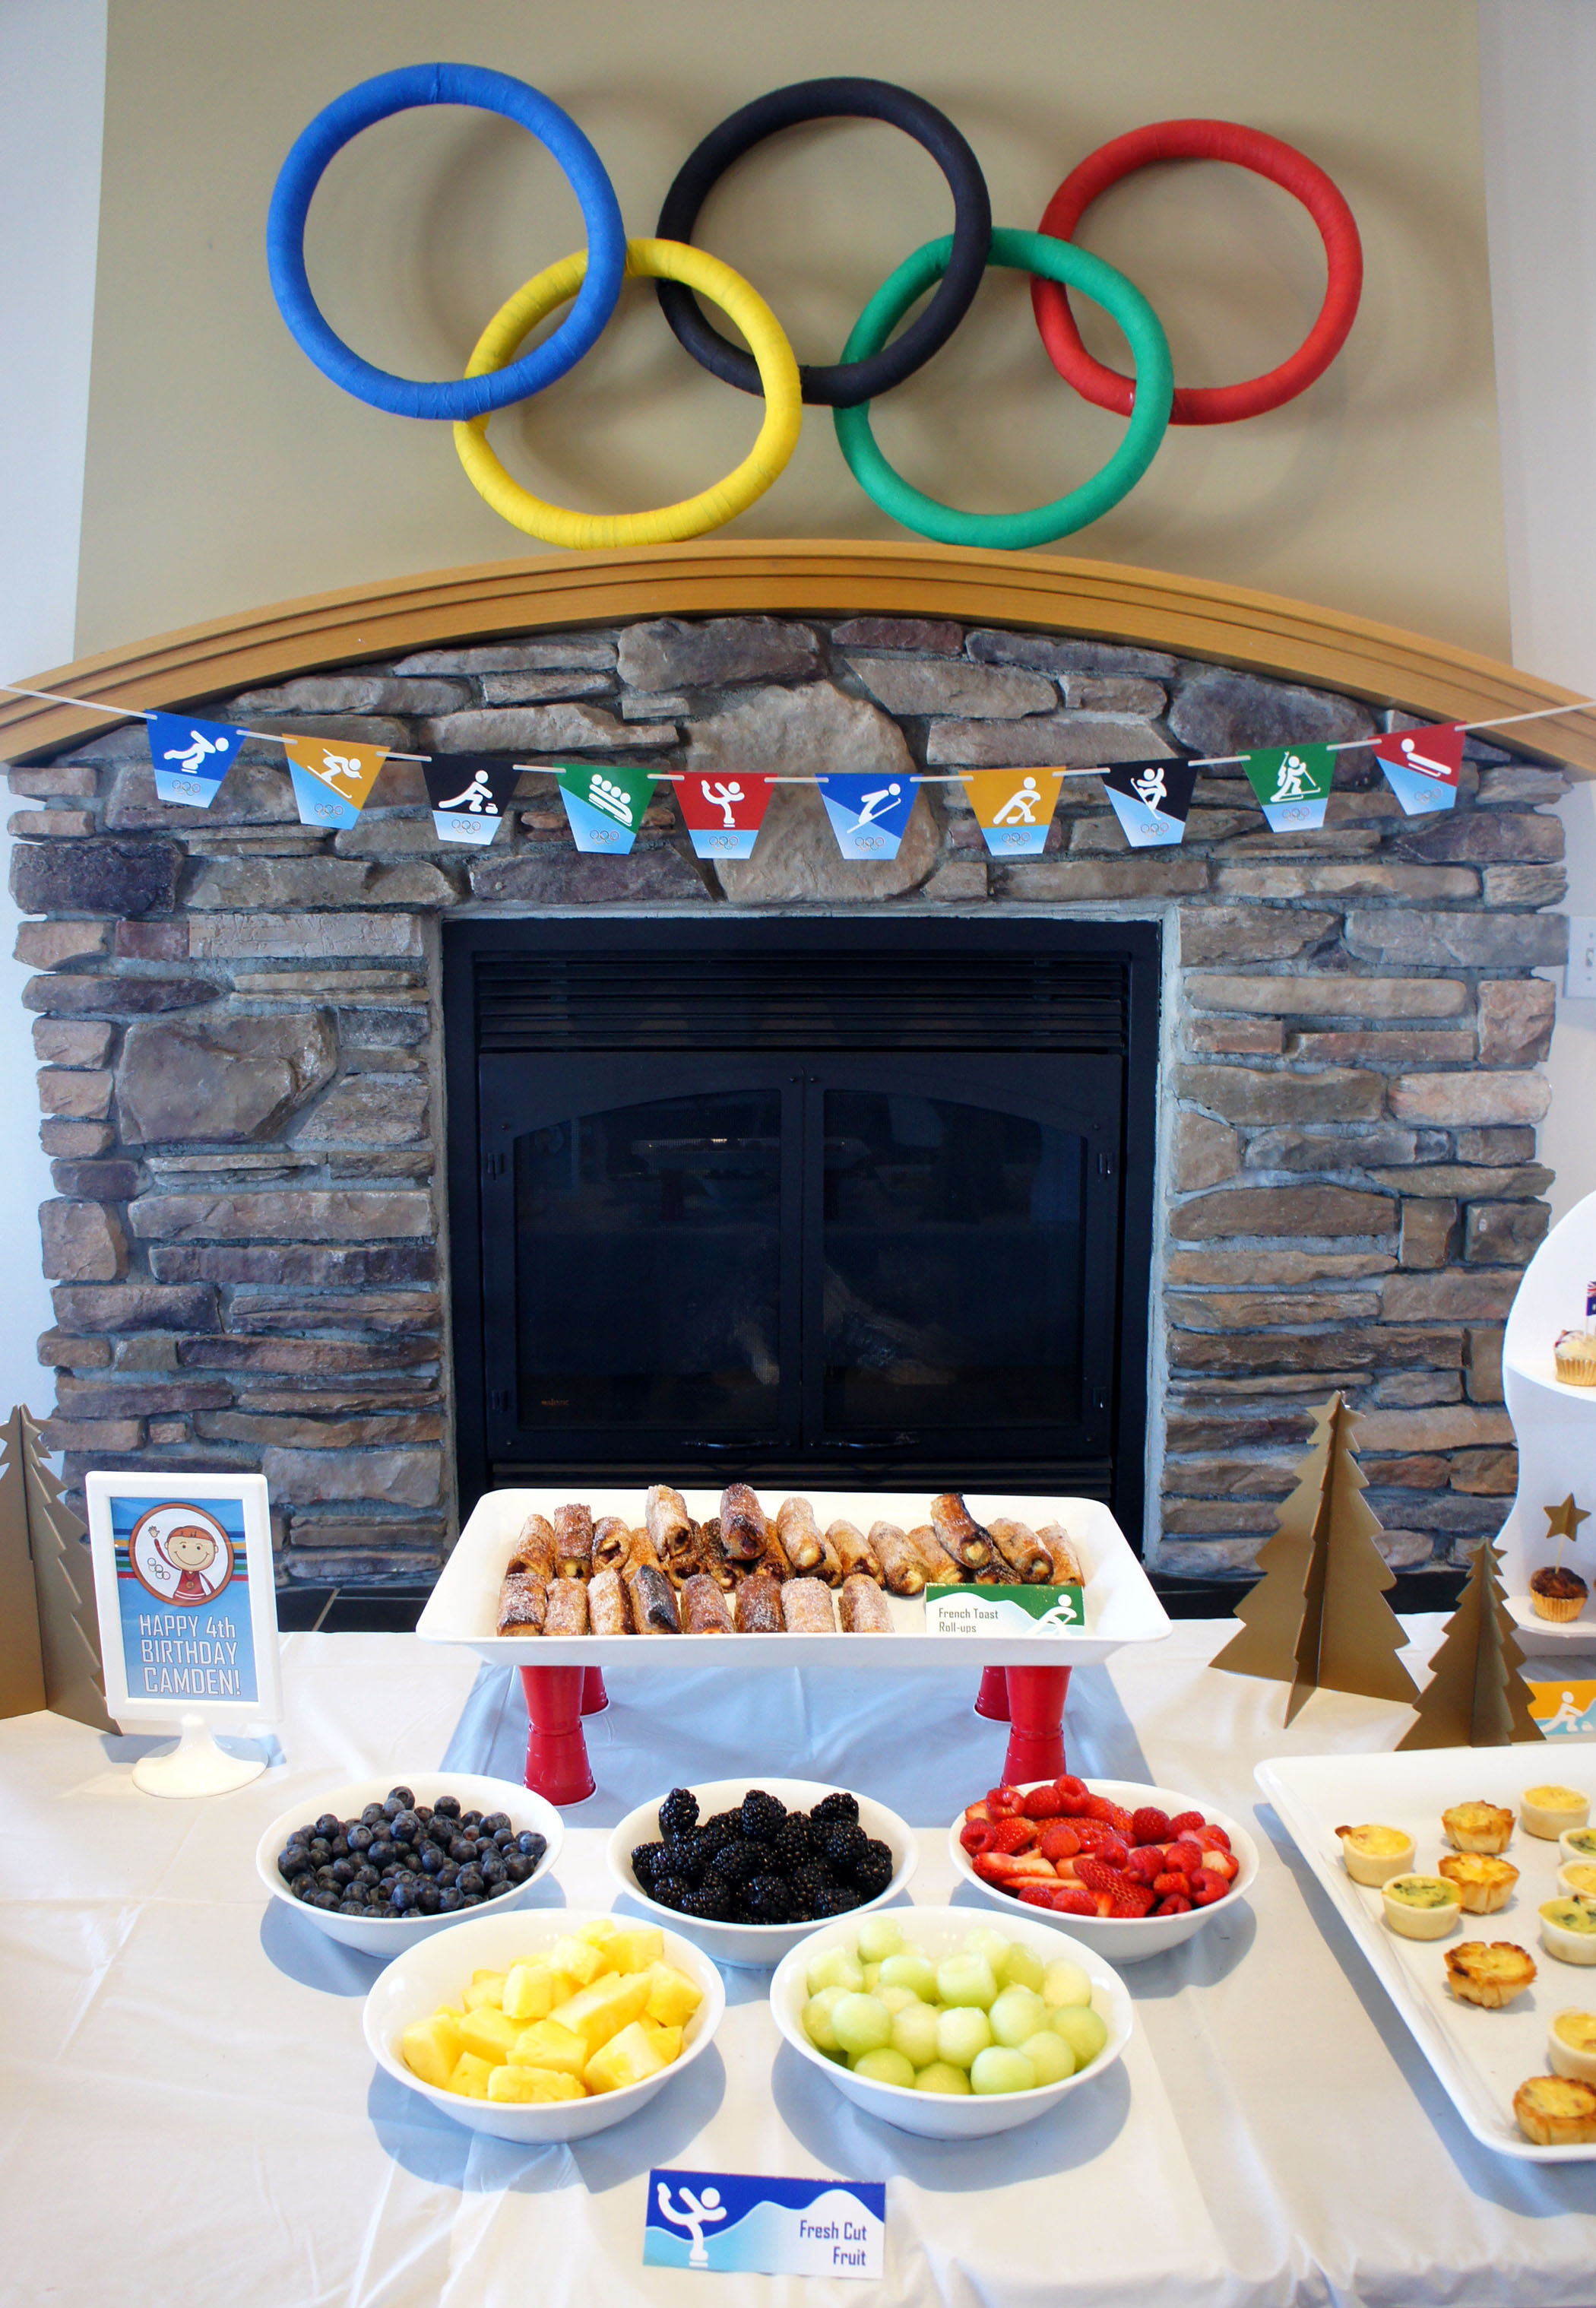
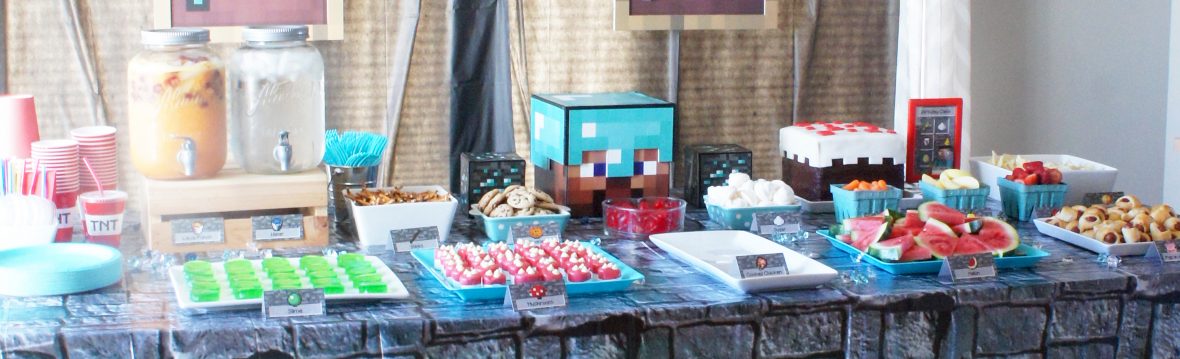
For food, I had both a brunch foods table and a sweets table.  For the brunch items we had bowls of fruit in the Olympic ring colors, fruit and yogurt parfaits, sugared bacon smokies, raspberry cream cheese french toast roll-ups, mini quiche, 2 bite cinnamon buns and 3 types of muffins (chocolate banana swirl, Orange Pineapple, and Almond Raspberry).

SONY DSC

To display my mini cinnamon buns and muffins I constructed large mountain shaped stands out of dollar store foamcore.  They were a little time consuming to build, but I think the final result was worth it and I will definitely be using the idea again for future parties.

SONY DSC

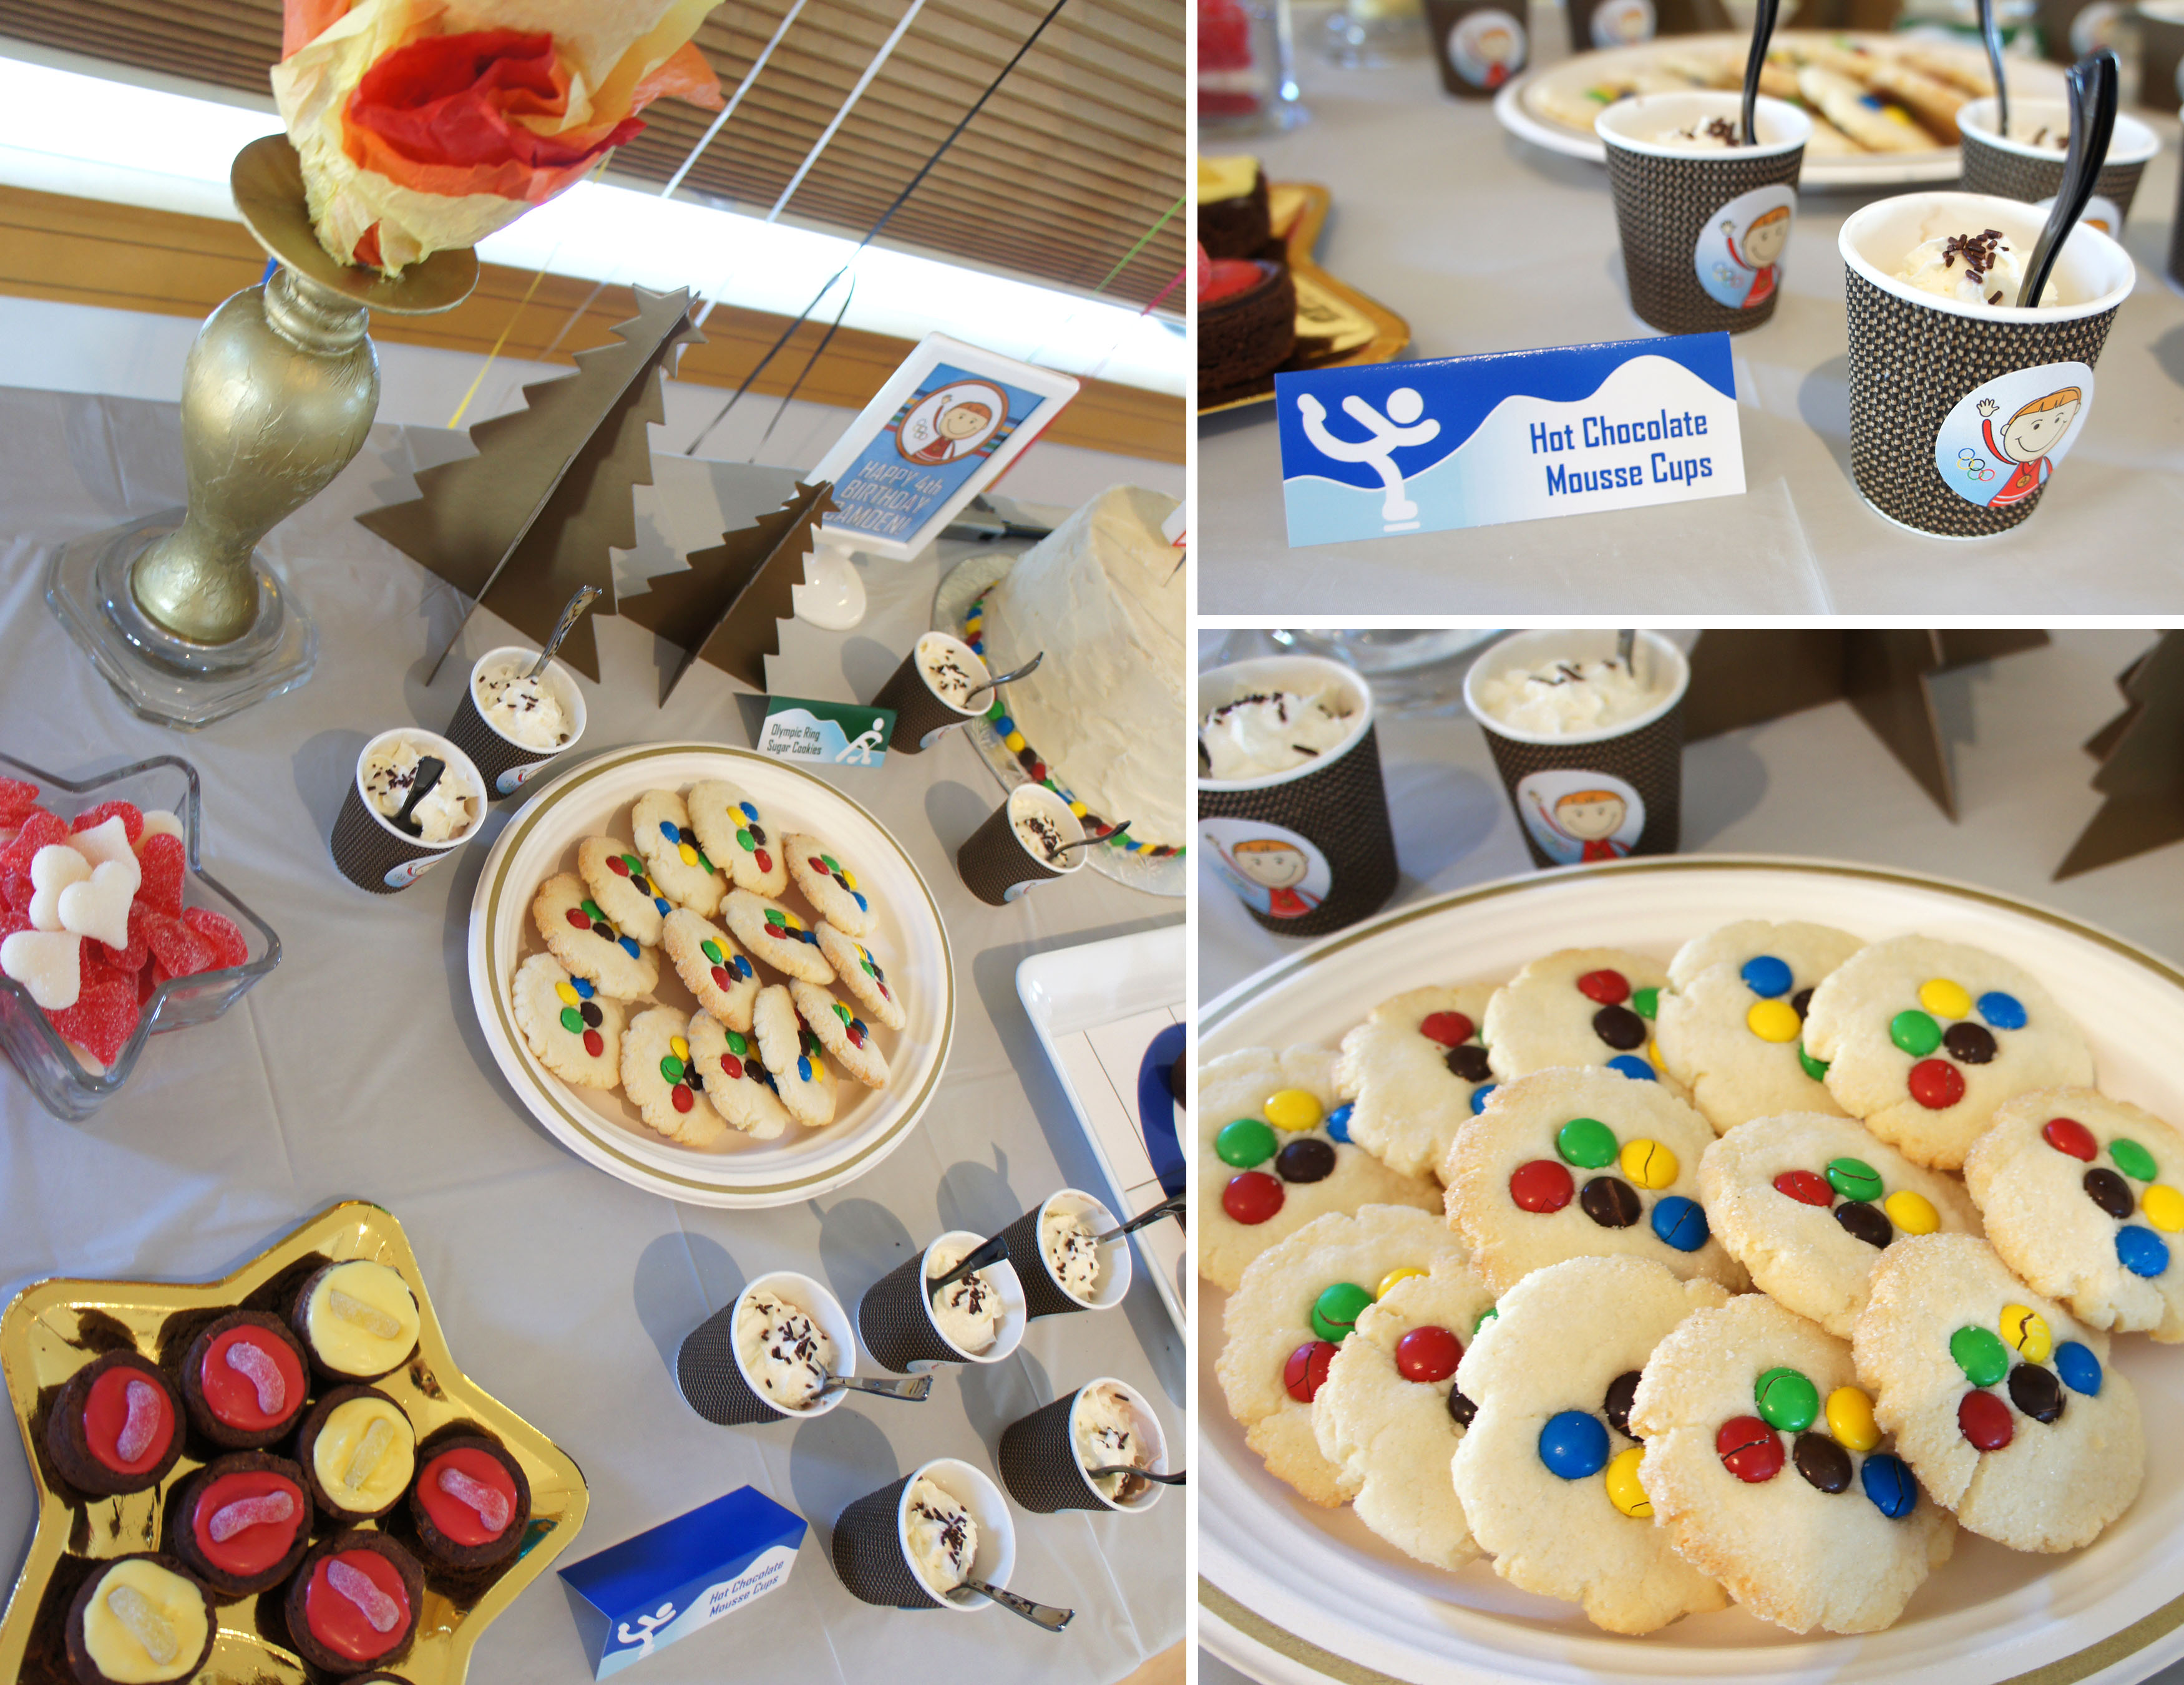
For the sweets table I had sugar cookies I decorated with M&M’s to represent the Olympic rings, small cups of hot chocolate mousse and edible curling rocks I fashioned out of two bite brownies, some colored melting chocolate and candy rings.

SONY DSC

SONY DSC

SONY DSC

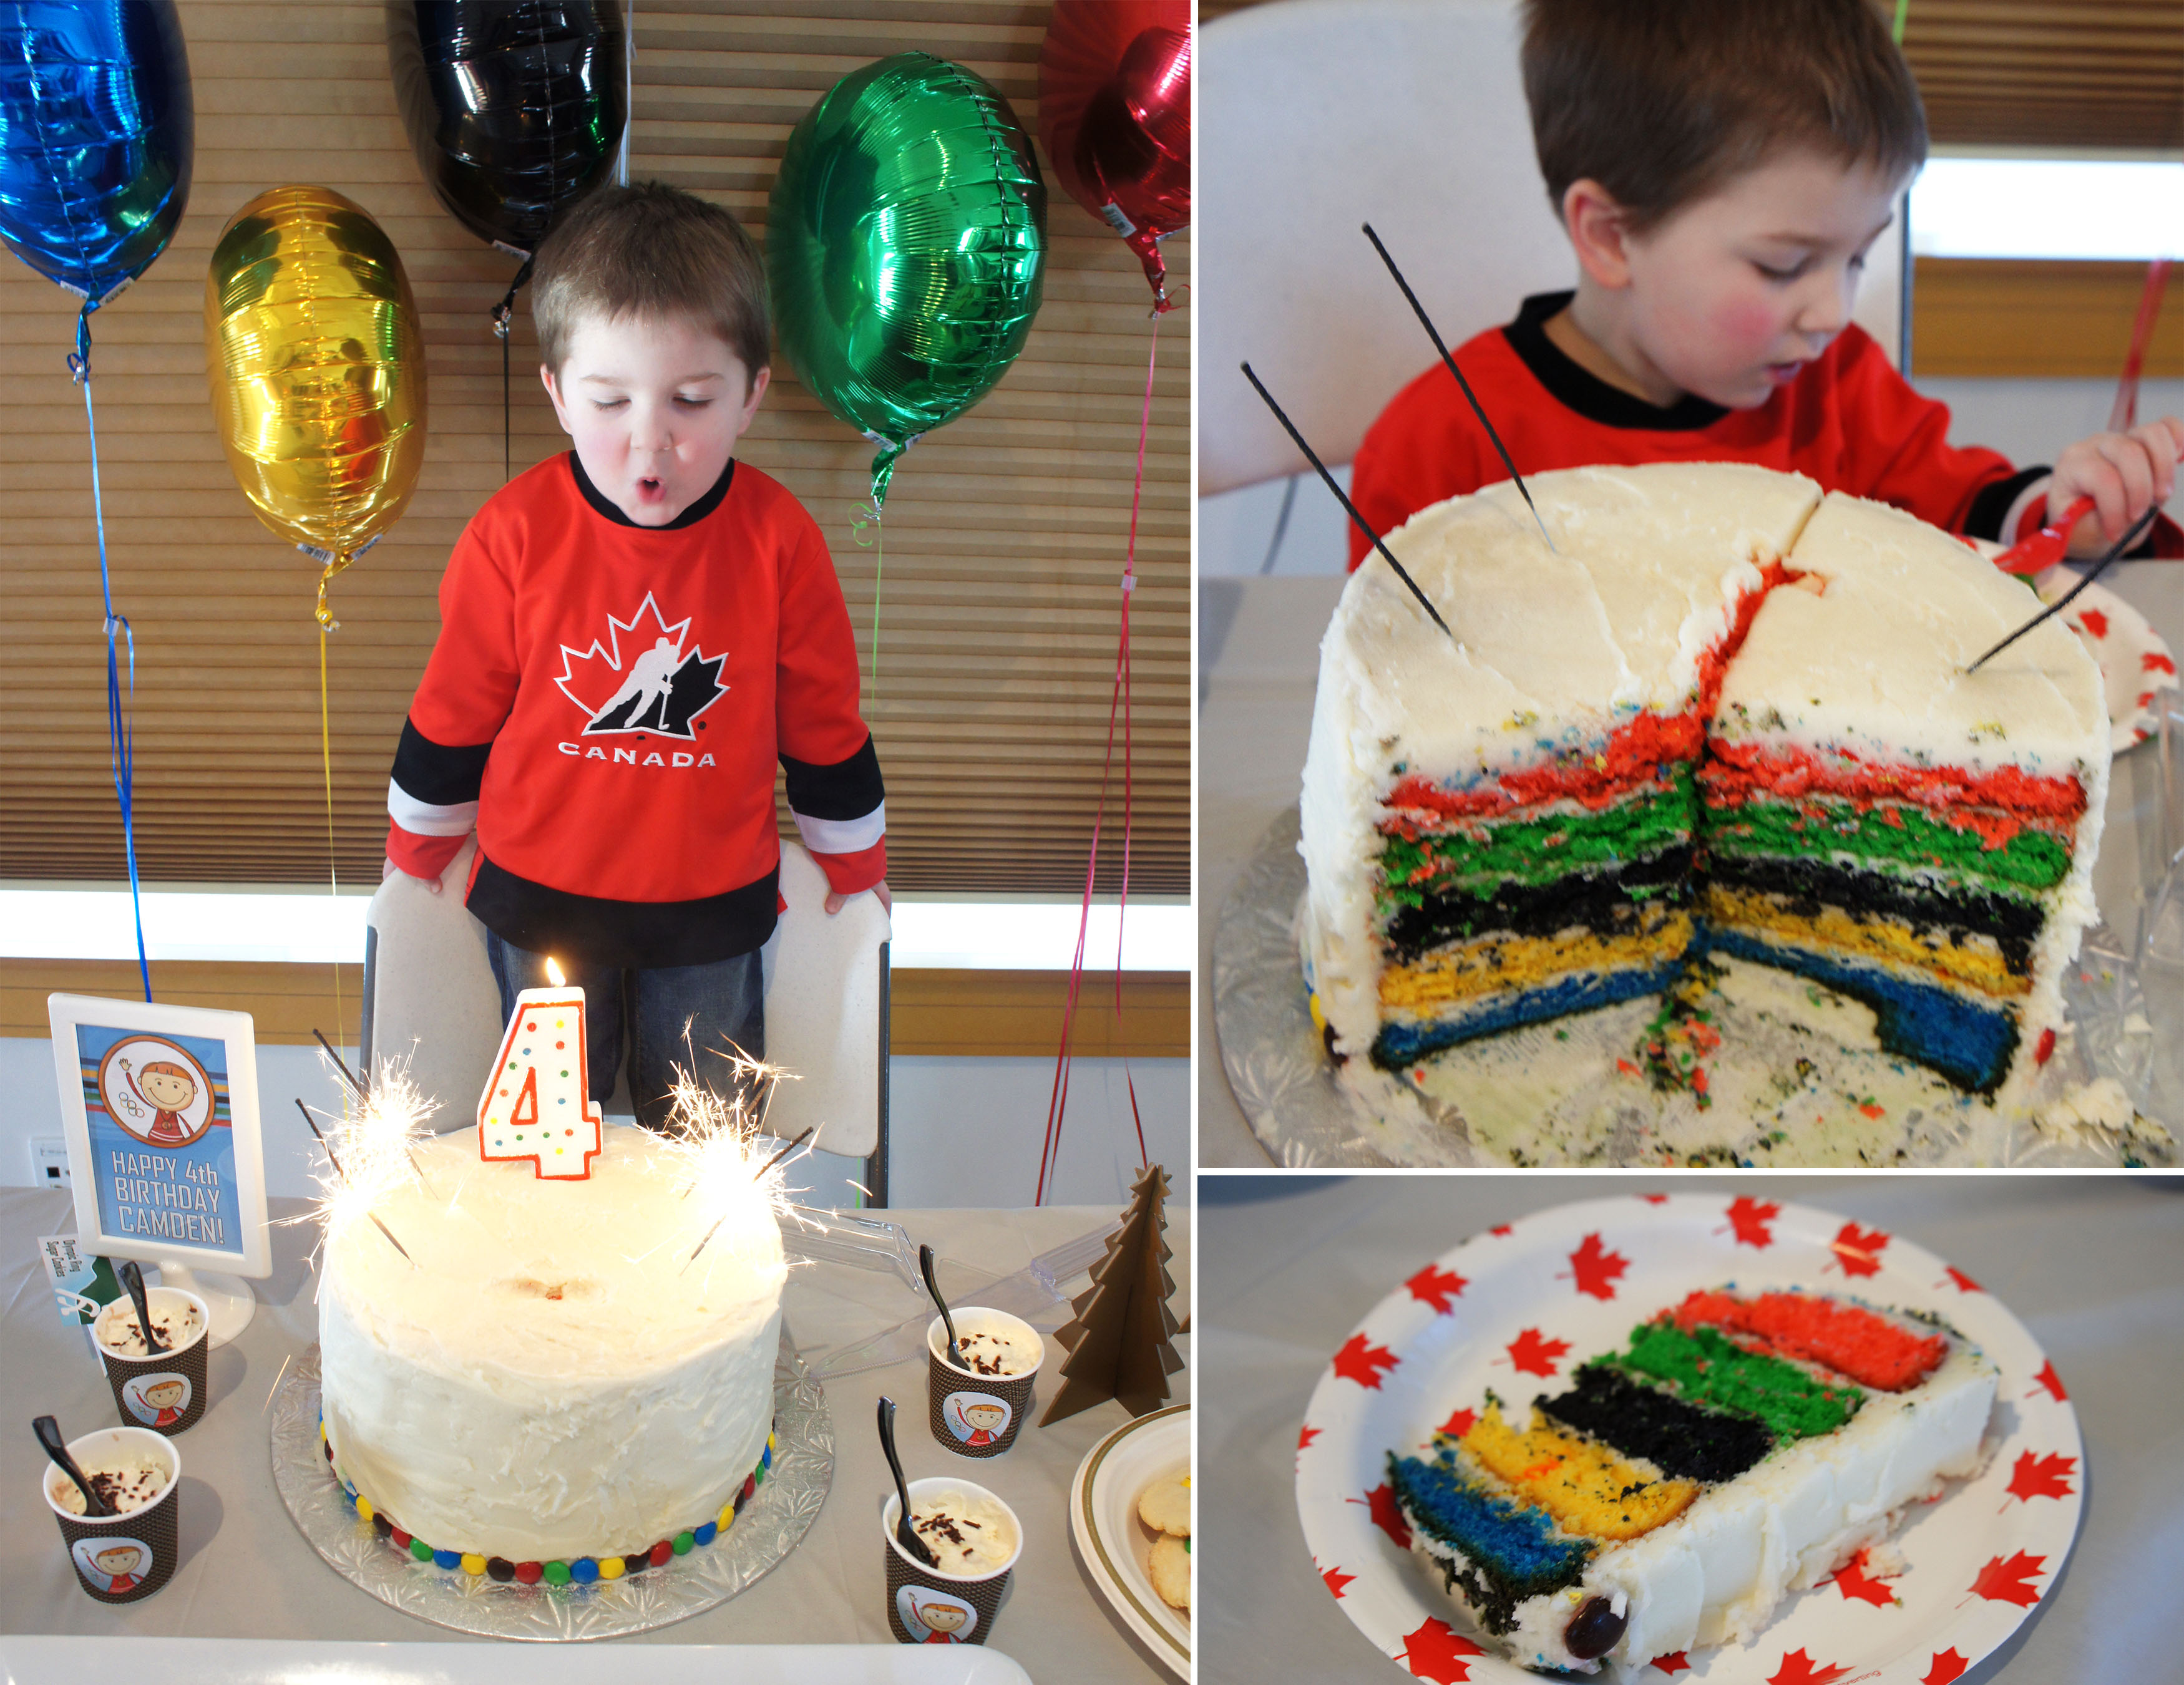
And, of course, there was also birthday cake.  I kept the outside plain and simple, with the surprise being the 5 layers inside colored to match the Olympic rings.  Camden loved his “rainbow cake” and I think it is one of the tastiest cakes I have made to date.

SONY DSC

At the “Decorate Your Own Medal” table, the kids had a fun time stringing colored pasta and a juice can lid on ribbon to craft their own Olympic medal.

SONY DSC

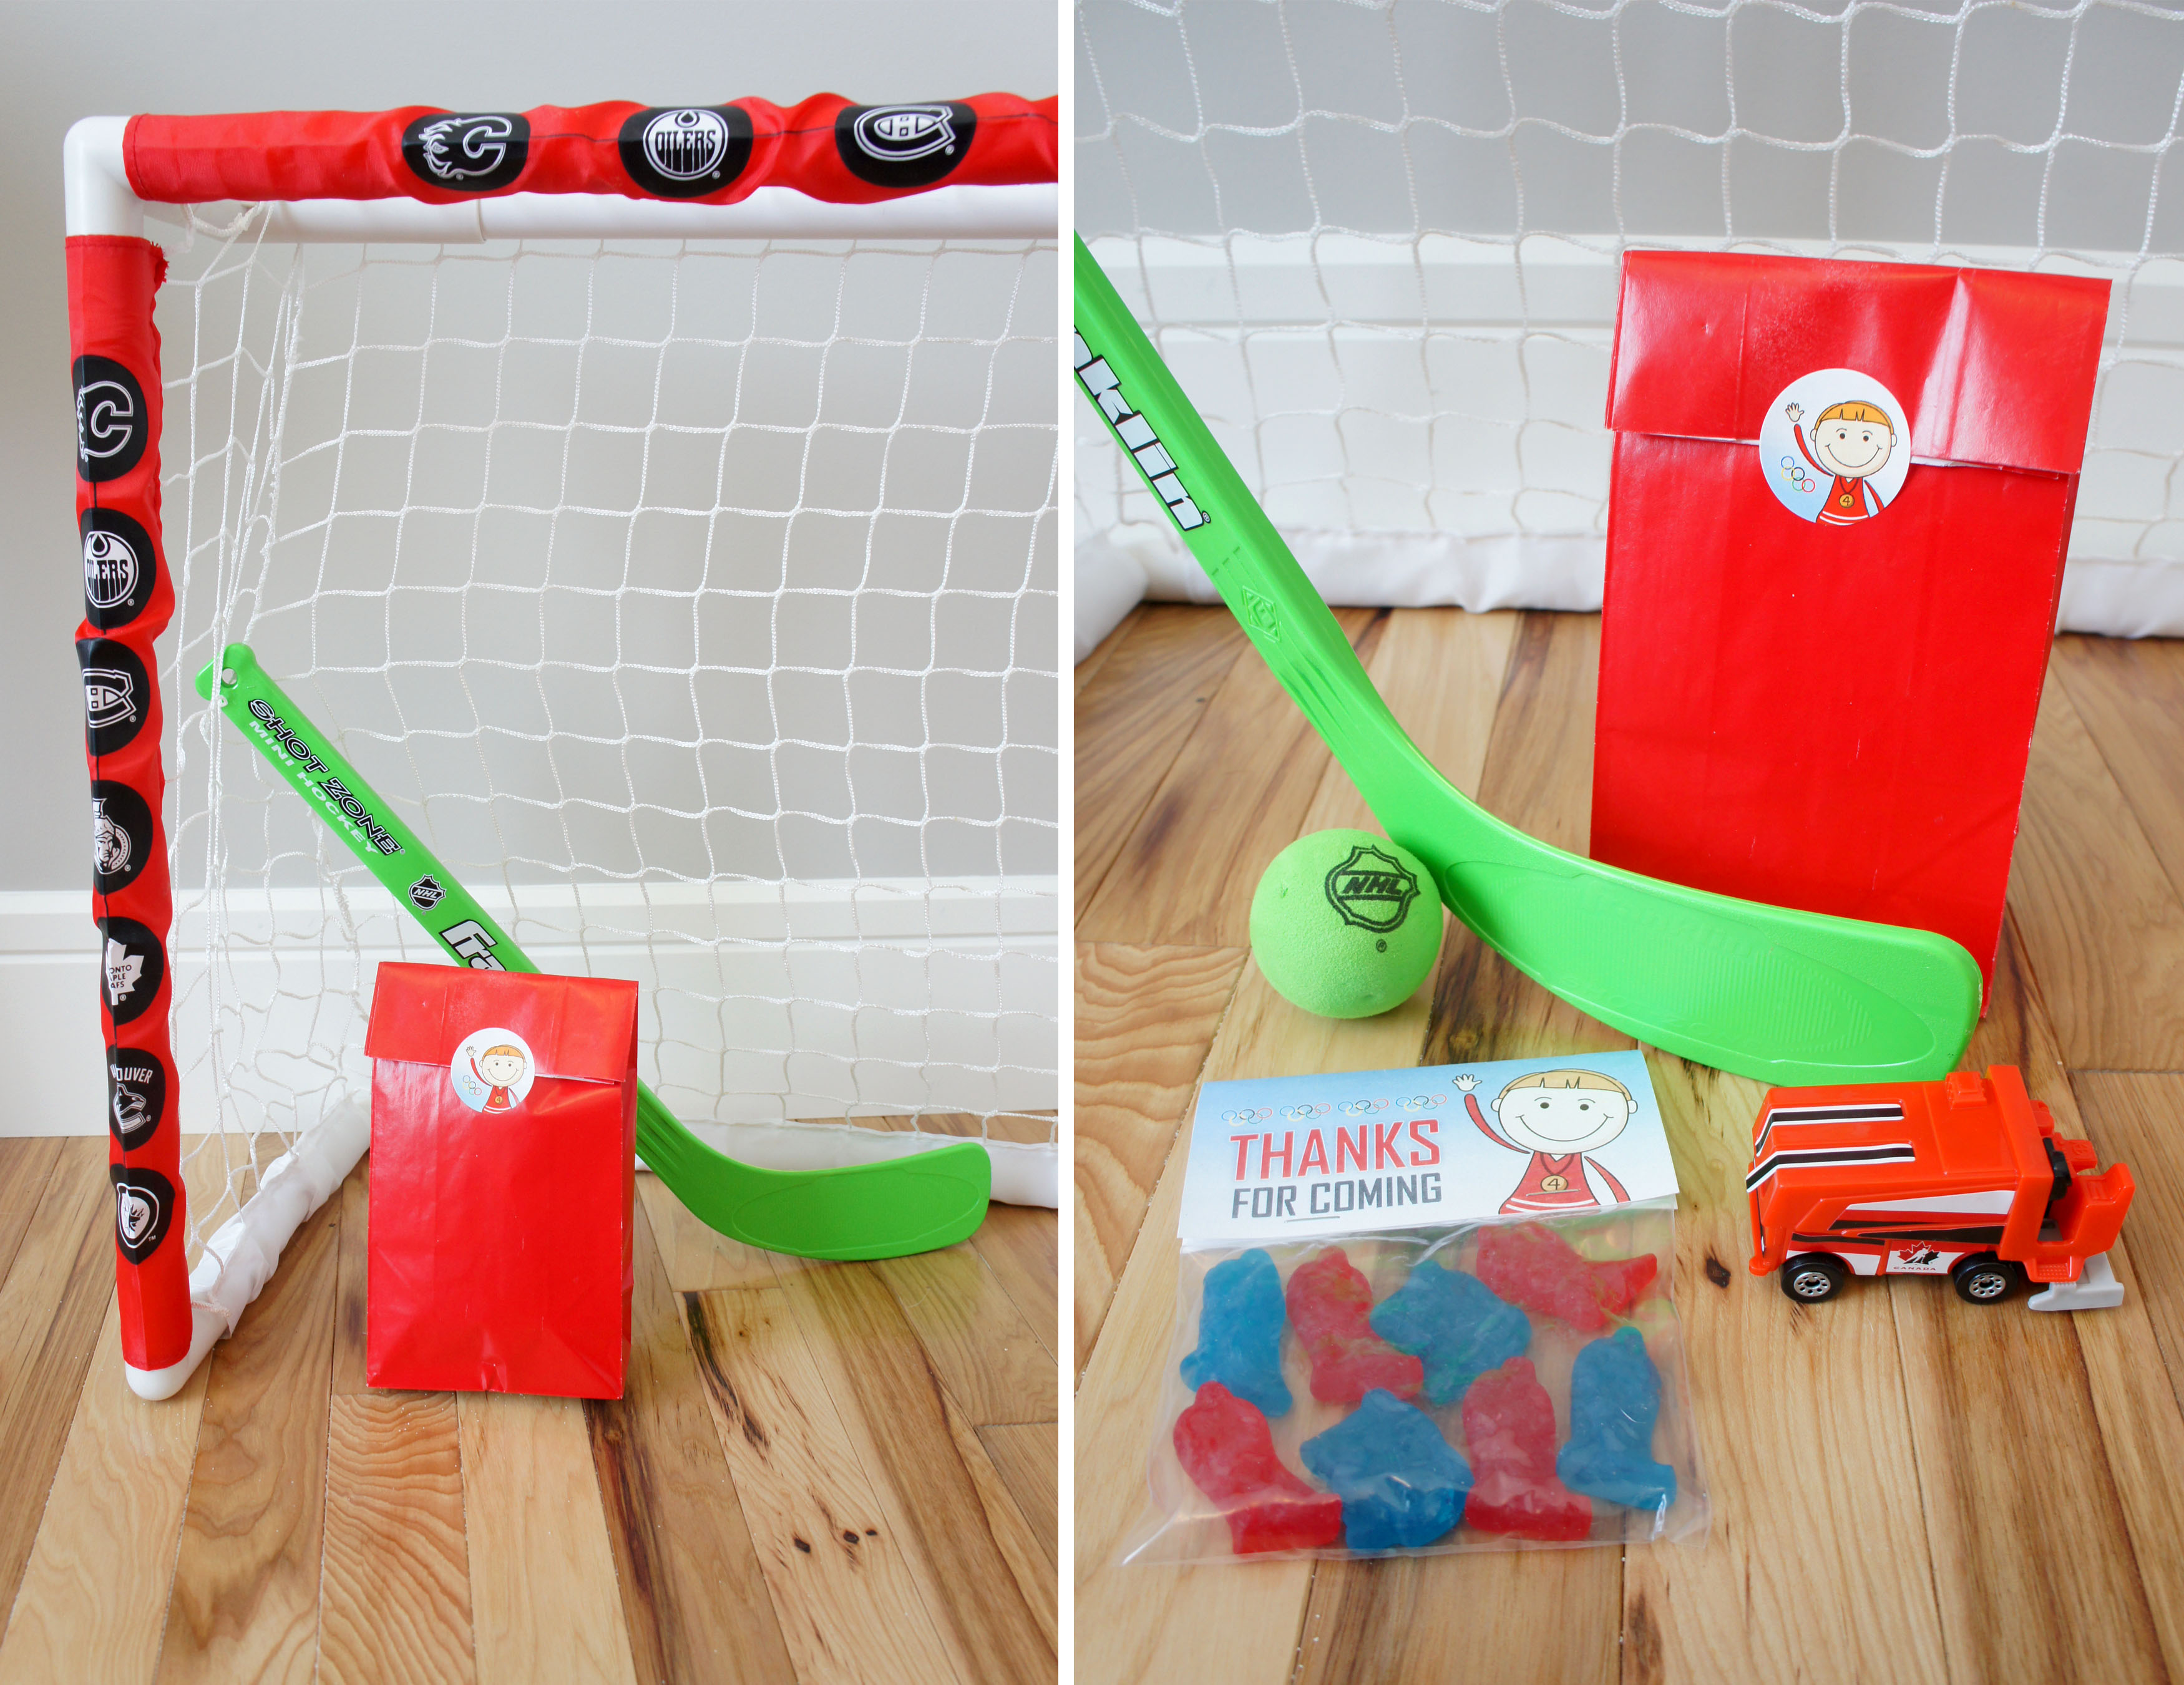
To keep the kids entertained, we also brought in our bouncy castle and set up a set of mini hockey nets with sticks and balls for them to play.  The bouncy castle, by far, was the most popular activity at the party!

SONY DSC

One activity that wasn’t such a huge hit was the Pin the Rocks on the rings game.  The kids all took a turn, but it didn’t turn out to be as exciting for them as I thought it might be.

SONY DSC

For favors, I ended up getting a good deal on mini hockey sticks and balls at the end of summer and  bought enough for each kid to play with at the party and then each take one home.  I continued with the hockey theme in the treat bags and included a small Zamboni toy I found at McDonalds, a foam hockey ball and a small bag of hockey played shaped candies I finished off with a personalized topper.

SONY DSC

It ended up being a crazy hectic weekend for us between getting possession of our new house on Friday and then hosting the party on Sunday, but it all worked out and I was happy to have the chance to celebrate my little boy with family and friends.  I was told the kids all went home exhausted and one of the 3 year olds was even so kind as to tell me it was “the best party ever!”

SONY DSC

I can’t wait to start planning for next year!

Celebrations, Crafts, Little Hands, Parties

Juice Can Lid Olympic Medals

OlympicsPartyTitle

I have to admit I am a little conflicted over whether to share my party projects or to keep them all as a surprise for my party guests who follow the blog.  Lucky for those not coming to the party, I have decided to share my ideas right away and give you time to do it yourself before or during the Olympics.

Today I am sharing a simple Olympic medal craft I have planned for the kids coming to my son’s 4th birthday party.

SONY DSC

Supplies

  • Frozen juice can lids (1 per child)
  • Stickers for decorating
  • String or ribbon
  • Dried pasta with holes (rigatoni, penne, etc.)
  • Rubbing alcohol
  • Gel food coloring
  • Zipper seal bags

I came across the idea to use frozen juice concentrate lids as medals when I was searching Olympic ideas on the internet.  I could have just strung the medal on a thick ribbon, but I decided the craft needed a little more to it to help keep the kids busy.  I came across this Fantastic Fourth Olympic Party  from Put a Bow on It where she had pasta necklaces as an activity for the kids and decided to borrow the idea for the ribbon portion of my medals.

I have never made colored pasta before and was surprised at just how easy it is.  All it took was some rubbing alcohol, gel food coloring and dried pasta mixed up in a plastic bag and I had colored pasta.  For each color I used approximately 2 tablespoons of rubbing alcohol, about 1/4 teaspoon of gel color and 2 cups of pasta.  I double bagged the pasta, as was recommended by Mommy Testers in their How to Make the Best Dyed Pasta tutorial, and then laid the colored pasta out on paper towel lined baking sheets to dry.  I then repeated for each of the 5 Olympic ring colors.  Luckily I needed the gel colors anyway for the cake so I wasn’t buying too many extra supplies for this project.

SONY DSC

Once I had the pasta prepared, I had my husband help drill a hole through my juice can lid and prepared a sample medal for the party.  To decorate the medal juice can lid portion, I used star shaped stickers I found from Dollarama and then strung the pasta on a ribbon I strung through the drilled hole.

SONY DSC

Camden seemed pretty excited about the finished medal so I am hoping the little Olympians at our party have just as much fun creating their own to wear!

Celebrations, Parties

Olympic Rings Display

OlympicsPartyTitle

I have rented out this beautiful space to host my son’s 4th birthday:

SummersideBeachHouseCropped

I love the stone fireplace and think the ski lodge type vibe it gives off works absolutely perfect with the Winter Olympics theme I have chosen.  It is, however, begging to be Dolled Up with a bit of decoration over the mantle – cue another DIY project!

SONY DSC

Supplies

  • 5 pieces of foam plumbing insulation tubing (found in the plumbing section of Home Depot or Lowes)
  • Sharp serrated kitchen knife
  • Crepe paper streamers in Olympic colors (blue, yellow, red, green and black)
  • White glue
  • Hot glue or wire to attach together

SONY DSC

1.  Gather all your supplies.  I recommend Dollar Tree to find your streamers – I ended buying my streamers from Target, Dollarama and Party City because none of the stores had all 5 colors.   Dollar Tree had all colors when I stopped there a week or two later.

SONY DSC

2.  Cut your plumbing insulation tubes down to your desired hoop size using a sharp serrated kitchen knife.  If you make perpendicular cuts, the ends will not fit together to form a nice round hoop – you can see the angles I cut mine at in the picture.  Once you have one cut to the desired size, use it as a template to cut the other 4.

I first considered using pool noodles for this project after seeing inspiration on pinterest, but I found that they were too thick and stiff to bend into a nice circular shape.  The plumbing insulation tubes ended up working perfectly and cost me no more then the Dollar Store pool noodles.

3.  Tape your hoops together using strong tape such as duct tape, packing tape or tuck tape.

SONY DSC

4.  Select a color of crepe paper streamers and begin wrapping all around your hoop.  I didn’t bother gluing at the beginning because it held pretty well once I just overlapped the streamers.

5.  When finished wrapping, apply a small amount of white glue to the end of the streamer to secure in place.

6.  Repeat the wrapping and gluing process with each of the other colors on your remaining hoops.

SONY DSC

7.  Attach all hoops together using thin gauge wire or hot glue.  I haven’t actually decided which method to use for mine yet, but the hot glue gun tends to be my go to.

SONY DSC

And there you have it – an Olympic logo decoration for your party!

I did end up with a lot of leftover streamers so I think I will find a rainbow inspired craft to do with my playgroup kids to use them up.

Celebrations, Parties

Olympic Party Game: Pin the Rocks on the Rings

OlympicsPartyTitle

At 4 years old, I think we are finally to a point where I can begin planning some small games and activities for my son’s birthday parties.  In the past it has just been a free for all with his toys, but this year I wanted to plan a few fun things that related to my theme.

Pin the Tail on the Donkey is a pretty common party game but I decided to give it my own Olympic spin by making it curling themed.  My husband is a curler and the kids and I often spend time at the rink watching him play so I figured this was something fun my birthday boy would recognize and enjoy.

To make the board, I simply created a curling ring design and will be printing it as a 16×20″ print ($8.99 through the Costco Photo Centre).

Pin the Rocks on the Rings Board

The rocks are sized on 4×6″ sheets so they will be printed as standard photos and then cut out.  I will attach double sided tape to the backs before the party so we are all ready to play the game.

Print

For your own game of Pin the Rock on the Rings, please click on each of the images above  and save as a jpeg to your own computer for printing.

Enjoy!

Celebrations, Crafts, Parties

Free Printable: Winter Olympics Party Banner

OlympicsPartyTitle

My little guys Olympic themed party is just over a month away so I have begun work designing printables for the party.   I usually like to do a banner of some sort and when I saw these icons for the Sochi Winter games I knew they would look great as a banner great strung across a table or mantle.

SochiIcons

I selected 10 of  the icons and then put them against the bright colors of the Olympic rings.

WInterOlympicsBanner

And here they are printed and strung up, all ready for the party:

SONY DSC

To print your own, please follow this link for the artwork: OlympicsBannerPrintable_DolledUpDesign

OlympicsBannerImageFinal


Enjoy!

Our Forever Home, Parties

It’s the Final Countdown!

Break out the moving boxes!  After months of anticipation, we final got our notice of possession from our home builder today.  As of February 20th, our Forever House will be all ours.  What once just seemed like a completely unrealistic dream will now be a full fledged reality, and I couldn’t be more excited.  Never did I think we would be able to make the move into an amazing house like this!

I posted an update with plumbing fixtures just the other day and my husband was onsite again today and was able to capture this picture of the hickory hardwood going in on our main floor:

Floors

It is gorgeous and I can’t wait to see it in person.

And since the packing, organizing and cleaning simply isn’t enough to keep me busy over the next month and a half, we are also counting down the last days of Camden being 3 and will be celebrating his 4th birthday just 3 days after we get possession!  I have been pinning ideas for the past year and have a good idea of what I want to do, but it is still going to be a lot all at once.

His actual birthday falls on Sunday, February 23 which also happens to be closing ceremony day of the Sochi Olympics so we are working with a Winter Olympic theme.  I have booked the hall, ordered the invites and managed to get the majority of the supplies bought for the DIY projects I am planning so I am still feeling pretty confident I will be able to pull off an awesome party.

I will try my darnest to share some of these projects in the upcoming weeks when I am not packing or dealing with the normal day to day of being a mommy.  For now, I will leave you with a sneak peek image from the invite:

OlympicSticker

Please visit my Olympic Birthday Party Pinterest board to see my inspiration and ideas for the party!

Celebrations, Parties, Recipes, Sweet

Cakes: Machine’s and Monkey’s for Max

SONY DSC

This weekend we celebrated my nephew’s 2nd birthday.  My sister and her husband just bought their first home so they have been very busy these past weeks moving in and working on home improvement projects.  She is also 7 months pregnant so I can only imagine how exhausted she is between chasing a 2 year old and unpacking.  Because of all this, and because I enjoy doing it, I offered to bake and decorate the cake for my nephew’s birthday party.

My sister has mentioned Max is into tractors and construction vehicles lately so I knew it would make a good theme for his cake.  I started with a 5 pack of small CAT toys I found at Target for $6 and decided to build a chocolately construction zone for them.  My cake decorating skills can still use some improving, so I loved that the mud and dirt on this cake didn’t require perfectly smooth icing to look good.

SONY DSC

Finishing details included green icing grass and small chocolate rocks.  The “dirt” was Oreo cookie crumbs.  For the final touches, I printed out some construction style signs with the birthday boy’s name and age  to stick into the cake with the “2” candle.

I am not sure the birthday boy ate much of his cake, but he sure did enjoy playing with the tractors and trucks on it so I would call that a success.

SONY DSC

The actual cake was from a mix and the icing was just a basic chocolate buttercream.  Inside was a delicious Oreo cheesecake filling.  I didn’t get a picture to show it in it’s full glory, but trust me it was tasty and definitely worth trying on your next cake.  I *may* have even eaten the leftover filling on it’s own by the spoonful.

Oreo Cheesecake Filling

  • 1 Package of cream cheese (8 oz)
  • 1 tub of Cool Whip
  • 1 tsp vanilla extract
  • 1 row of Oreo Cookies, crushed

To make filling, blend room temperature cream cheese.  Add in defrosted Cool Whip and vanilla extract, then mix until smooth.  Gently fold in crushed Oreo’s.


Max’s First Birthday Monkey Cake

I also had the priviledge of making the cake for Max’s first birthday last year.  I went with a monkey theme and ended up doing a large cake for the party guests and a small monkey just for the birthday boy.  To get the round cake shape, I baked the cake in my Pampered Chef batter bowl.  The cake was also baked from a mix and I used the same chocolate buttercream as the construction cake, with some banana flavored icing for the mouth and ears and melted chocolate for the mouth, hair and eye details.

SONY DSC

I do enjoy cake decorating and love that this gives me a chance to both practice my skills and give my nephew something special for his birthday.  I am afraid I may have started a trend and will now be asked to make the cakes for all upcoming birthdays, but I think I am okay with that!


Celebrations, Parties

An Elephant Baby Shower

SONY DSC

My adorable curly-haired little nephew Max celebrated his birthday this week.  I don’t get the chance to see him as often as I would like, but when I do I always enjoy visiting and seeing how he has grown.  They change so fast and it is hard to believe it has been now been over two years already since I hosted the baby shower for my sister in his honour.

Décor
With Max, my sister knew she was having a little boy, so I decided right away on a green, blue and grey color scheme.  For the overall theme, I chose elephants because my sister had a stuffed elephant growing up that she was very attached to and I think still sleeps with to this day.  The main graphics I used were an “oh boy.” typographic image and a picture of a mom and baby elephant intertwined.  These were used on the invite, banner and food toppers.

SONY DSC

I created a simple wreath for the front door and strung articles of baby clothing with elephants on them across the front window of my mom’s house.  Paper lanterns were put up across the food table with the “It’s a Boy!” banner and a felt elephant mobile I crafted up got hung from the kitchen light at the middle of the table.  I also found small paper mache elephants at Michaels so those got put out on the food table.

SONY DSC

Food

The shower was help in the mid afternoon so I served a range of finger foods and sweets.  Savory items included spinach dip cups, pigs in a blanket, sweet and sour meatballs, bruschetta and garlic toast, stuffed mushrooms, and surprise dip with tortilla chips.

SONY DSC

SONY DSC

For the sweet items, I made fruit bouquets in green and blue flower pots, baked and decorated elephant shaped sugar cookies and made a mini cupcake display.  For the cupcakes, we had chocolate cake with mint frosting and white cake with a banana flavored frosting.  To keep with the elephant theme, they were all topped with a small marshmallow peanut.

SONY DSC

One other fun sweet item I made was blue candy popcorn.  The labels were custom designed by myself and put on small wedding favor boxes, then filled with a basic sugar popcorn recipe.  I love the pink colored elephant brand popcorn when I was growing up, so I thought this was a fun twist on it.

SONY DSC

Games

I know a lot of people dread the typical baby shower games, so I tried to come up with some fun games that wouldn’t  embarrass anyone or require my guests to eat disgusting mush.   I decided on two games – Baby Scattegories and a Price is Right style game using baby items.  I think the guests all enjoyed it and afterwards the mom-to-be was able to take the Price is Right items and put them to use with her new baby.

SONY DSC

Favors

As guests left, they were given small bottles of hand santizer with custom designed labels I ordered from stickeryou.  They were quick and easy and I think they turned out pretty cute.

SONY DSC

So there you have it.  Like any shower or party, I had a lot of fun designing and planning this special day for my little sister.  She is  expecting again this December and while I won’t be throwing another baby shower for this new niece or nephew, I am just as excited for their arrival.

You can also view my Elephant Baby Shower planning board on pinterest.

Celebrations, Parties

Camden’s First Birthday Luau

SONY DSC

We were lucky enough to take a family vacation to Hawaii when Camden was 9 months old.  While there, I learned that first birthday’s are a big event in the Hawaiian culture and that led me to my inspiration for Camden’s first Birthday – a birthday Luau.

The invitations were designed using a picture of Camden I had taken in Hawaii.

189543_10150418538360497_1470663_n

The birthday boy’s special outfit was a Carter’s onesie and a Hawaiian print short set I bought when we were in Hawaii.  I didn’t buy the set planning to use it with the onesie, but it ended up matching perfectly.  If you check out Keira’s first birthday party, you’ll also notice she had the same onesie in pink!

SONY DSC

I found most of my decorations on orientaltrading.com.  They had a line of luau party supplies with rubber duckies that worked perfect for a first birthday.  I ordered plates, napkins, garland, centerpieces, a custom banner, hanging palm trees and small rubber duckies for both favors and the cake topper:

SONY DSC

SONY DSC

Besides the cake, other Hawaiian inspired desserts I made included sand dollar sugar cookies and macadamia coconut macaroons.  These were displayed in “sand” I made from a mixture of brown sugar and graham cracker crumbs.  I also brought back some macadamia nut Hershey Kisses from Hawaii that got put out with the desserts along with some Almond Joy Pieces.

SONY DSC

Camden’s monthly photo’s were displayed over the fireplace using small picture holders I found at Michaels.  A hanging palm tree, painted cardboard surfboards and a few beach toys also helped set the scene above the mantel.

SONY DSC

The tiki inspired drink bar was a DIY project made from bamboo sticks, rope, and a dollar store hula skirt for the roof. I saw similar bars at party supply stores and online, but this ended up being a much cheaper option. Drinks were tropical soda’s and Corona – not quite Hawaiian, but still beachy!

SONY DSC

Food was all Luau inspired and included barbequed huli huli chicken skewers, teriyaki beef skewers, Hawaiian potato salad, Hula Grill coleslaw, marinated shrimp, macadamia nut hummus with root vegetable chips, mini ham and pineapple pizzas, a fruit bouquet and luau pig bites.  Items were labelled using small tent cards I designed and printed at home.

SONY DSC

SONY DSC

SONY DSC

Most of our party guests were under the age of one or adults so I ended up having two different favors.  The babies got stacking blocks, luau rubber duckies, a duckie printed beach ball and tiny sunglasses while the adults got these peep favors:

SONY DSC


This was my first attempt at a party and what really helped spark my passion for party planning.  It is fun to look back at all the details – I have gotten better at taking pictures, but the small attention to detail has been there since the beginning.  I know my baby’s won’t remember their first birthdays, but I still feel it was well worth the time and effort to give them that special day and have these pictures to look back at!


Celebrations, Parties

Hangin’ With My Gnomies Bridal Shower

SONY DSC

I had the pleasure of being my sister’s Maid of Honor last August – my first time being in a wedding party!  I was thrilled to be part of my sister’s wedding day and excited because it meant I got to plan a Bridal shower.

When my sister first told me she wanted a gnome themed Bridal shower, I wasn’t quite sure if she was serious about it or just pulling my leg.  After confirming that was indeed her choice of theme, I began designing and acquiring gnome related items.  She was very specific about the style of gnome she wanted so while I found plenty of gnome statues, none of them quite fit with her vision.  In the end, I designed my own gnomes to use on her invites and as cardboard cut-outs for table decorations.

The invite:

Print

The main food table was decorated with mushrooms, fake grass and plants, and a white picket fence.  A banner with the Bride and Groom’s name was strung across two topiary trees and cardboard cut-outs of gnomes were placed throughout.

SONY DSC

SONY DSC

I think that food is one of the most important aspects of a shower, so I spent a lot of time scouring the internet for finger food recipes.  The final menu I made included bacon wrapped dates, baked brie pops, mini twice baked potatoes, veggies and dip in small flower pots, stuffed mushrooms, and chicken salad rollups.

SONY DSC

SONY DSC

Other guests were kind enough to bring the amazing fruit bouquet, mango salsa with tortilla chips, and a fruit salsa with cinnamon chips.

SONY DSC

Desserts included s’mores bites and a beautiful cake with adorable toadstool cupcakes made by our friend Katy.

SONY DSC

Drinks were a non-alcoholic watermelon punch and red wine sangria, as well as layered cherry jello shooters.

SONY DSC

For favors and an activity, I had a flip flop decorating station.  The guests were asked to RSVP with their shoe size and favorite color and I picked everyone out a pair of flip flops when Old Navy had their $1 flip flop sale.  Glue guns, ribbons, beads and flowers were provided and guests went to working adding a little extra pizazz to their new sandals.  It ended up being a lot of fun to see what everyone came up with and guests then had a pair of comfy shoes to bring to the casual camp themed wedding.

SONY DSC

Another component of the shower (as seen in the invite above) was donating to the underpants gnome.  Guests each brought a pair of fun new underwear for the bride-to-be and we strung them on a line in the living room.  They were paired with an advice card and the bride had to guess who had given them based on the advice written and the style of underwear chosen.  She had a lot tougher time guessing then I would have expected and there were many laughs shared with the crazy marriage advice and the gag underwear that were about 5 sizes too big.

SONY DSC

Finally, I also made a few gnome themed props from foam core and posterboard to take some fun photos of the bride-to-be and her guests.

SONY DSC

SONY DSC

Even though we were stuffed from all the appetizers, we finished the evening off going for dinner and then out dancing.  I had a ton of fun planning  this shower and providing a special day for my sister and now can’t wait to one day be able to plan a baby shower for her!

Print