Recipes, Sweet

Christmas Baking: Chewy Ginger Snaps

There is a nine and a half year age gap between my little brother and myself. When he was still in elementary school, I was already out living on my own and attending university. While he was in grade four, his school put together a cookbook and he decided since I liked to bake and cook it would make the perfect gift for me for Christmas. It is one of the sweetest gifts I have ever received.

This Ginger Snap recipe comes from that cookbook. I used it for my first attempt making ginger snaps and they turned out so well I haven’t bothered trying a different recipe since.  They have become a family tradition and it now isn’t Christmas without a batch of these chewy, spice filled cookies.  Judging by how quickly my 3 year old made his disappear this afternoon, I don’t think it is a tradition that I will be breaking anytime soon.

SONY DSC

Ingredients

  • 3/4 cup butter or margarine, softened
  • 1 cup sugar
  • 1 egg
  • 1/2 cup molasses
  • 2 1/2 cups of flour
  • 2 teaspoons baking soda
  • 2 teaspoons ginger
  • 1 teaspoon cinnamon
  • 1/2 teaspoon salt

Directions

  1. Preheat oven to 350 degrees.
  2. Cream butter and sugar well.
  3. Beat in the egg and molasses.
  4. Stir in baking soda, ginger, cinnamon and salt.
  5. Gradually add flour and mix well until combined into a soft dough.
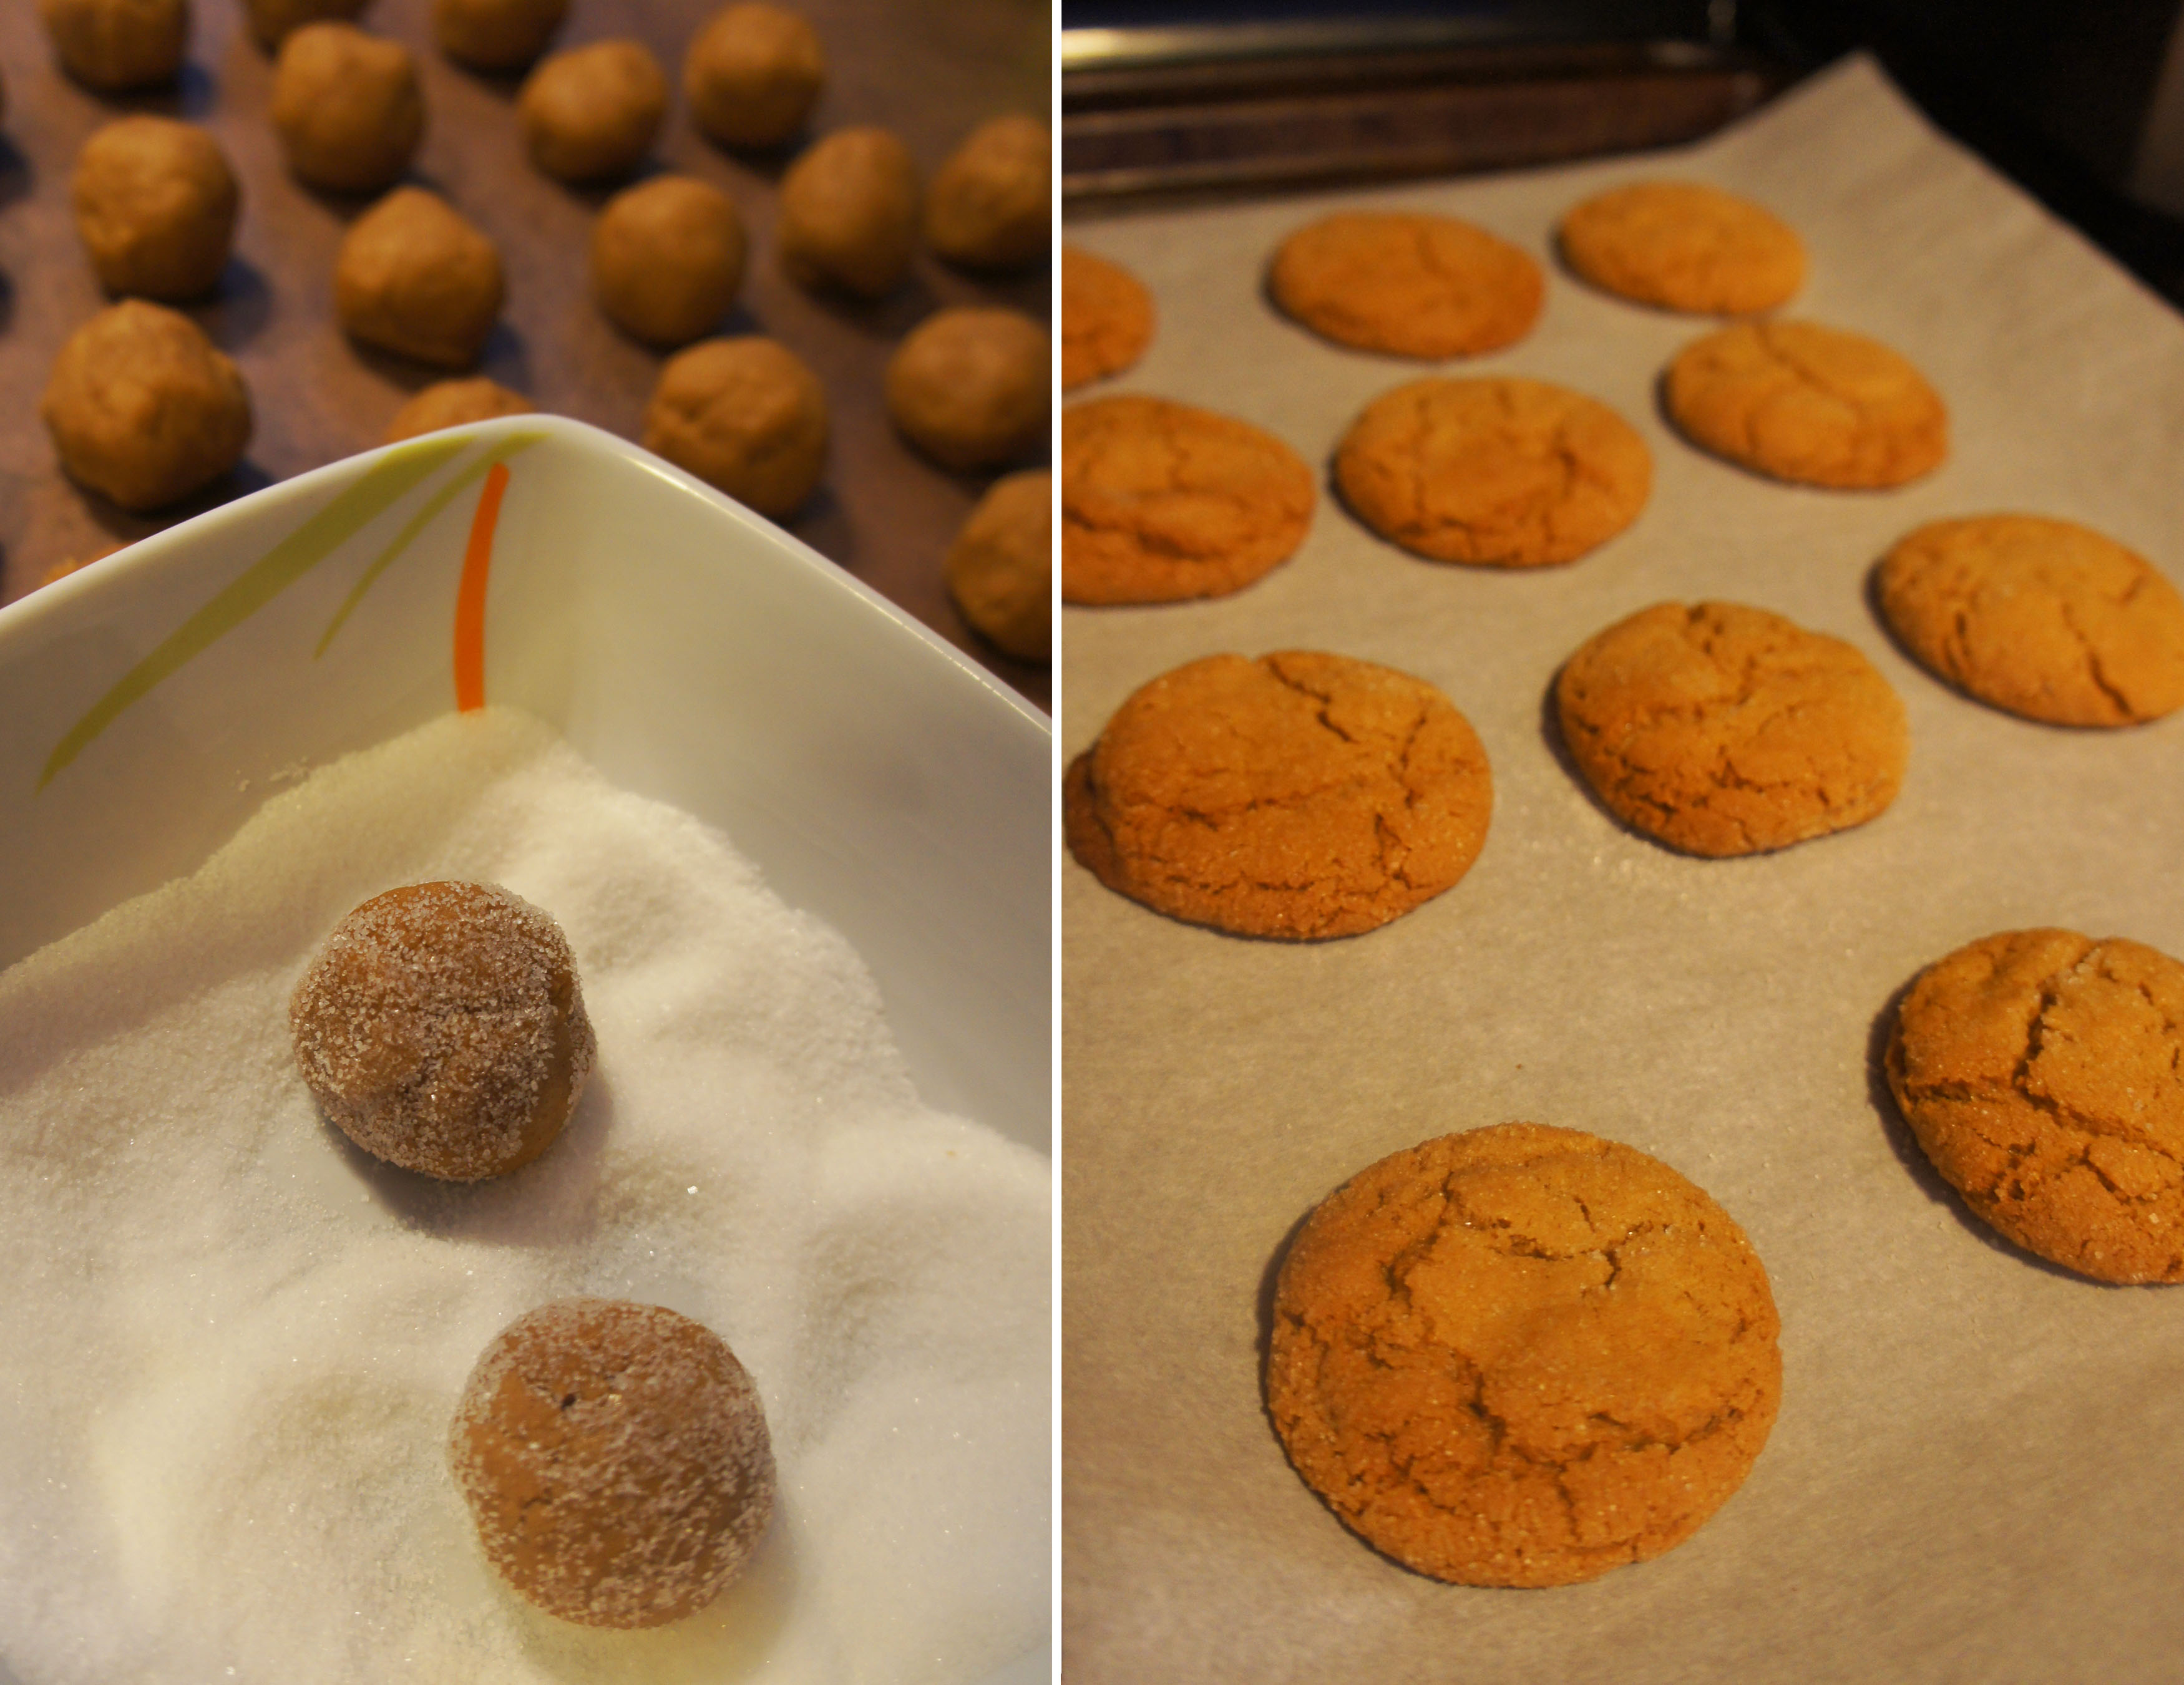
  6. Shape into approx. 1 tsp balls and roll in sugar.
  7. Place balls on parchment lined baking sheet and bake for 8-10 minutes.

SONY DSC

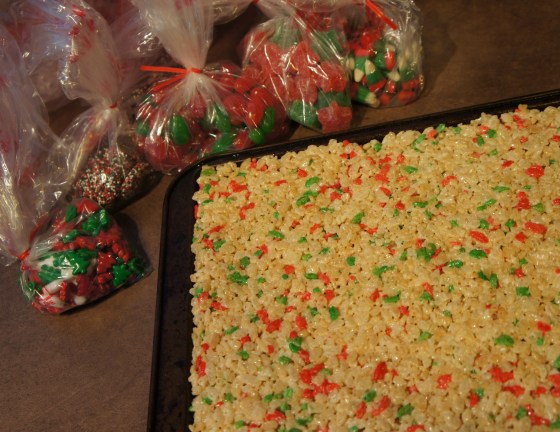
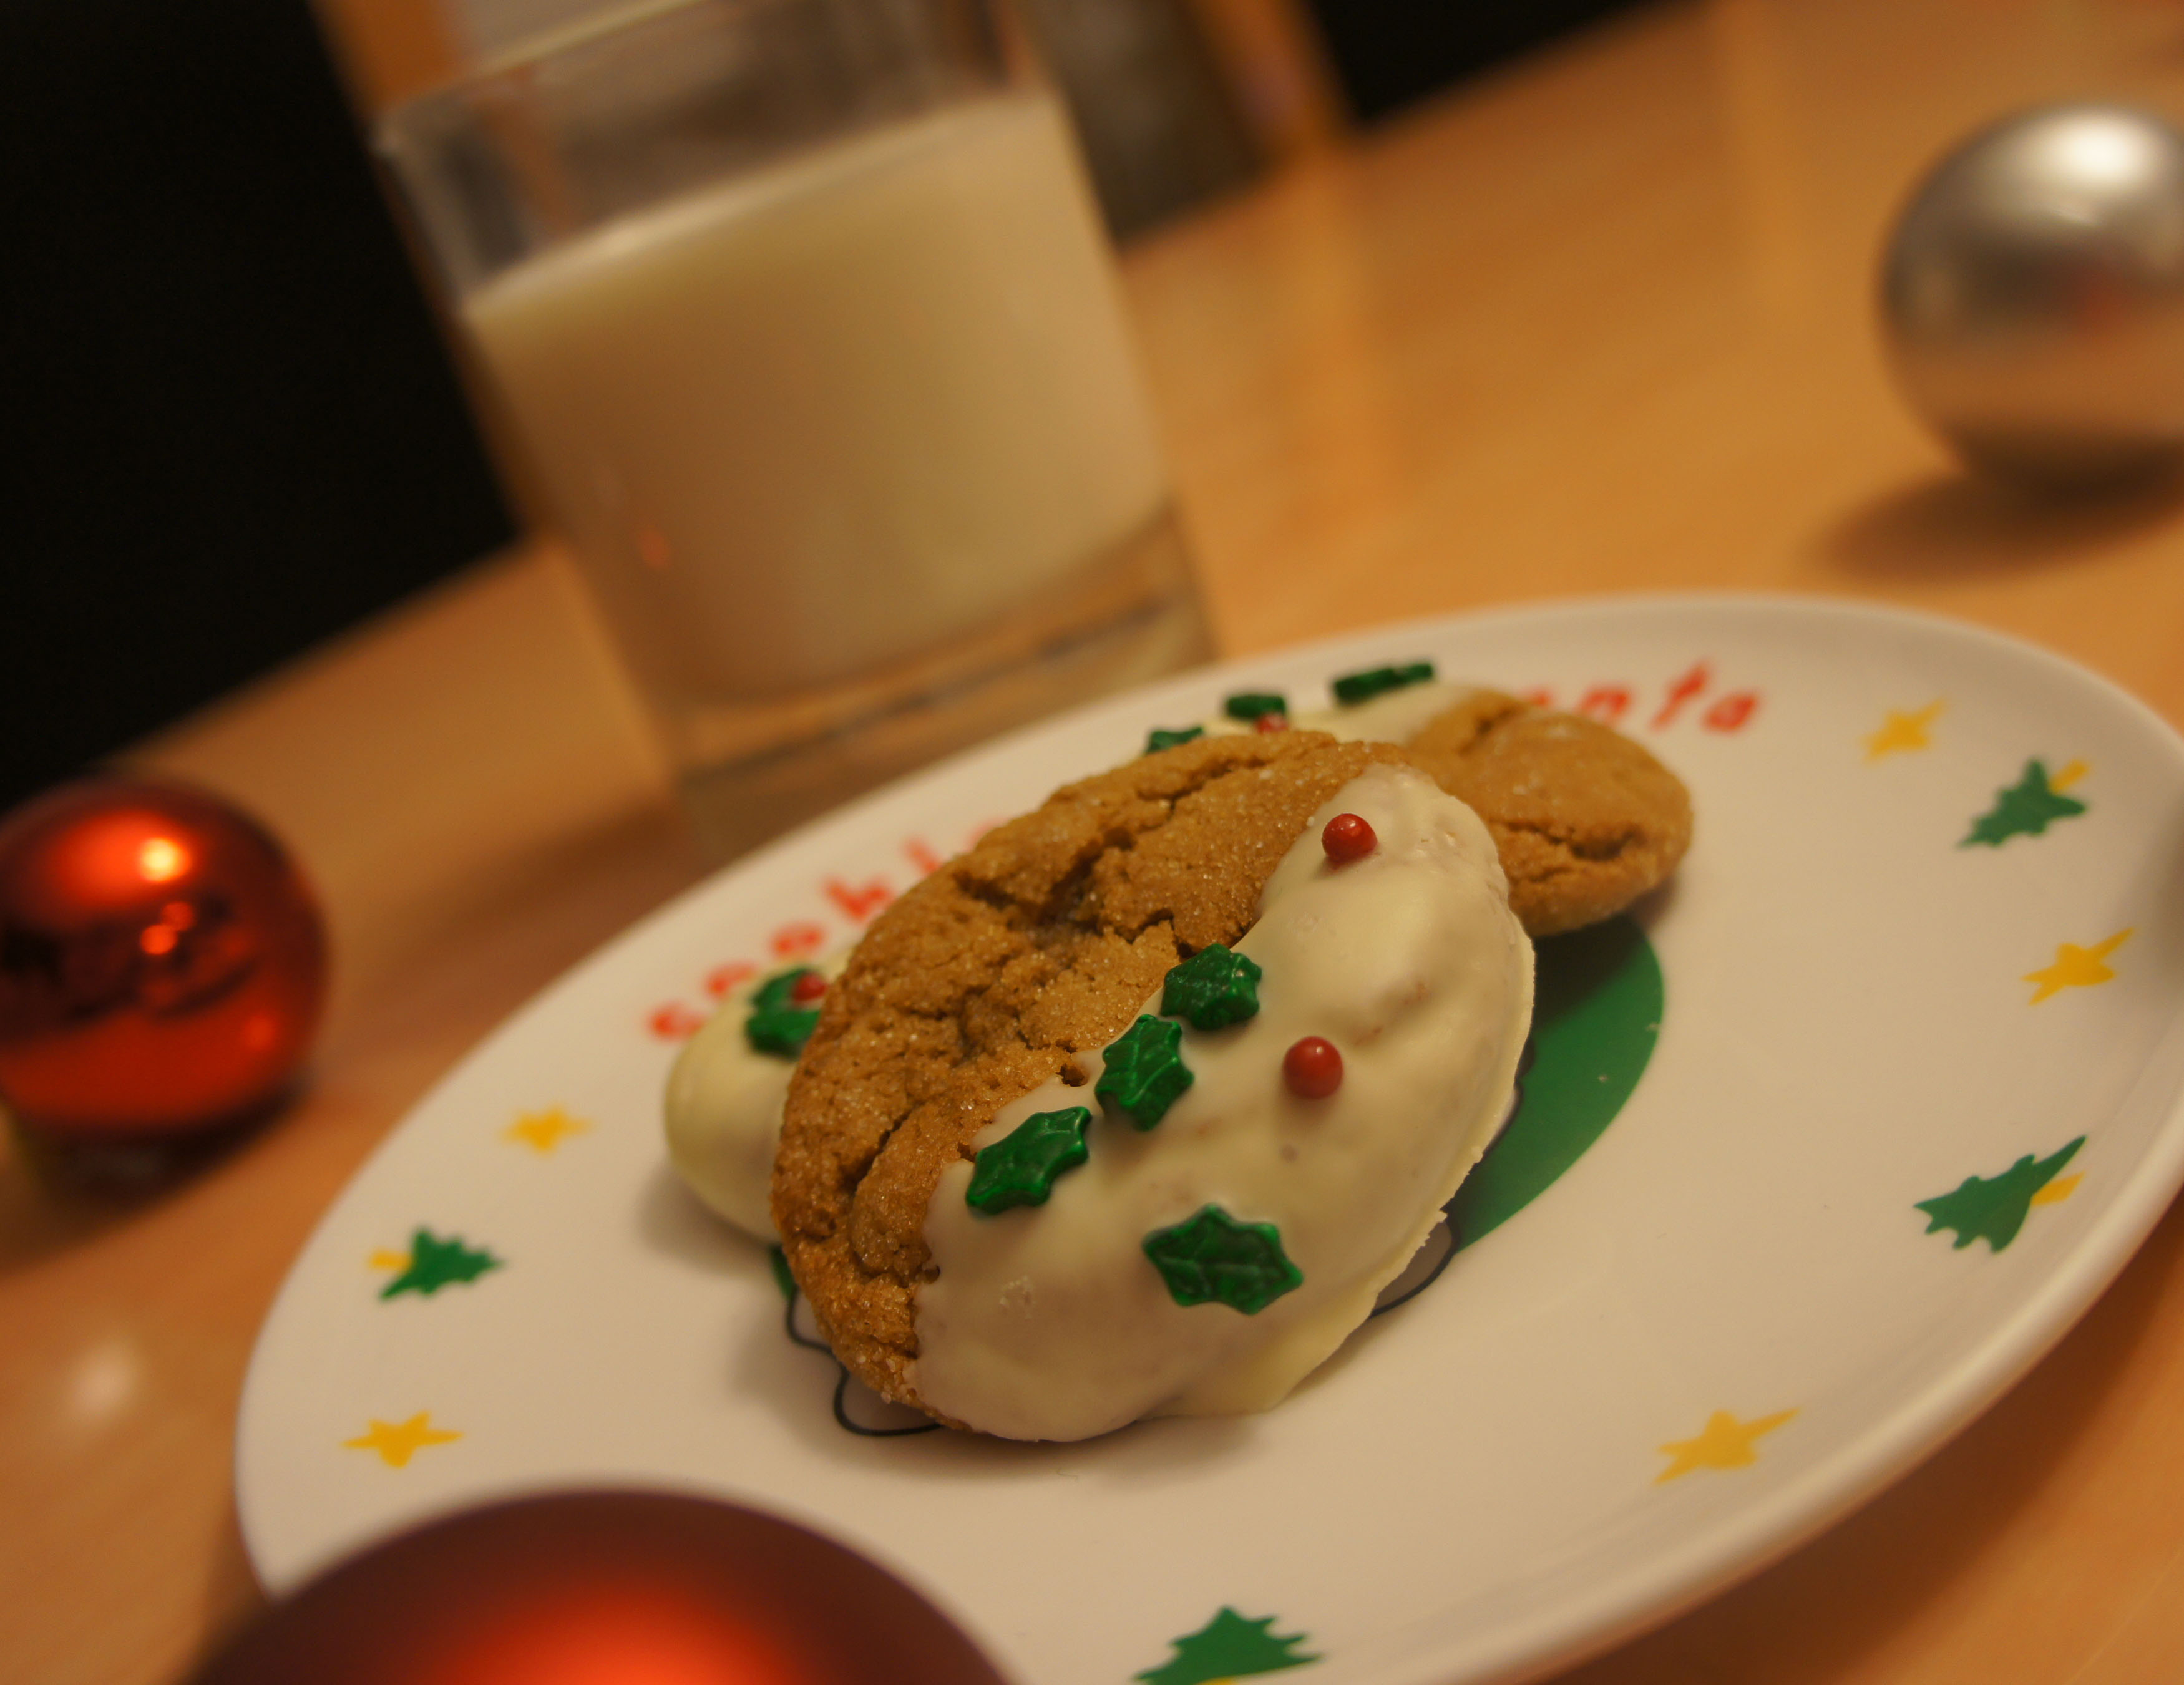
I typically roll my ginger snaps in a mixture of red and green sugars for Christmas to add a festive touch.  This year, I decided to get a little fancier and dipped them in melted white chocolate and sprinkled them with some Wilton holly shaped sprinkles I found at Michaels.  Either way they are delicious!

SONY DSC

SONY DSC

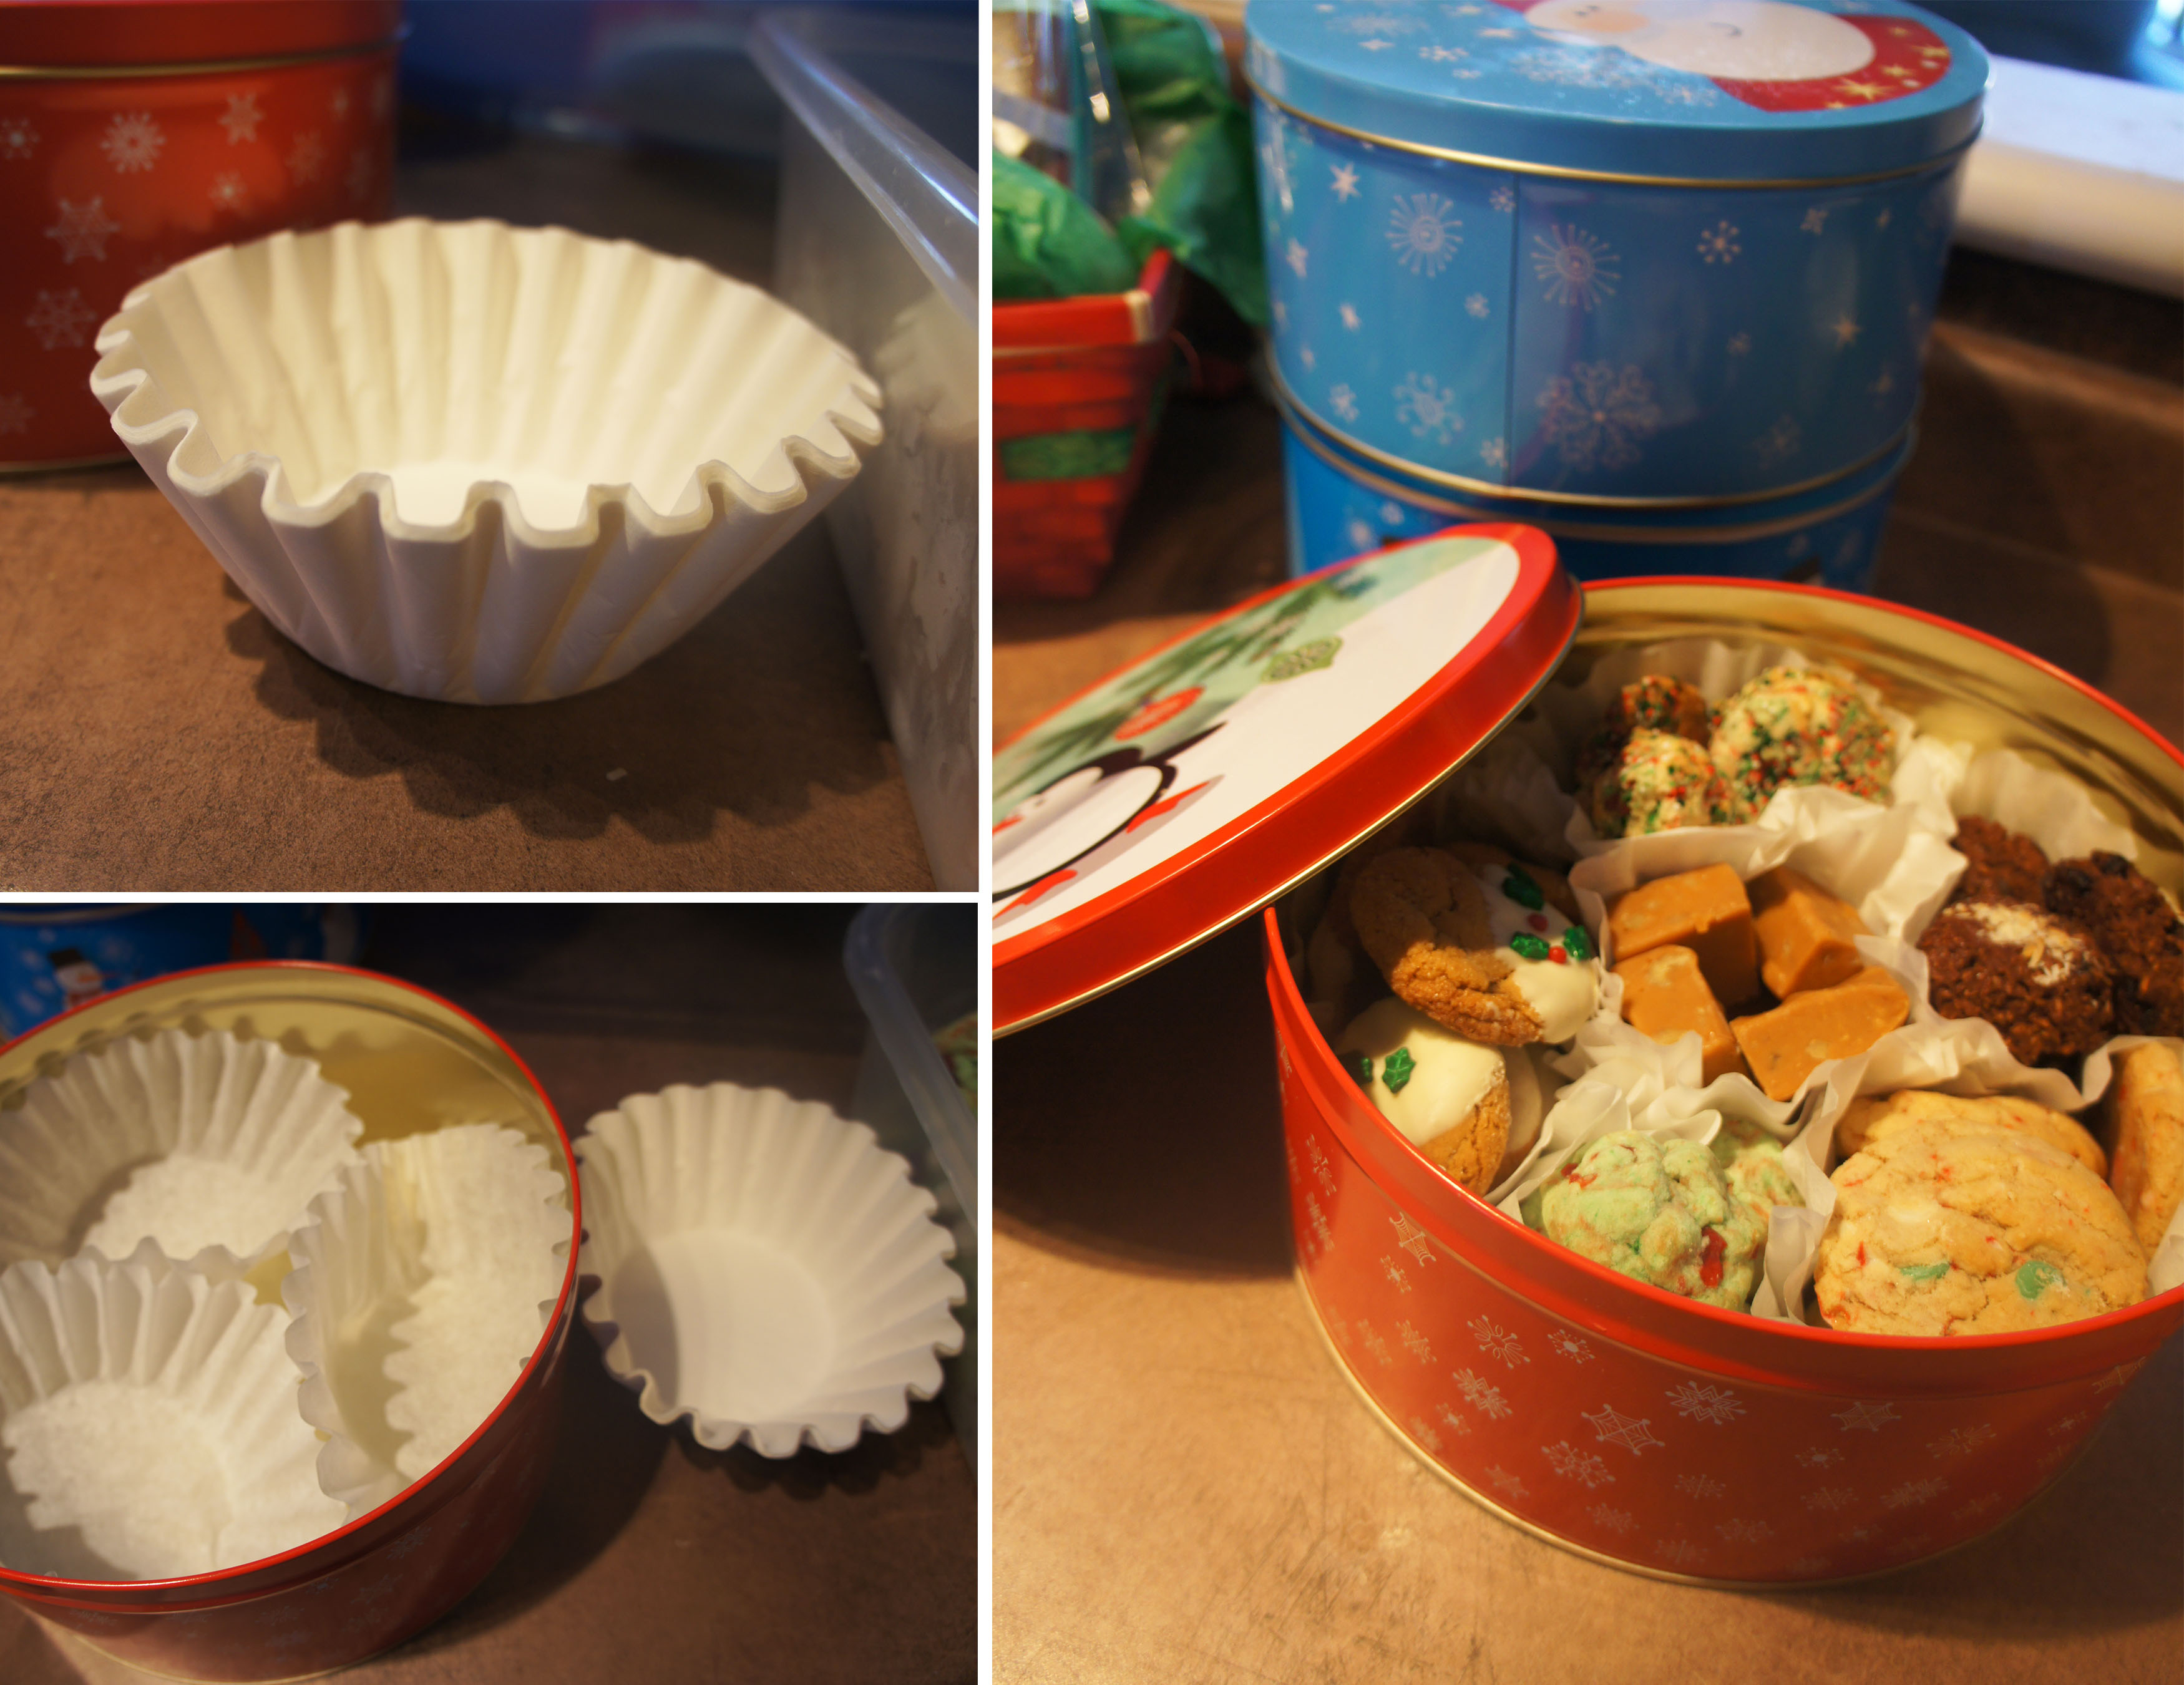
These ginger snaps were also the final item for the tins of baking I was packaging up for my siblings.  Last year I had the bright idea to use coffee filters in the tins to separate each of the baking items and it worked so nicely I thought I would share.  They keep the flavours for mixing and add a nice white ruffle throughout the basic Dollar Store tins I used.

SONY DSC

Advertisement
Recipes, Sweet

Christmas Baking: Easy Maple Walnut Fudge

I have a whole pinterest board devoted just to fudge.  They all look delicious, but for my Christmas baking I resorted back to this recipe I made last year because I knew it was super tasty and easy.

SONY DSC

Ingredients

  • 1 can Eagle Brand Dulche de Leche sweetened condensed milk (You could substitute regular)
  • 3 cups butterscotch chips (you will need two bags to get enough)
  • 1/2 cup chopped walnuts
  • 2 teaspoons Maple extract

SONY DSC

Directions

  1. Prepare a 9×9″ pan by lining it with parchment paper.
  2. Pour butterscotch chips and sweetened condensed milk in a microwave proof bowl.
  3. Microwave on high for 1 and a half minutes.  Stir.
  4. Microwave for another minute and a half.  Stir well until condensed milk and melted chips are fully combined.
  5. Stir in Maple extract and chopped nuts.
  6. Pour mixture into pan and spread evenly.  Put in fridge to set.
  7. Cut into bite sized squares.

SONY DSC

SONY DSC

SONY DSC

Enjoy!

Recipes, Sweet

Christmas Baking: Peppermint Vanilla Chip Cookies

I finally got a start on my Christmas baking last night while the other members of my family were not-so-quietly watching Christmas specials.  I managed to get through two recipes last night and am hoping to get through a few more throughout this week.

I still had some leftover peppermint candy sticks sitting on my counter from the candy buffet I did in August so I decided I to find a candy cane cookie recipe to use them up.   I came across a few different recipes on pinterest, but am glad I finally settled on these Peppermint White Chocolate Chip Cookies from Closet Cooking.  I chose them because the reviews were good and the recipe was very straightforward.  My recipe quantities below are doubled from her recipe and the cookies turned out so tasty I am glad I made the decision to make s larger quantity!

The original recipe calls for white chocolate chips, but I decided to substitute vanilla flavored holiday chips I found several weeks ago at the grocery store.  When I spotted them I promptly tossed two bags into our shopping cart, not knowing what I was going to make with them but excited for the extra touch of festive color I knew they could bring to one of my recipes.

SONY DSC

Adapted from Closet Cooking

Makes 4 dozen
Total preparation and baking time: 1 hour 30 minutes

Ingredients
  • 1 cup butter (only real butter, not low fat), room temperature
  • 1 cup brown sugar, packed
  • 1 cup white sugar
  • 2 eggs
  • 2 teaspoon vanilla extract
  • 3 cups all purpose flour, sifted
  • 2 teaspoon baking soda
  • 1/2 teaspoon salt
  • 1 package Chipits vanilla flavored holiday chips (can also use white chocolate chips)
  • 3/4 cup peppermint candy cane, crushed

Directions

  1. Cream the butter and sugars in a bowl.
  2. Beat in the egg and vanilla extract.
  3. Mix in the baking soda, salt and flour.
  4. Add the vanilla chips and the peppermint candy cane, folding in gently.
  5. Chill the dough in the fridge for 30-60 minutes.
  6.  Scoop the dough in to 1 tablespoon sized balls and place on a parchment lined baking sheet.
  7. Bake in a 350F preheated oven until just lightly golden brown around the edges, approximately 8-10 minutes.

SONY DSC

SONY DSC

Also up this week will be the Rice Krispie Treat gingerbread house I promised to make with my 3 year old.  We had a good time this morning picking out our candy decorations at the bulk store and are just waiting for the pan of treats to set and be ready to cut into walls and a roof.

SONY DSC

Recipes, Savory

What’s For Dinner? Bruschetta Chicken Bake

Print

Thursday nights are curling nights for my husband.  He alternates weekly between the early and late draw and, on the early nights, I need to have dinner cooked and ready for him to eat and head right back out the door.  5:00 always seems to be when my kids are at their absolute worst so I need quick, easy recipes that require very little watching.  Bonus if it is something I can prep while the baby naps and then just throw it into the oven!

I discovered this recipe one night when I had no idea what to make for dinner.  After staring into the pantry for inspiration, I eventually pulled a box of Stove Top stuffing down from the shelves and was happy to discover a recipe on the back of the box with ingredients I already had in the house.  It came together so quickly (prep time is 10 minutes) and was a lot tastier then I expected.  I think it is one of the easiest things I make and is my go to when I am feeling particularly lazy and don’t want to cook.

SONY DSC

Ingredients

  • 1 can (540mL) stewed tomatoes, undrained
  • 1 package Stove Top Stuffing Mix (I use the lower sodium version)
  • 2 cloves of garlic, minced
  • 1 lb boneless, skinless chicken breasts
  • 1 tsp dried basil
  • 3/4 cup of shredded mozzarella cheese

SONY DSC

SONY DSC

Directions

  1. Preheat oven to 400 F.  Combine tomatoes, stuffing mix and garlic in bowl and mix together.
  2. Cut chicken breasts into bite sized cubes and layer in the bottom of an oven safe baking dish.
  3. Sprinkle chicken with dried basil and shredded cheese.
  4. Top with stuffing mixture.
  5. Bake 30 minutes, until chicken is cooked through.

SONY DSC

SONY DSC

Serve with steamed veggies and enjoy!

Recipes, Savory

What’s For Dinner? Sweet Chicken

Print

One of the best wedding presents I received was a lovely recipe book my mom compiled of all our favorite family recipes.  I know it took a lot of time for her to type up and put together and I am thankful to have all the tried and true recipes I enjoy from my childhood.  I have added my own recipes to it over the past couple years, but there are still a lot of the originals I come back to time and time again.

SONY DSC

Last night I decided to make the sweet chicken that was included in our books.  It is a simple recipe that consists of chicken baked in a combination of honey and soya sauce,  and proves that sometimes simple is best.  The sauce is a lot like a teriyaki and I enjoy it best served over rice to soak up the extra sauce.  With a steamed veggie on the side, it makes for a quick meal that both the adult and child family members of my family enjoy – the dogs seemed pretty pleased with the kids leftovers too!

SONY DSC

Ingredients

  • 3 lbs chicken (we found boneless, skinless chicken thighs work best)
  • 1 cup honey
  • 1/2 cup soya sauce
  • 1 clove garlic, minced
  • 2 Tbsp Ketchup
  • Salt and pepper to taste

SONY DSC

Directions

  1. Place chicken in a shallow pan.
  2. Sprinkle with salt and pepper.
  3. Whisk together other ingredients to make the sauce.
  4. Pour sauce over chicken.
  5. Cook at 375 degrees for 1 hour.

SONY DSC

SONY DSC

Enjoy!

Celebrations, Parties, Recipes, Sweet

Cakes: Machine’s and Monkey’s for Max

SONY DSC

This weekend we celebrated my nephew’s 2nd birthday.  My sister and her husband just bought their first home so they have been very busy these past weeks moving in and working on home improvement projects.  She is also 7 months pregnant so I can only imagine how exhausted she is between chasing a 2 year old and unpacking.  Because of all this, and because I enjoy doing it, I offered to bake and decorate the cake for my nephew’s birthday party.

My sister has mentioned Max is into tractors and construction vehicles lately so I knew it would make a good theme for his cake.  I started with a 5 pack of small CAT toys I found at Target for $6 and decided to build a chocolately construction zone for them.  My cake decorating skills can still use some improving, so I loved that the mud and dirt on this cake didn’t require perfectly smooth icing to look good.

SONY DSC

Finishing details included green icing grass and small chocolate rocks.  The “dirt” was Oreo cookie crumbs.  For the final touches, I printed out some construction style signs with the birthday boy’s name and age  to stick into the cake with the “2” candle.

I am not sure the birthday boy ate much of his cake, but he sure did enjoy playing with the tractors and trucks on it so I would call that a success.

SONY DSC

The actual cake was from a mix and the icing was just a basic chocolate buttercream.  Inside was a delicious Oreo cheesecake filling.  I didn’t get a picture to show it in it’s full glory, but trust me it was tasty and definitely worth trying on your next cake.  I *may* have even eaten the leftover filling on it’s own by the spoonful.

Oreo Cheesecake Filling

  • 1 Package of cream cheese (8 oz)
  • 1 tub of Cool Whip
  • 1 tsp vanilla extract
  • 1 row of Oreo Cookies, crushed

To make filling, blend room temperature cream cheese.  Add in defrosted Cool Whip and vanilla extract, then mix until smooth.  Gently fold in crushed Oreo’s.


Max’s First Birthday Monkey Cake

I also had the priviledge of making the cake for Max’s first birthday last year.  I went with a monkey theme and ended up doing a large cake for the party guests and a small monkey just for the birthday boy.  To get the round cake shape, I baked the cake in my Pampered Chef batter bowl.  The cake was also baked from a mix and I used the same chocolate buttercream as the construction cake, with some banana flavored icing for the mouth and ears and melted chocolate for the mouth, hair and eye details.

SONY DSC

I do enjoy cake decorating and love that this gives me a chance to both practice my skills and give my nephew something special for his birthday.  I am afraid I may have started a trend and will now be asked to make the cakes for all upcoming birthdays, but I think I am okay with that!


Recipes, Sweet

Carrot Cake Cheesecake Cupcakes

SONY DSC

If you are anything like me, you have all kinds of yummy stuff pinned on pinterest that you want to eventually try some day, but haven’t actually gotten around to making many of the recipes.  It is probably better that my pin boards continue to grow instead of my waistline, but once in a while there is a recipe I come across that I deem worthy of the extra effort and calories.

When I saw these Carrot Cake Cheesecake Cupcakes from Crazy for Crust, I knew it was one of those recipes.  Usually I tend towards all things chocolate, but the carrot and cream cheese combination appealed to me instantly and I knew it was something I had to make.  I have been waiting for an excuse to attempt them and this week I finally found my reason.

Tommorow, my good friend Linda from playgroup will be undergoing surgery on her knees to help with the back issues she has been having.  She will be missing out on the fun and treats for our Halloween party next week and won’t be back to playgroup for several weeks, so I wanted to do something special for her.  I recall a discussion where she told me of her love of cream cheese icing and how she has even gone so far as to eat it by the spoonful directly from the container.  Whipping up a batch of icing would have been much simpler, but I figured these carrot cake cheesecake cupcakes would make a pretty tasty vehicle for the cream cheese icing!  I was not disappointed.

Carrot Cake Cheesecake Cupcakes

Carrot Cake Layer:

  • 1 egg
  • 1/3 cup vegetable oil
  • ½ cup sugar
  • ½ teaspoon vanilla extract
  • ½ cup flour
  • ½ teaspoon baking soda
  • ½ teaspoon baking powder
  • Pinch of salt
  • ½ teaspoon cinnamon
  • ¾ cup shredded carrots
  1. Preheat oven to 350°. Line muffin pan with liners.
  2. Make the cake batter:  In a large bowl, beat together eggs, oil, sugar, and vanilla. Mix in flour, baking soda, baking powder, salt, and cinnamon. Stir in carrots.
  3. Distribute evenly between 12 muffin liners. Set aside.

SONY DSC

Cheesecake Layer:

  • 1 pack (8 ounces) cream cheese, softened
  • ¼ cup sugar
  • ¼ teaspoon vanilla
  • 1 egg
  1. Make the cheesecake batter by mixing together the cream cheese, egg, sugar, and vanilla. Pour evenly on top of cake batter in muffin pan.
  2. Step over snoring bulldog at your feet to get to oven. *Optional
  3. Bake for about 25 minutes, until cheesecake is no longer runny.  Cool completely.

SONY DSC

Cream Cheese Frosting:
  • 8 ounces cream cheese, softened
  • ½ cup butter, softened
  • 4 cups powdered sugar
  • 1 teaspoon vanilla extract
  1. Make the frosting: Using a mixer, cream butter and cream cheese until smooth. Slowly add in powdered sugar and vanilla and blend.

Store in refrigerator.  Yield: 12 cupcakes

SONY DSC

I brought enough to share with the other ladies at playgroup, and packaged up a few extras for Linda to take home with her.

SONY DSC

The recipe has a few steps, but it is fairly simple and straightforward.  I doubled the quantities which meant it required 4 whole bricks of cream cheese between the cheesecake layer and the icing.  While I was happy to be able to buy my cream cheese in bulk at Costco, I am now at a loss about what to do with the remainder of my giant bag of Costco carrots.  At only $5 for the bag, dealing with 10 lbs of carrots seemed much easier then having to make a stop at a second grocery store with kids in tow.

SONY DSC

Please feel free to share your best carrot recipes in the comments below!

Recipes, Sweet

Super Easy Pumpkin Creamcheese Muffins

SONY DSC

There’s a two ingredient pumpkin muffin recipe floating around pinterest that is simply 1 box of cake mix mixed with 1 can of pure pumpkin.  I have made it before and the results are a dense, moist pumpkiny treat.  It is good, but I decided I could make it a bit better – enter the creamcheese!

The idea for the creamcheese was actually inspired by a copycat recipe for the Starbucks Pumpkin Creamcheese muffins.  That recipe asks that you blend the creamcheese and then roll it into a log and freeze to be cut into rounds.  This seemed like a lot of work for me so I took the lazy way out and simply cut pieces off my brick of creamcheese and poked it into my muffin batter.  If I am feeling extra ambitious next time I may whip the creamcheese first, but the lazy method still seemed to make some pretty tasty results.

SONY DSC

Easy Pumpkin Creamcheese Muffins 

Ingredients

1 can (15 oz.) 100% Pure Pumpkin

1 box cake mix – Spice Cake Flavor

1 brick (8 oz) creamcheese

Chopped walnuts or pecans

Directions

Preheat oven to 350 degrees.

Combine canned pumpkin and cake mix and mix until well blended. (I also added a bit of pumpkin pie spice to mine).

Spoon muffin mixture 2/3 full into cupcake liners.

Cut creamcheese into approx. 1 tsp portions and push slightly into the middle of each muffin.

Sprinkle with nuts and sugar/cinnamon sugar if desired.

Bake for 20 minutes.

SONY DSC

Enjoy.

Makes 18 muffins.

Friday Favorites, Recipes, Sweet

Friday Favorites: Vanilla Cupcakes with Raspberry Buttercream

FridayFavoritesTitle

I decided to bake up some quick cupcakes earlier this week for the human members of our family to enjoy on the dog’s birthday.   They weren’t supposed to be anything spectacular, but they turned out so tasty I just had to share.

SONY DSC

For the cake part, I just used a Mrs.Fields boxed cupcake mix from Dollar Tree.  I absolutely love these mixes and try to keep one chocolate and one vanilla on hand at all times.  They make one dozen cupcakes versus the 24 cupcakes you usually get from a standard boxed cake mix – perfect for our family of four.  The liners and cupcake toppers were a kit I found at Dollarama and had sitting around in the pantry.  The multicolored sprinkles were my 3 year old son’s addition.

995183_10153150395950497_1626957816_n

Because we had just gone berry picking the day before and I had a bunch of fresh raspberries, I thought why not add them to the buttercream icing.  After a quick google search I came up with this frosting recipe from myrecipes.com.  It whipped up quickly and tasted amazing!  It was just the right amount of sweet and tart, with a pretty pink hue.  I enjoyed it so much I may just have to make it again for my birthday in a few weeks!

SONY DSC

Raspberry Buttercream Frosting

Ingredients

  • 1/2 cup butter, softened
  • 1/2 cup fresh raspberries
  • 1 teaspoon vanilla extract (almond would be delicious too!)
  • 1/8 teaspoon salt
  • 1 (16-oz.) package icing sugar

Directions

1. Beat butter, raspberries, vanilla and salt with electric mixer (medium) until smooth and creamy.

2. Gradually add the icing sugar, blending in slowly after each addition.

BONUS FAVORITE  Since we are on the topic of Dollar stores and cupcakes, I thought I would share one more favorite – these awesome cupcake carriers I have found at both Dollarama and Dollar Tree.  I always struggle to find a way to store my cupcakes at home or take them to events so these are perfect.  At only a couple dollars each they are a lot cheaper then a lot of other versions, and I feel like I could afford to lose or leave them behind without being too heartbroken.  I only wish they had them for mini cupcakes!

cupcakeholder

(I was going to take a picture with cupcakes in it but by the time I thought of it, the cupcakes were long gone!  They were that good.)

Celebrations, Recipes

Peanut Butter Delight Doggie Birthday Cake

SONY DSC

I try to make a homemade cake for the dogs birthday’s each year, but there have been a couple times life has gotten in the way and they have ended up with store bought.  When it is homemade, my default recipe for the last 4 years has been this peanut butter delight cake.  Many of the dog cake recipes I found were meat based and I like that this one uses regular baking ingredients and is closer to a cake I would enjoy myself.  It smells great cooking and I don’t have to worry when the kids try to get in on the action!

SONY DSC

Peanut Butter Delight Dog Birthday Cake

1 cup white or whole wheat flour

1 tsp baking soda

1/4 cup peanut butter

1/4 cup vegetable oil

1 cup shredded carrots

1 tsp vanilla

1/3 cup honey

1 egg

Directions

Preheat oven to 350°F (180°C)

Mix together flour and baking soda. Add remaining ingredients and mix well. Pour into a small round pan and bake for 25-30 minutes.

Frosting

8 oz cream cheese

1 container of baby food bananas

1 tsp cinnamon

Mix ingredients together and use to frost cake.

Enjoy!

Bullini2Birthday

Our pups have enjoyed this recipe as both a full cake and cupcakes.  I have baked it in a loaf pan and cut it out to look like a bone and I have done it as a small round and added several cupcakes to create a paw print shape.

RumbullCupcake

It doesn’t matter how it is decorated, my dogs love it!

SONY DSC