Everyday Life, Two Legged Fun

A Trip Back in Time: The Ukrainian Cultural Heritage Village

I have driven past the Ukrainian Cultural Heritage Village, just east of Edmonton, several times and have always wanted to check it out.  My mom lives out that direction, so this summer we decided to meet up and spend the day together with the kids seeing the sites.

SONY DSC

It took the kids and I less the an hour to drive out to the village from the Southside of Edmonton and the highway is well marked as you near the Village to make it easy to find.  There is ample parking and the staff all seemed very helpful and informative if you did have questions.

SONY DSC

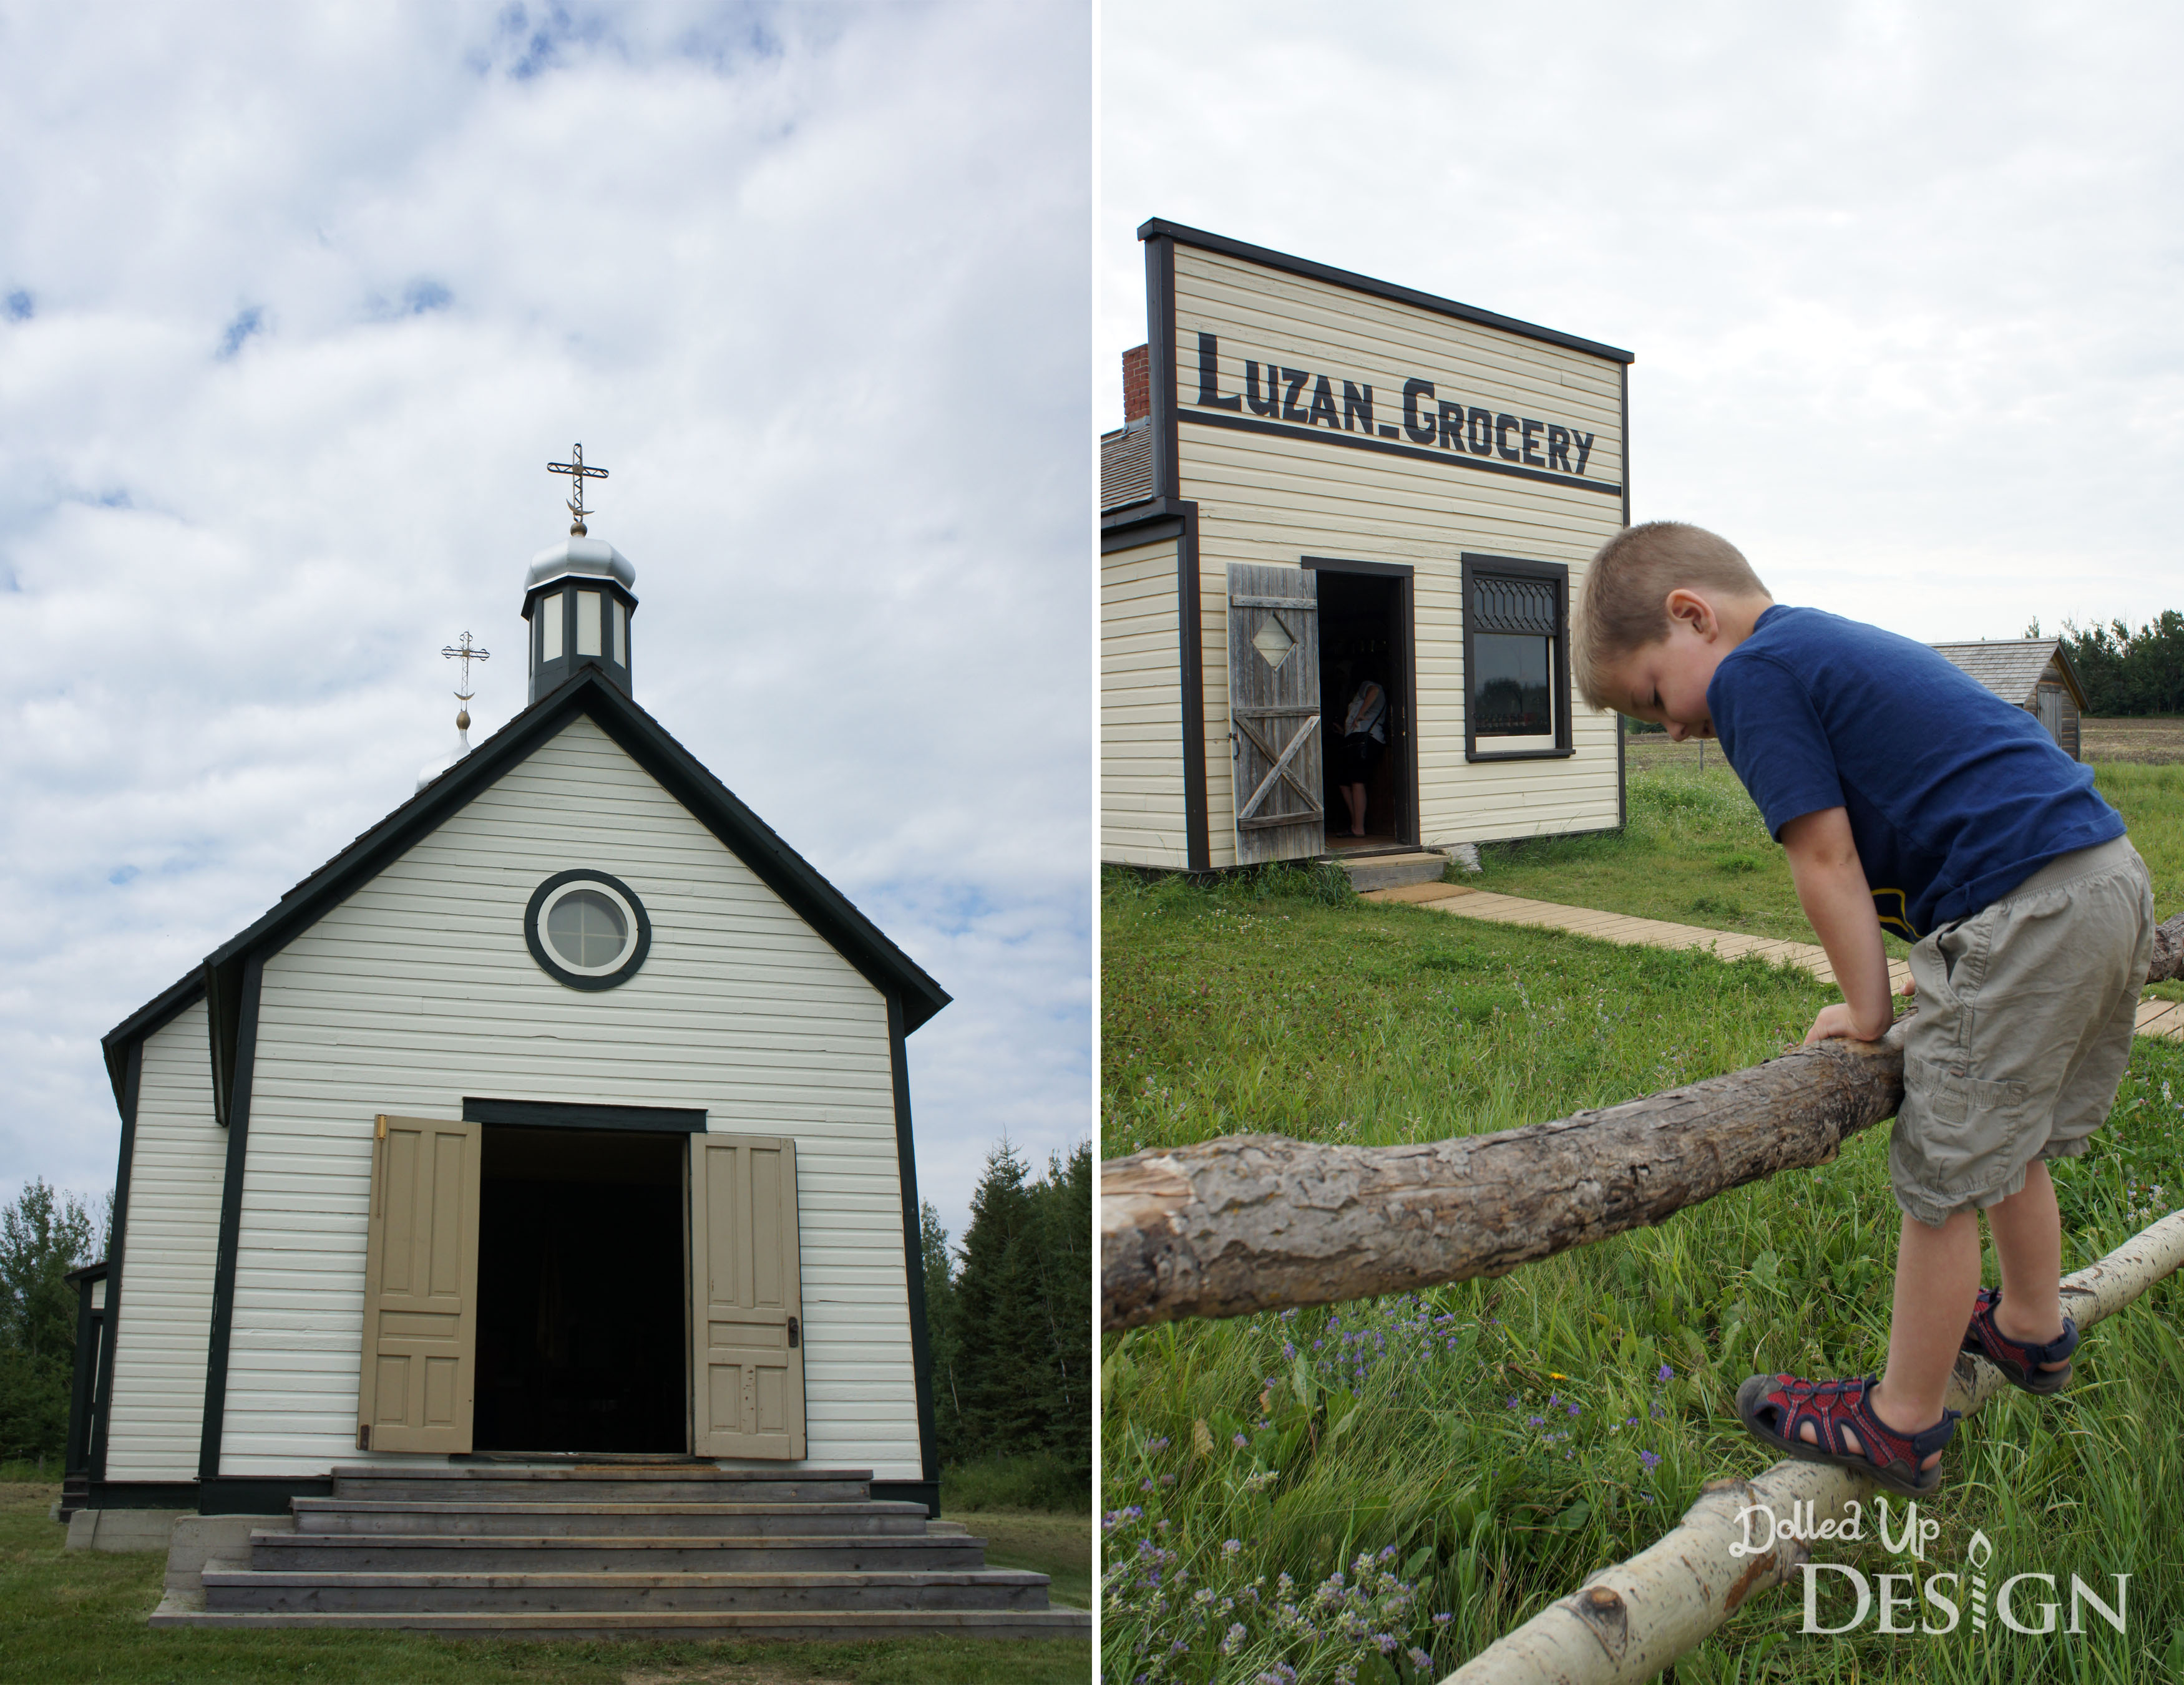
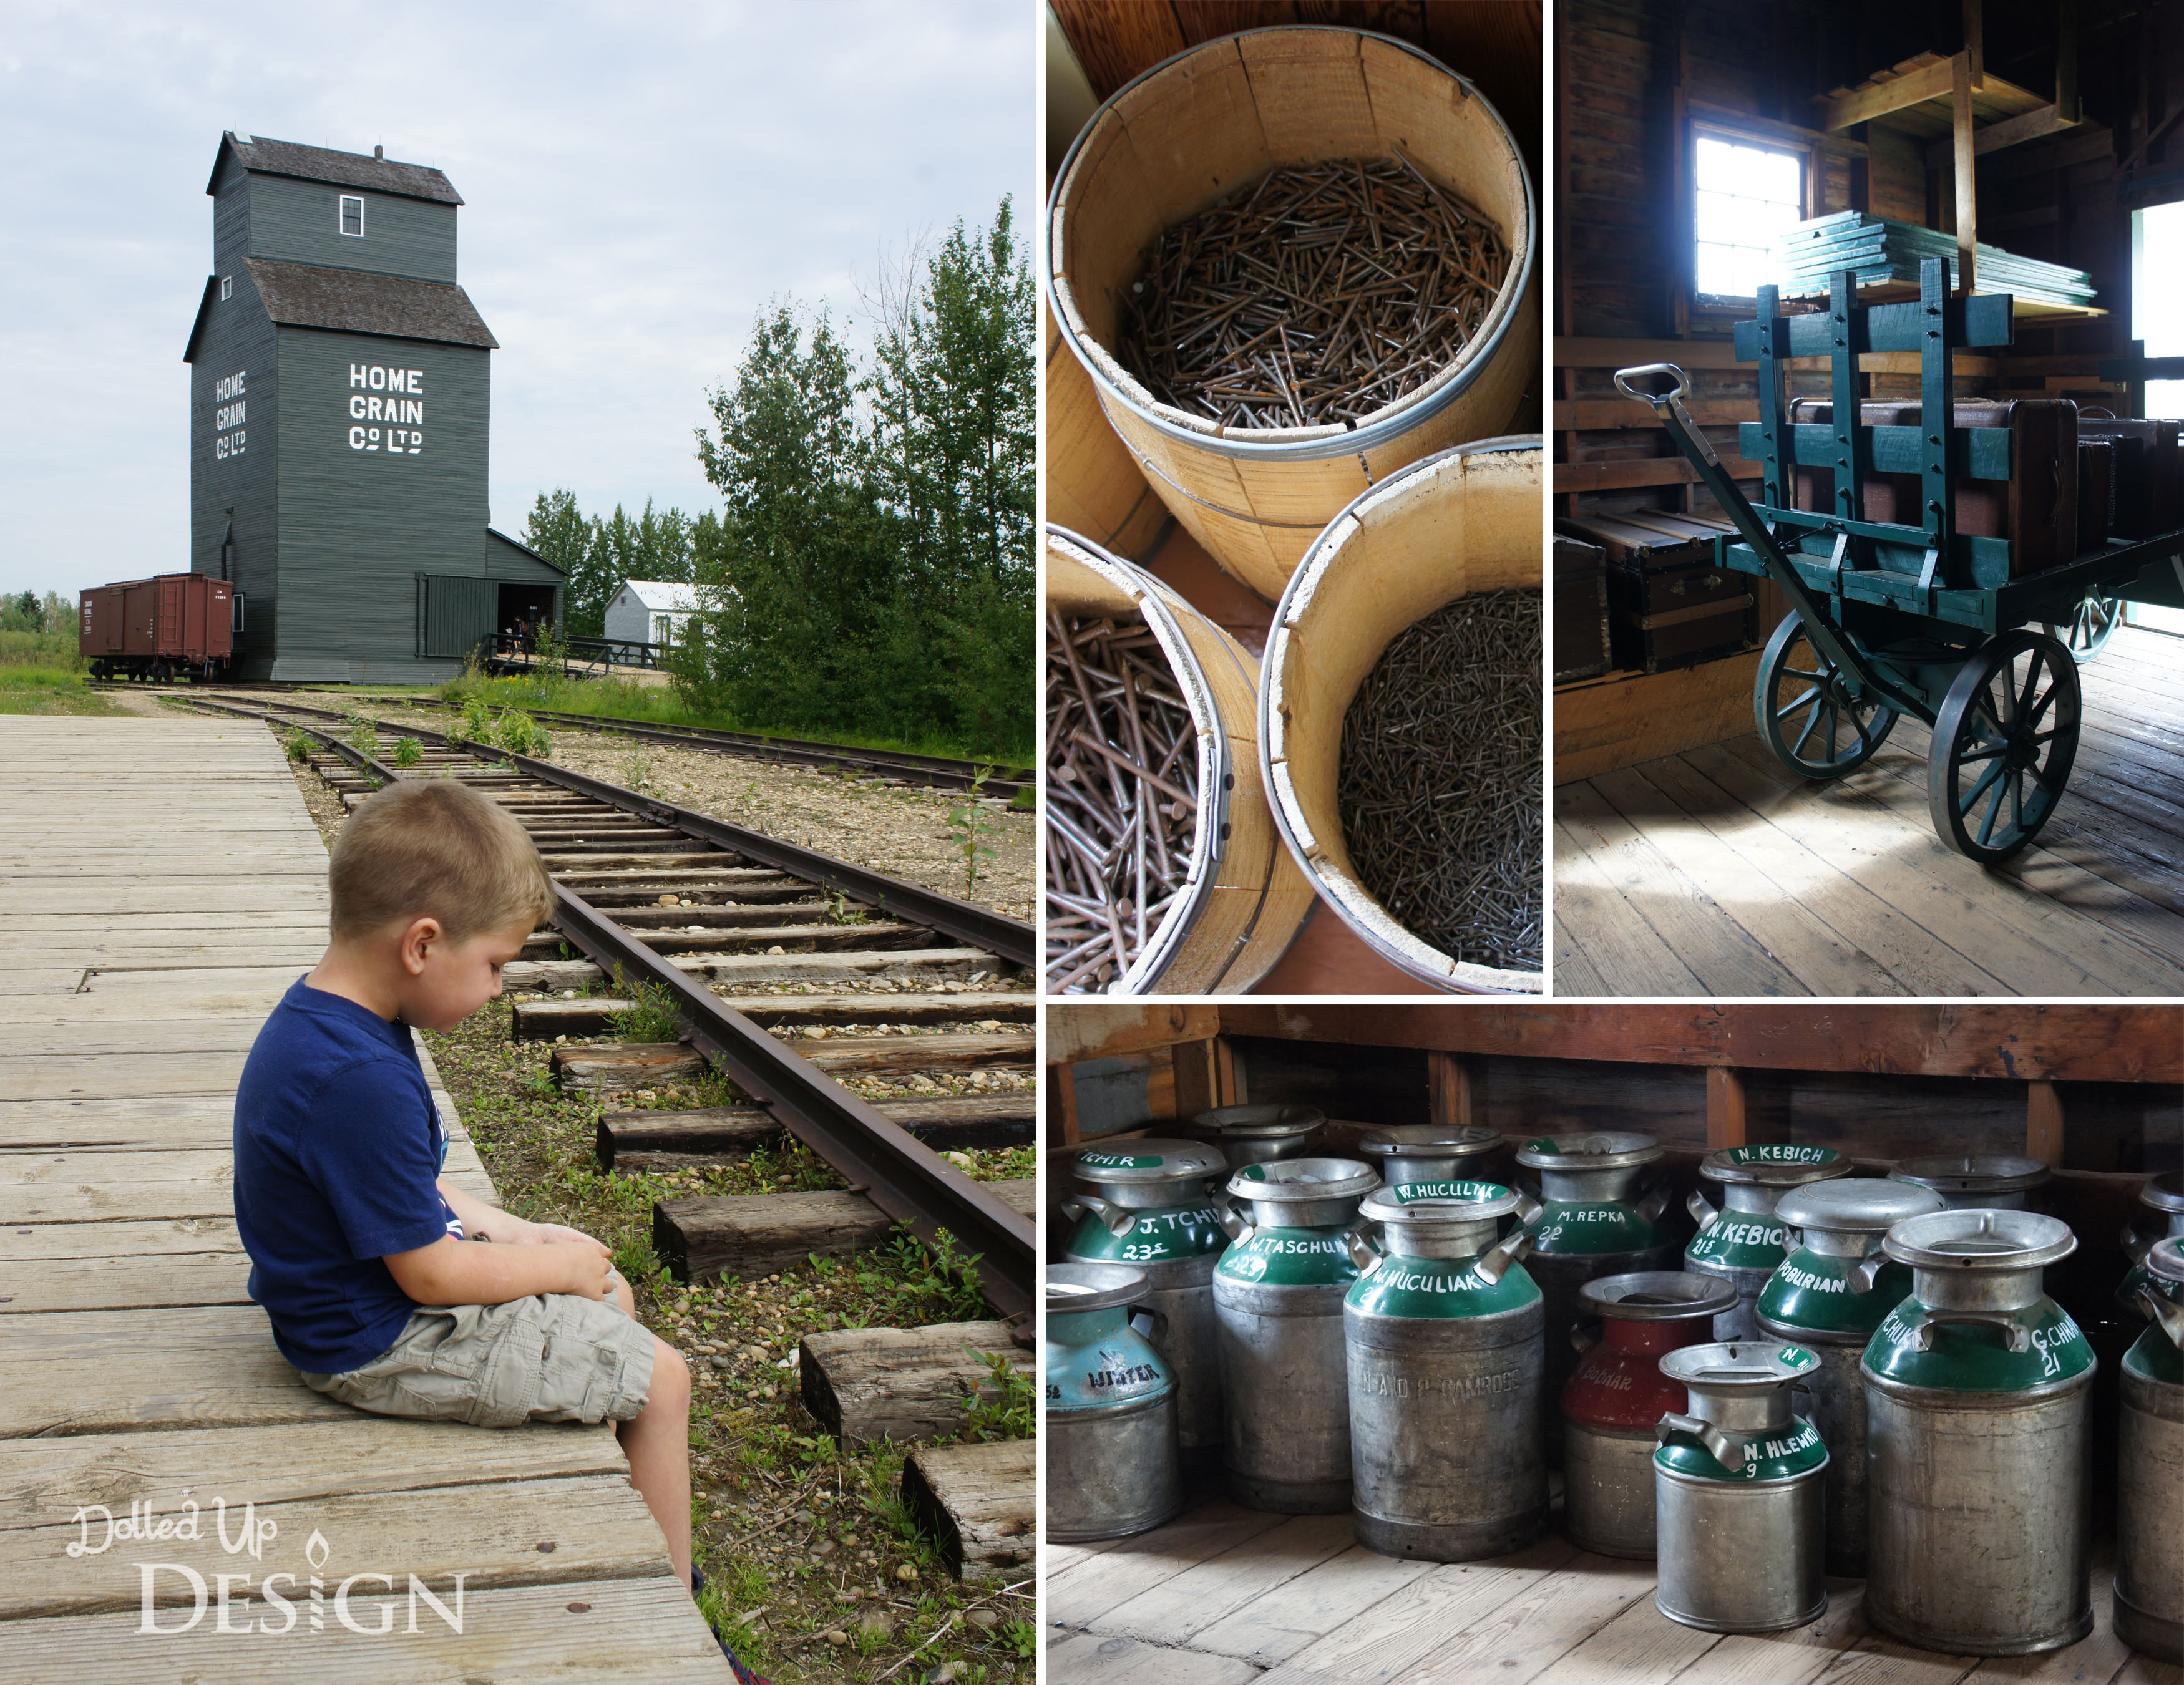
There were also costumed interpreters throughout the park that did an excellent job of keeping in character.  My mom questioned the young lady in the grocery store about where they found the old packages and bottles and she would not break character, telling her they had just arrived via train.

SONY DSC

SONY DSC

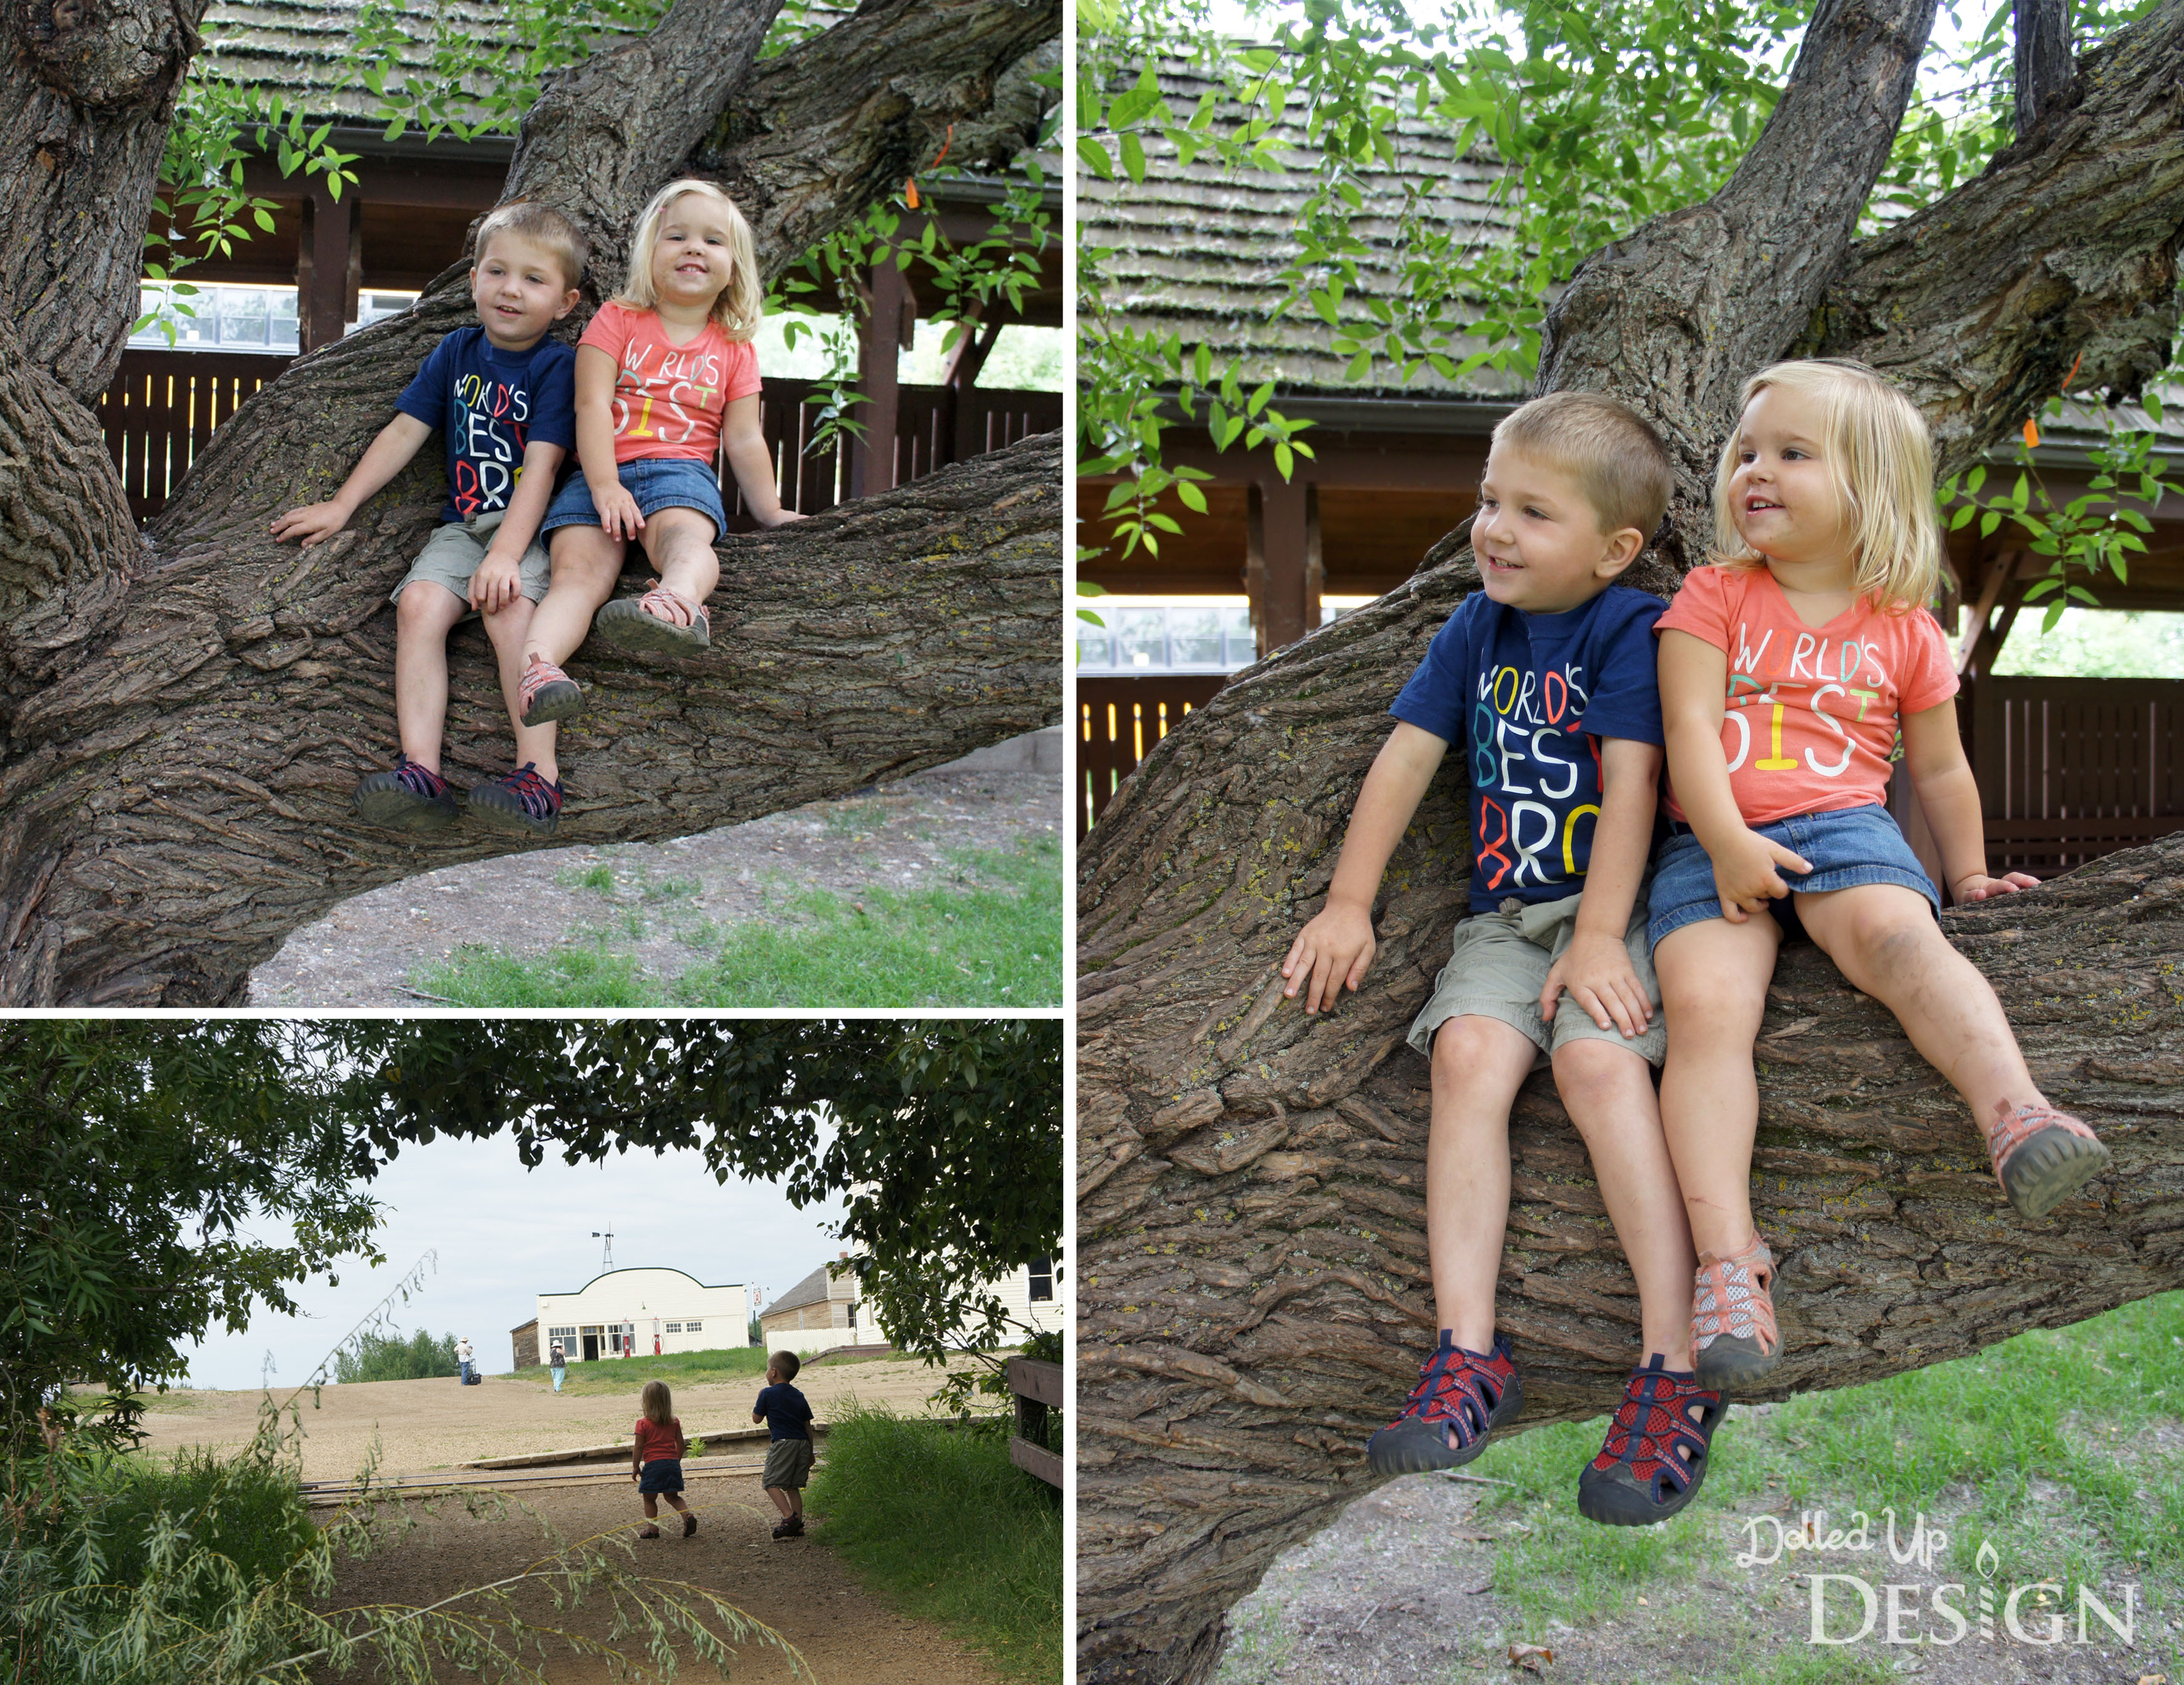
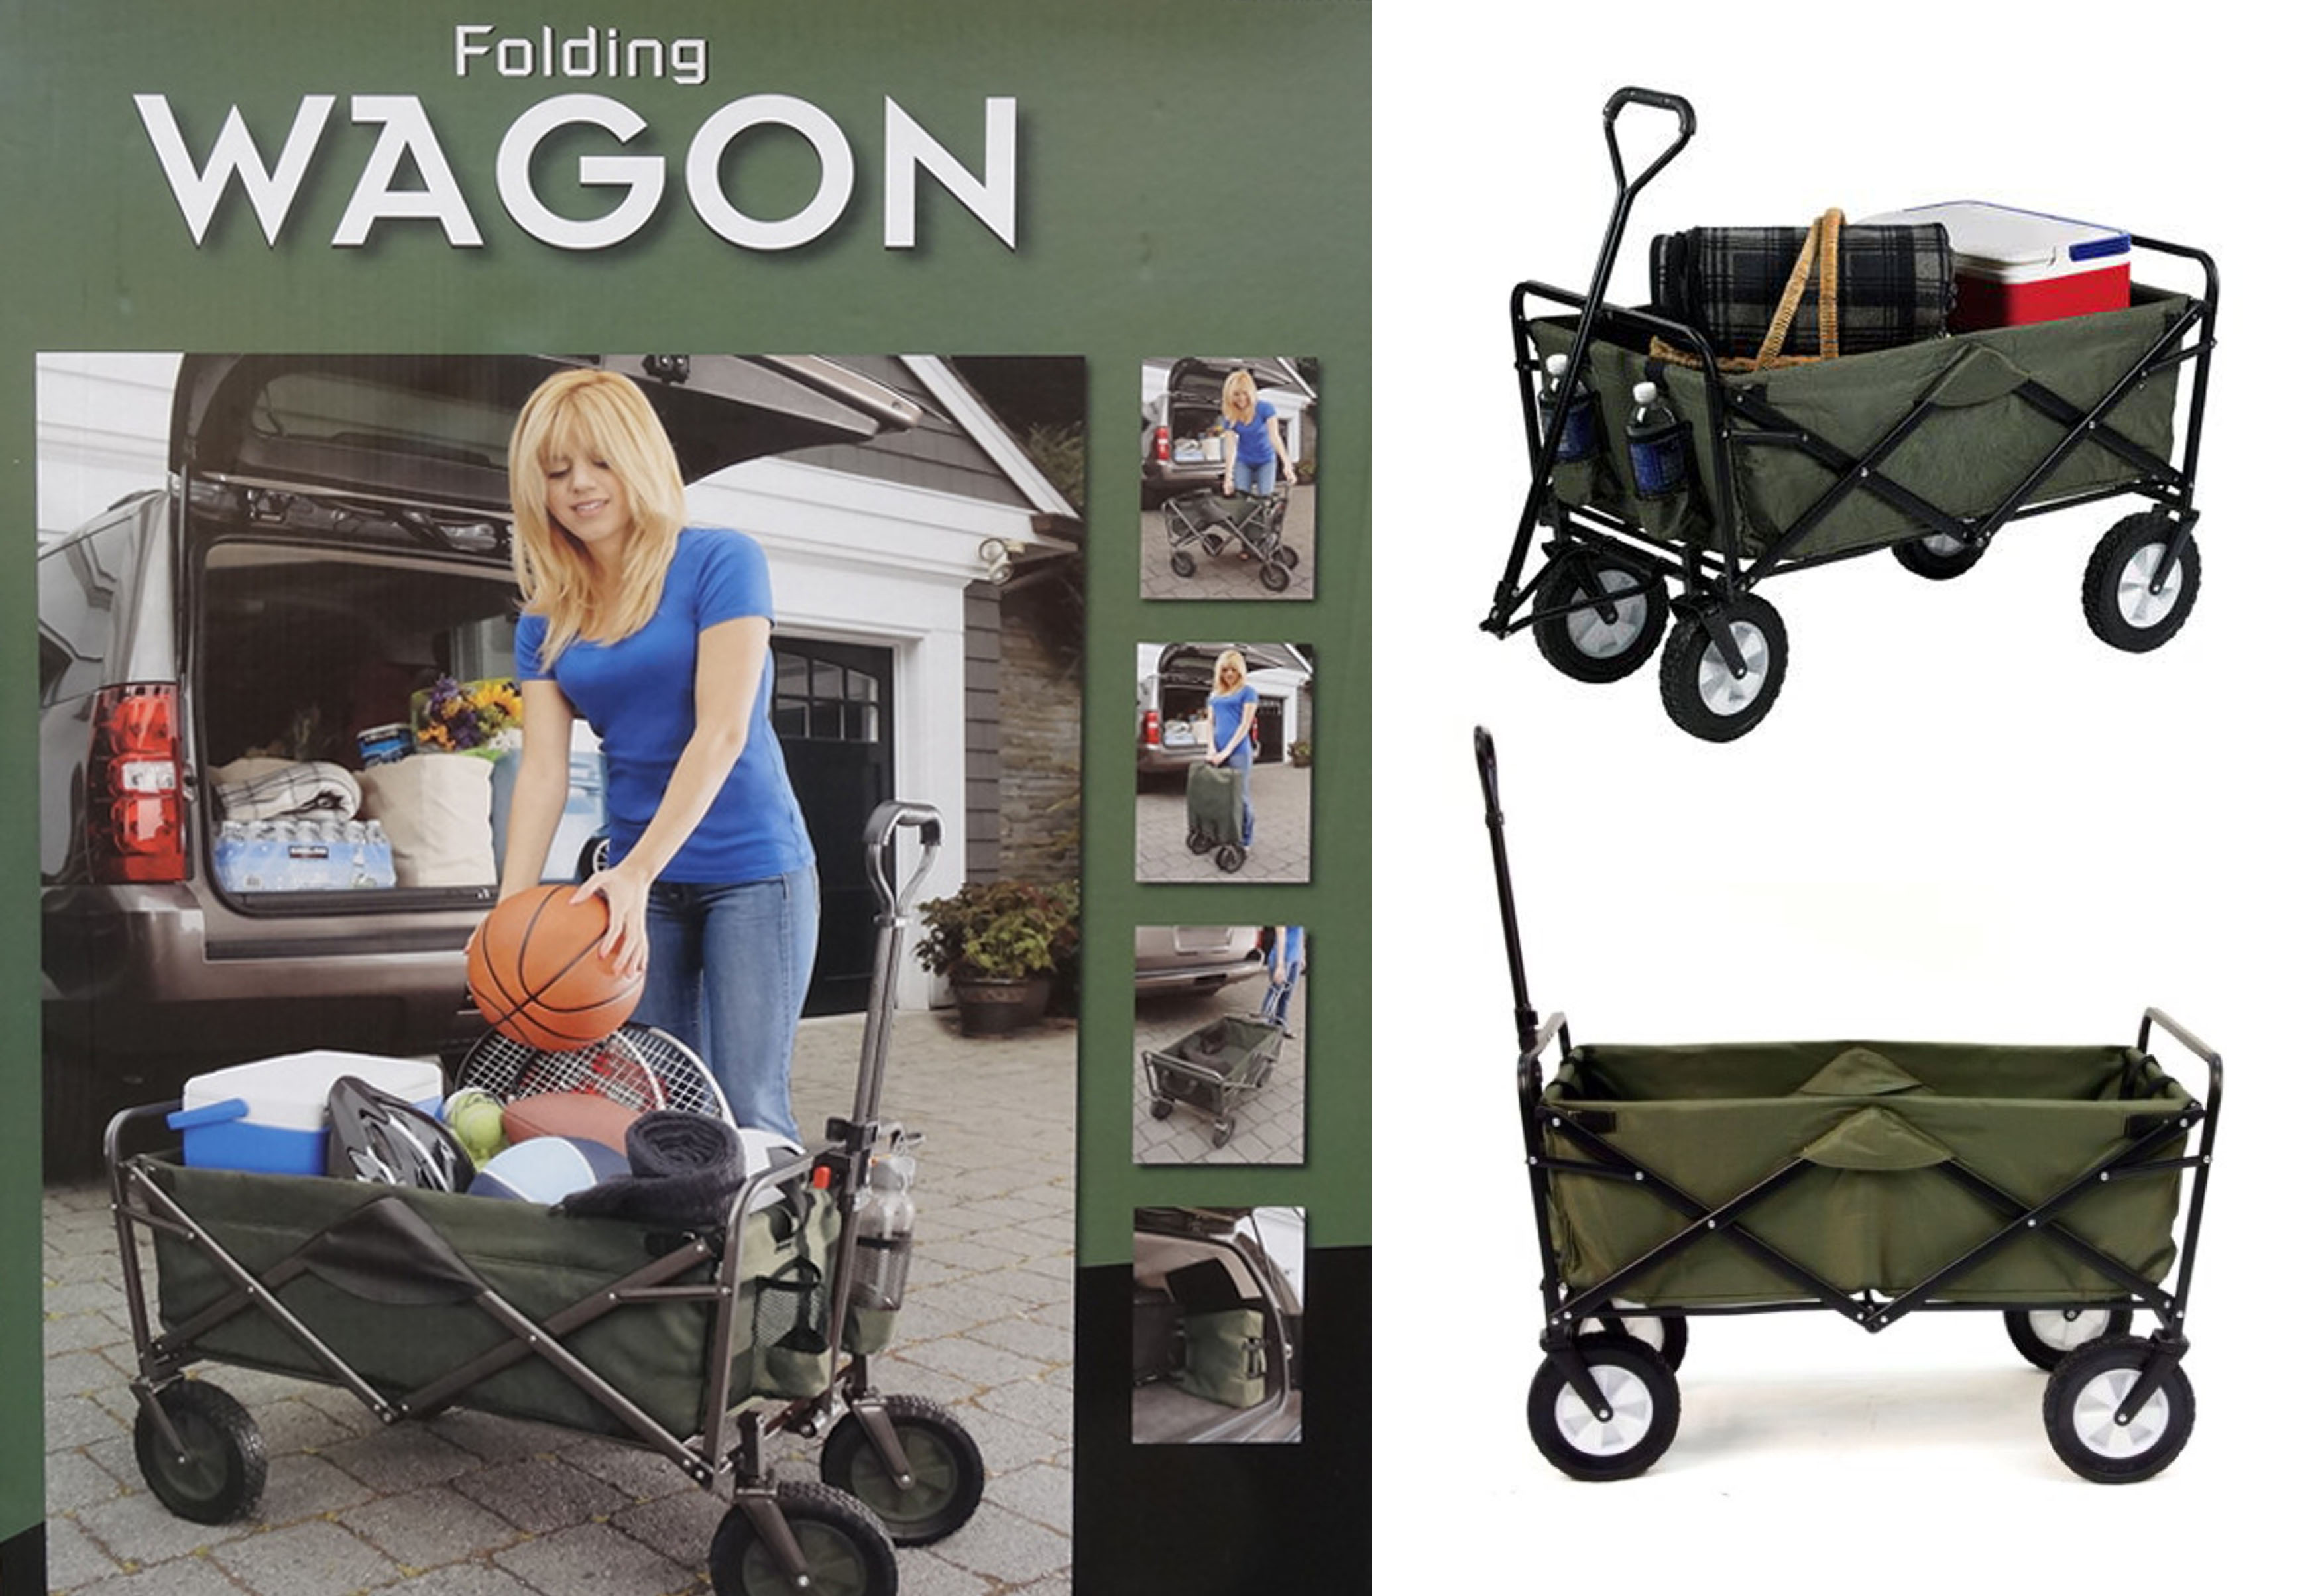
The village is fairly widespread which means a lot of walking to get between the different buildings.  Even to get from the main gates into the village is quite the little hike through a treed area and over a small pond.  I brought my wagon along, but was quite tired by the end pulling the kids over the gravel roadways.

There is a horse-drawn wagon that runs throughout the park and is happy to help transport you through the Village.  We hopped aboard it for a small loop just so the kids could enjoy a wagon ride.

SONY DSC

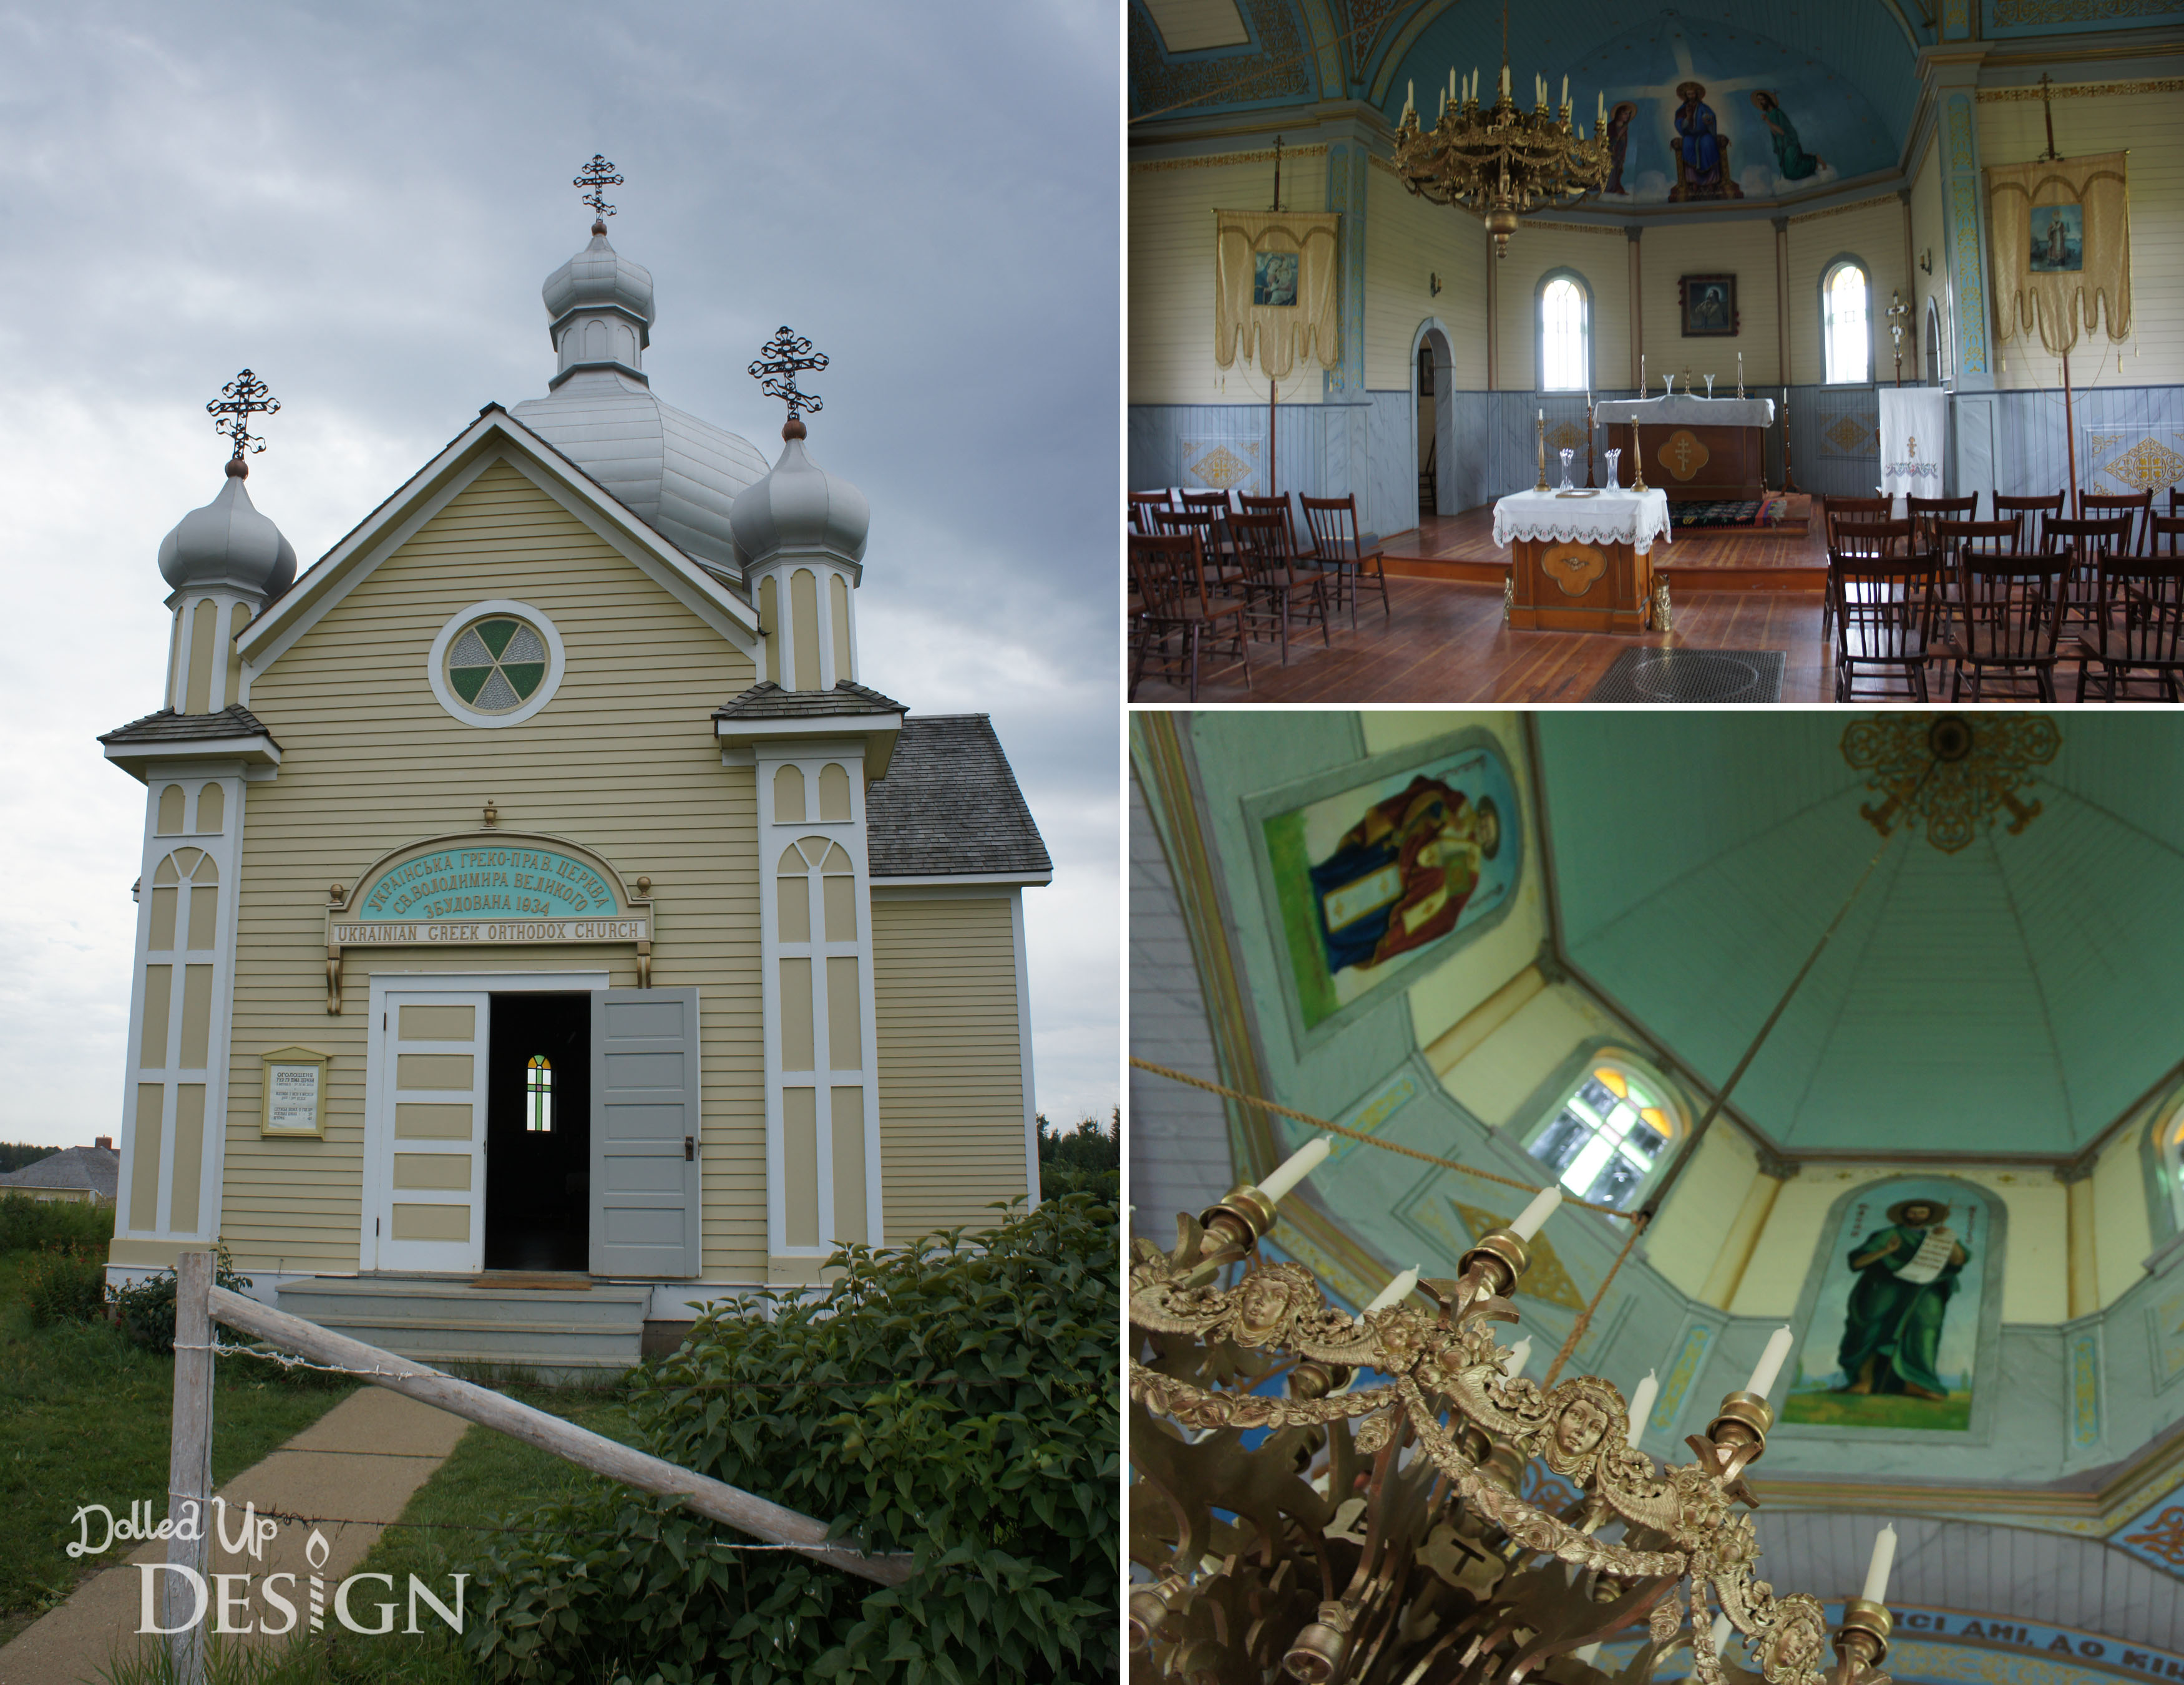
There are two different churches on site and they have done a wonderful job restoring the religious artifacts and artwork inside.  There weren’t as many buildings as I was expecting, but they all seem very well kept and authentic to the time period.

The village seems to be constantly adding buildings and there were quite a few under restoration when we were there so it might be worth going back in several years to see how it has changed.

SONY DSC

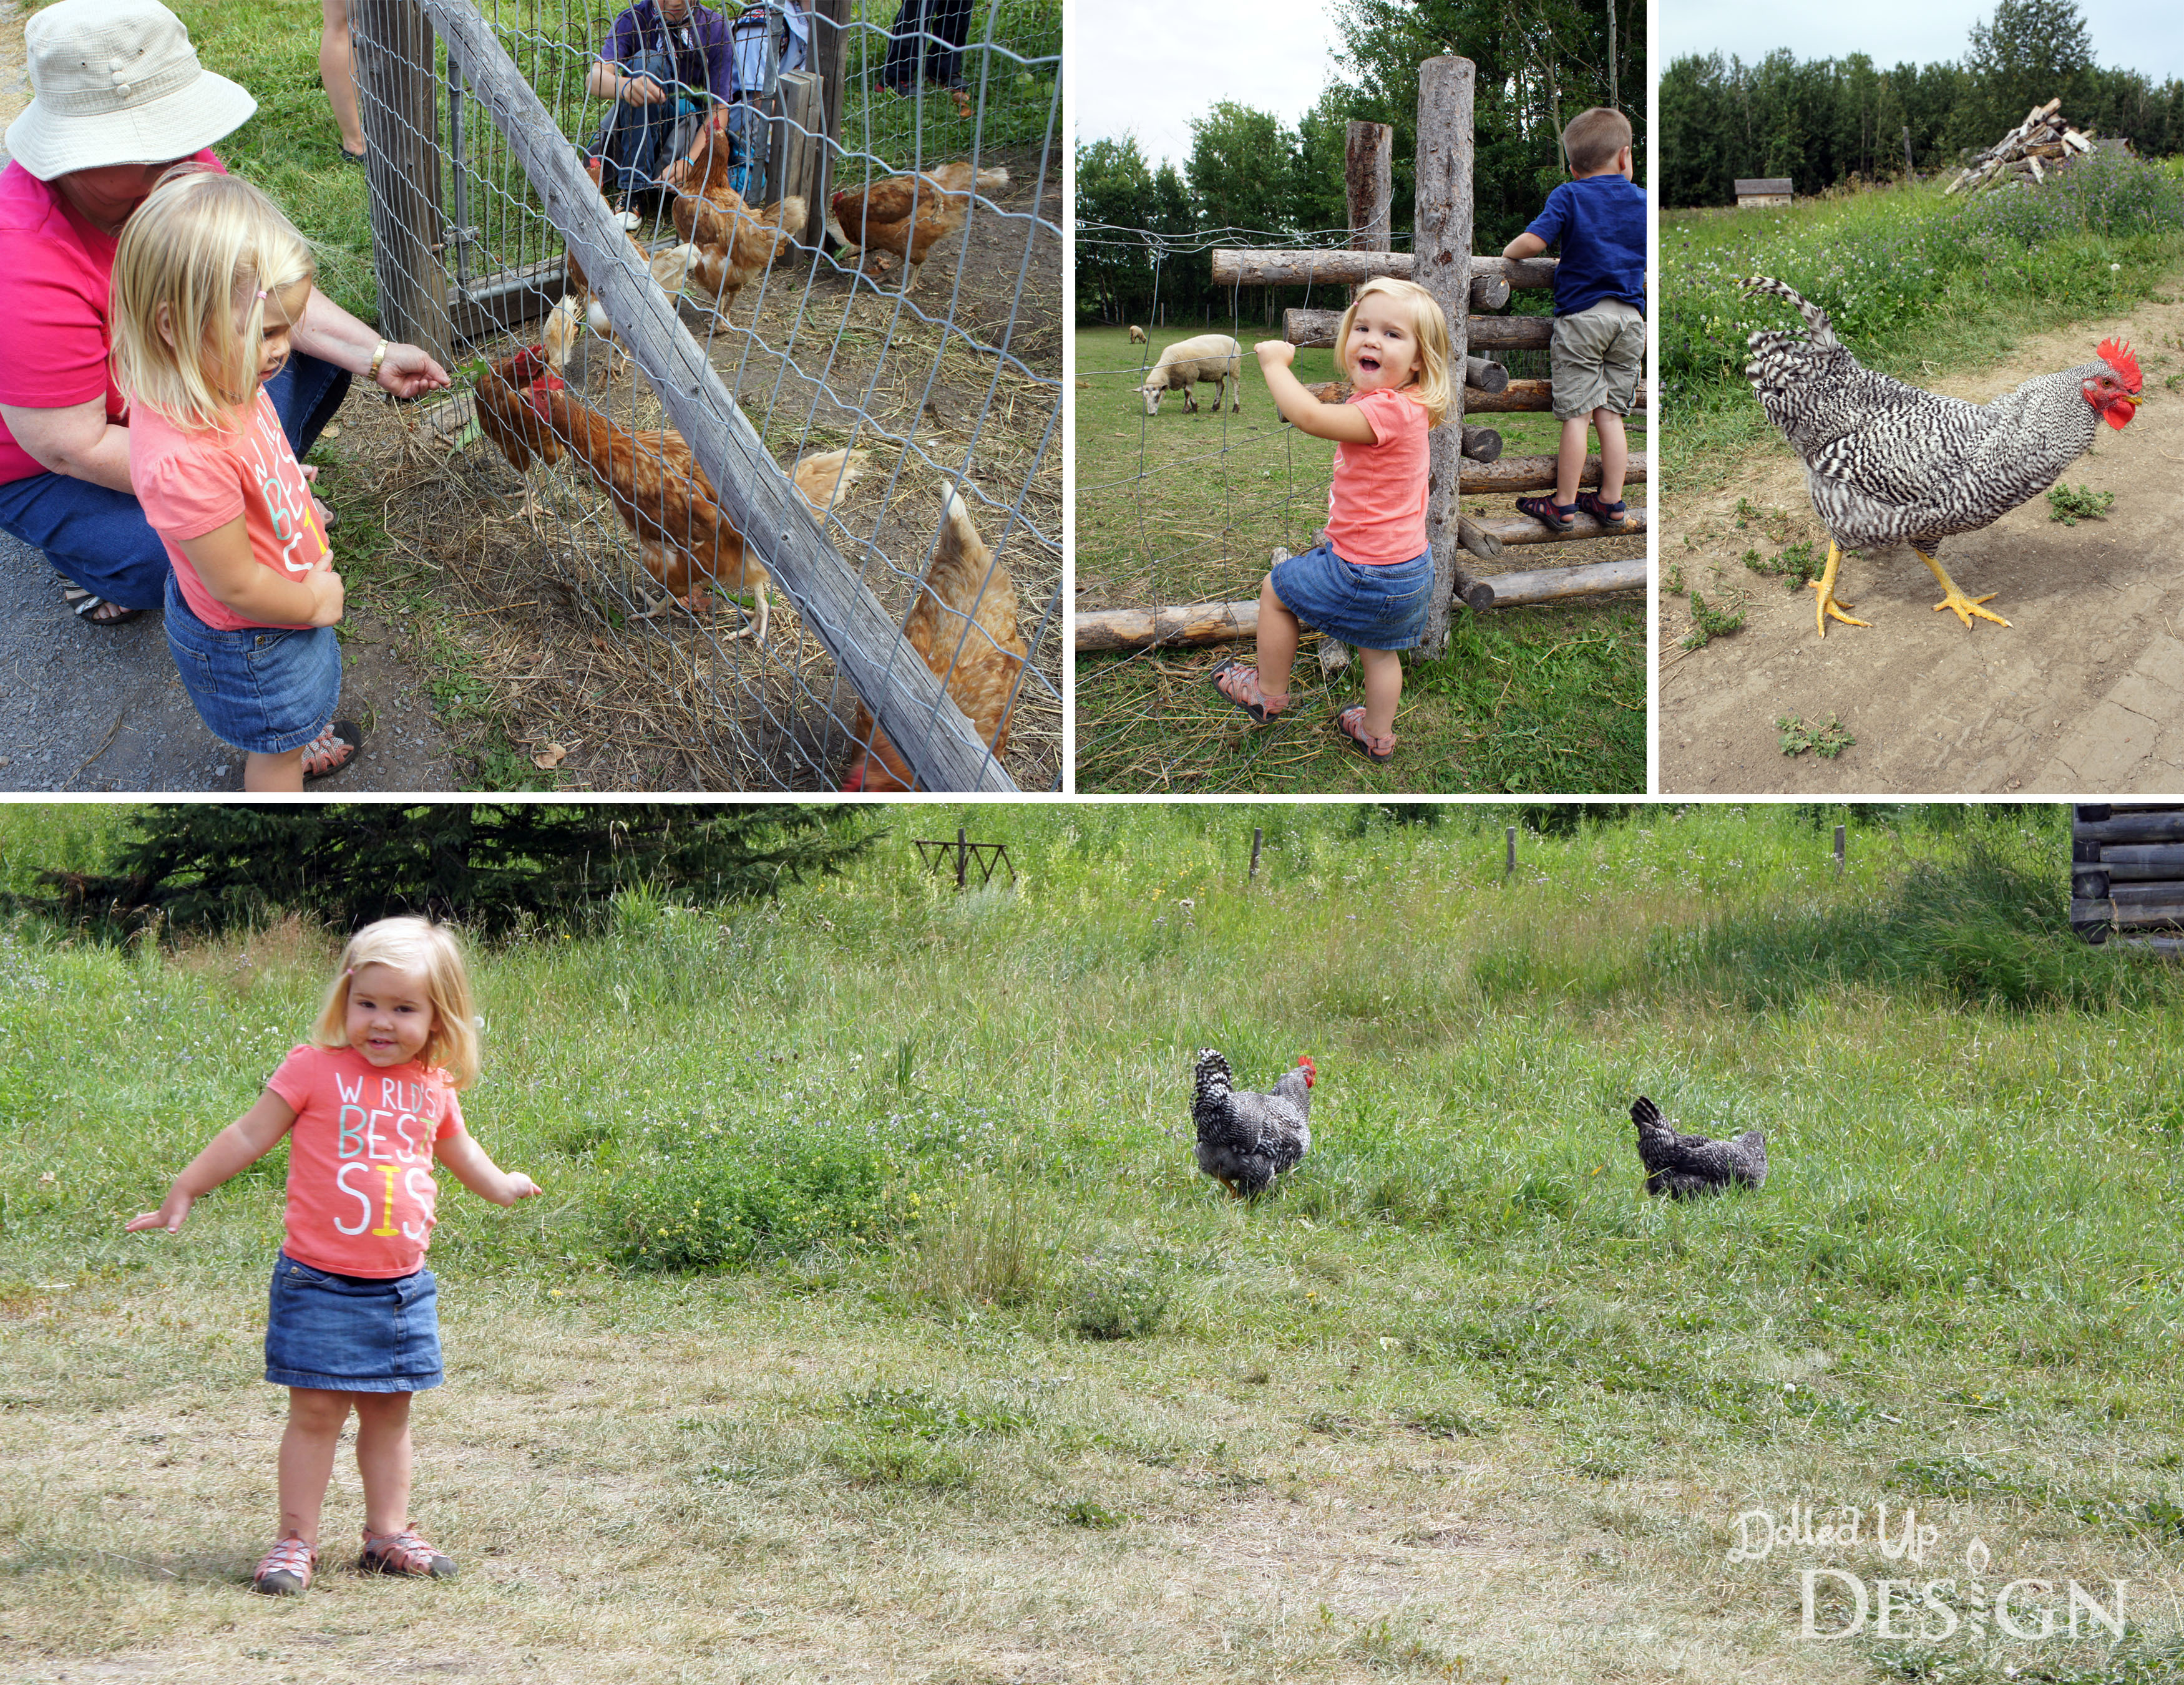
The farm animals were, by far, the biggest hit for my kids.  They were excited to see the pigs, horses, sheep and chickens.  After spending the day chasing chickens, my youngest has now happily added “bock bock” to her vocabulary.

SONY DSC

SONY DSC

It wasn’t the most exciting of places to take young children, but there was plenty of space for them to run and explore, and we managed to find enough to keep their interest.

SONY DSC

SONY DSC

One of my favorite buildings was the old school house.  We toured it just after a summer camp group had gone through and it looked like the teacher was doing a good job leading them through some games in the schoolyard.  Keira was just happy to test out sitting in all the desks!

SONY DSC

Overall it was a nice day and I am glad the kids got to spend some time with Grandma.  After touring the village, we wrapped up our day by enjoying a delicious sausage, cabbage roll and perogy lunch from the food counter on site.

SONY DSC

I was glad to finally see the Ukrainian Cultural Heritage Village, but I don’t think we’ll make plans to go back anytime soon.  As mentioned, it was not the most exciting of places for my young kids and I didn’t like the fact that it was so widespread.  In terms of historic villages, my kids get far more enjoyment out of Fort Edmonton and I think that will continue to be our go-to in the summer.  Watch for our review of that next!


Big Hands, Crafts

Treats for the Frozen Lover

SONY DSC

If you have kids, it would be a pretty safe assumption that you have seen the Disney movie Frozen.  Several times.  Maybe several dozen times.

I took my son to see it in theater back in December, and while he and I both enjoyed it, I didn’t think it would be the massive hit it has turned out to be.  When the movie came out on DVD and my Facebook feed exploded with mentions of everyone’s children singing adorable renditions of “Let It Go”,  I admit I got kind of annoyed and refused to buy the DVD.  It took a couple months, but I did finally give in and both kids and I have enjoyed sitting down to watch Frozen half a dozen times or so now.

The craze hasn’t seemed to really die down on social media and my Facebook and Pinterest feeds are still full of Frozen mentions.  If you can’t beat ’em, join ’em so I decided to fully embrace the madness and came up with this adorable Olaf inspired treat jar to share as my first contributor post on Moms & Munchkins.

SONY DSC

This craft is a fairly simple DIY and was easy to pull together with easy-to-find materials including terra cotta pots and saucers, acrylic paints, felt, google eyes, a fake carrot nose, pipe cleaners and a hot glue gun.  The most expensive item for the project actually ended up being the chocolates to fill it!

SONY DSC

To see full written, step-by-step directions, please visit my contributor post on Moms & Munchkins.

SONY DSC

SONY DSC

SONY DSC


SONY DSC

To complete my finished snowman, I filled it with Hershey’s Hugs.  If you have seen the movie, you’ll understand why this seemed fitting!

SONY DSC

SONY DSC

Right now our Olaf is just sitting out on our kitchen counter, but I can’t wait to incorporate him into our decorating come Christmas time.  If you have a Frozen lover in your life, this would make a wonderful Christmas gift or look great as part of a Frozen party table or display.


Celebrations, Four Legged Fun, Friday Favorites

Friday Favorites: BarkBox

This week we celebrated a very special birthday in our house –  our loveable hound dog turned 6 on August 19!

SONY DSC

I have always made an effort to celebrate the dog’s birthdays in our house, but this one was particularly meaningful to me because it is the first 6th birthday we have gotten to celebrate.  Our sweet Bullini sadly passed shortly before her 6th birthday.

SONY DSC

For her birthday, I baked Nova a birthday cake and the kids and I went to the pet store and picked out a couple new toys for the dogs to enjoy.

On top of that, I had decided to sign up for BarkBox last month and our first one arrived at the end of July.  As eager as I was to see what was inside, I decided to hold off opening it until Nova’s birthday.  Both dogs, and the kids, couldn’t wait to see what was inside the box.

SONY DSC

I was hesitant ordering the BarkBox, but after good reviews from my sister I decided to take a chance.  I was super impressed with the first box and can’t wait to get our next!  The dogs love the Bixbi Chicken Jerky Treats and the Healthy Dogma Coconut Flavor Barkers smell so good that I am not even disgusted by the fact that my 2 year old keeps sticking them in her mouth!  I also was worried about the quality of toy, but the Loopies Floppy Fishbone passed my tug test and looks like it will actually stand up to my heavy pullers.

SONY DSC

We are blessed to have Nova in our lives.  She is so sweet and loving.  The kids crawl all over her and she is nothing but patient with them.  One of Keira’s first words was, of course, “dog” and she was quick to expand it to “hound dog”.  Nova is a sensitive soul and hides if there is too much noise or excitement, but never strays too far from the family.  Her favorite spot in the new house has become the back bench and it brings a smile to my face everytime I see her curled up back there as I am going about my day.

Happy Birthday Bassanova!  And thank you BarkBox for providing such a great product for the fur legged members of our family.

FridayFavoritesTitle


Two Legged Fun, Uncategorized

Goin’ to the Zoo, Zoo, Zoo….

One of our Summer Bucket list items was to visit the zoo.  We have managed to complete this Bucket List item twice over, at two different and amazing zoos: The Calgary Zoo and the Edmonton Valley Zoo.


The Calgary Zoo

Back in June we made a weekend trip to Calgary to visit my sister.  The main purpose of the trip was to pick out the paving stones we wanted to order for our patio, but we decided to make an entire weekend of it.  I looked at other things to do with the kids in Calgary, but ended up coming back to the Calgary Zoo again because it was something we had done before and enjoyed.

SONY DSC

I knew the kids were going to like it, but I was still surprised by just how excited my 2 year old animal lover got over seeing all the creatures.

SONY DSC

I had brought our folding wagon along because I know it is a lot of walking, but my two year old was insistent on walking almost the entire zoo on her own so she could see all the animals up close.  Nothing beats seeing the excitement come over a young child when they spot an animal in one of the habitats!

SONY DSC

SONY DSC

And, of course, like most of our outings this summer, there had to be ice cream.

SONY DSC

After our ice cream break, we headed to the back of the zoo where I was excited to see they have added on some kid friendly attractions such as a carousel, train ride and a great playground.  It was a nice break from the walking and the kids were excited to try out the rides and animal themed park.

SONY DSC

Camden also discovered some large rocks that he happily climbed.

SONY DSC

And in true little sister fashion, Keira had to get in on the climbing action too!

SONY DSC

The dinosaur park has been there for as long as I can remember.  I remember enjoying it as a kid, but since it is such a big zoo we have ended up skipping over it the last few visits.  This time Camden seemed pretty interested in seeing the dino’s so we decided to take a walk through the Prehistoric area where we discovered all kinds of different dinosaurs along the path.

SONY DSC

And, we finally got to see the penguins on our way back out.  I think Keira could have spent the entire day just watching the penguins swimming and waddling and hopping around their Penguin Plunge habitat.  I don’t blame her, this is one of my favorite parts of the Calgary Zoo now too.

SONY DSC


Edmonton Valley Zoo

I can’t say enough about how impressed I am with the improvements to the Edmonton Valley Zoo.  Before it didn’t even compare to the Calgary Zoo, but the new entrance and expanded facilities has it looking more and more like a “real zoo”.

SONY DSC

I don’t know how, but some how we managed to miss seeing the biggest animal at the zoo – Lucy the Elephant.  She must have been out when we passed by her cage and then we didn’t see her out on her walk as we made our way through the rest of the zoo.  I was a little disappointed since we didn’t get to see any elephants at the Calgary Zoo either, but there were still plenty of other amazing animals to look at.

SONY DSC

SONY DSC

One thing that hasn’t changed in decades at the Edmonton zoo is the petting zoo area, now known as their Urban Farm.  Camden sat it out so he wouldn’t have to wash his hands after petting the animals, but Keira was right in there with the goats, sheep, ponies and chickens.  This kid really has no fear when it comes to animals and I love seeing the excitement on her face and the jump in her step with each new creature she gets to come face to face with.

SONY DSC

Another highlight is the train that runs past the Urban Farm and through a tunnel.  It is a short ride, but the kids love it and there always seems to be a pretty good line-up to get on the train.  I also love that this attraction is now included with admission, whereas we had to buy tickets to ride the similar train at the Calgary Zoo.

SONY DSC

And I must say the Edmonton Zoo has Calgary Zoo beat hands down for ice cream selection.  They have a concession stand dedicated solely to frozen treats where you can find any kind of popsicle or hard ice cream flavor you could ever want.  Camden was pretty darn excited to pick out a Sonic popsicle complete with gumball eyes!

SONY DSC

In the newer area of the Valley Zoo is a whole section of rocks and tunnels meant to be climbed through and explored.  It made it a little hard to keep track of my two kids, but they had a great time.  I particularly liked the giant beaver house the kids could walk right into.

SONY DSC


Although they were two different trips, there were many common elements that made for a fun day.   For my kids you seem to be guaranteed a good time if there are interesting animals, a train ride, big things to climb on and ice cream!

And the marker of a good time for me?  Two happy, sleeping kids in the backseat after both visits!

Two Legged Fun

Happy National S’mores Day 2014

August 10th is National S’mores Day.  In celebration I was planning to try one of the many delicious recipes I have on my S’mores Pinterest Board, but decided to just keep it simple with these easy S’mores pops.

SONY DSC

I chose this recipe because it was ridiculously easy and only required 3 ingredients – graham crackers, large marshmallows, and milk chocolate chips (I used mini Hershey kisses), plus sticks to skewer them on if you so desire.  I was going to try something more complicated to get my S’mores fix, but this worked perfect to get the kids involved and let them have a little messy fun in the kitchen.

SONY DSC

To make the pops, simply crush the graham crumbs in the food processor (or buy a box of crumbs) and set out in a bowl.

Next, melt the chocolate chips in the microwave in 1 minute increments, stirring between, until the chocolate is smooth.

Insert straws or popsicles sticks in each of the marshmallows then have the kids dip the marshmallows in the chocolate, then coat the chocolate in the graham crumbs.  Be careful as the chocolate may be a little hot for the kids.

Set the finished pops aside for the chocolate to harden.  I put mine on a cookie sheet and into the freezer for a short period to speed up this process.

SONY DSC

Enjoy!

SONY DSC

We made our pops yesterday so I could bring them along as a treat last night to watch Rio 2.  Our private beach holds an annual summer event where they bring in a giant inflatable screen and residents get to sit out on the sand and watch a Movie at the Beach.

SONY DSC

I wasn’t sure how my 4 year old would do since the movie began at 9:45, but he managed to stay awake and was pretty into it.  I ended up enjoying it a lot more then I was expecting and can’t wait to go back next year.  It was so nice to sit out on the beach and enjoy a movie and treats with my little guy, cuddled in blankets on the sand.

SONY DSC

Have a great S’mores Day!

If you are still looking for more S’mores inspiration, please check back to my S’mores post from last year featuring my sister’s S’mores Themed Wedding Cake.


Friday Favorites, Uncategorized

Friday Favorites: Solo For Kids On-The-Go Cups

In the warm summer months I like to occasionally treat myself to a slushy type drink – whether that be a Frappuccino, Time Horton’s Iced Capp, Frozen Lemonade or the good old standby, a Slurpee.  Both my kids are old enough now that they know the delights of the drive-thru and gone are the days of me sneaking through to grab a frozen treat all of my own.  I have learned that I need to now buy everyone each their own or risk having mine completely disappear.

Last summer Tim Horton’s still offered an XS sized cup that was the perfect size to get my then 3 year old a smoothie or Frozen Lemonade all his own.  This has been discontinued and their smallest size is now way too big for just one of my kids, but not quite enough to split two ways.  One day, since we were headed right home, I had the brilliant thought to just order a medium Frozen Lemonade and split it into their sippy cups when we got home.   A medium is far cheaper then two smalls and there is way less drink wasted this way.

Shortly after, I recalled the packs of lidded Solo brand For Kids On-The-Go cups I had seen in the grocery store and decided to pick up a pack to keep handy in the car for just this reason.

SONY DSC

McDonalds offers a snack size in their smoothie that is perfect for my kids, but everywhere else I have switched to ordering one medium and using these Solo cups.  A Starbucks Grande smoothie divided perfectly for my two kids.

SONY DSC

When we are on the road and end up with other tricky items such as square cartons of chocolate milk, I also pull out these cups.  They fit nicely in the carseat cupholders and I love that the bendy straws mean less chance of them jabbing into the roof of the kids mouths if they are drinking and we hit a bump.

SONY DSC

Shhhh…just don’t tell the kids they are actually sharing!

SONY DSC

FridayFavoritesTitle

*The opinions expressed in this post are all my own.  I have not received compensation for this review.


Celebrations, Throwback Thursday, Uncategorized

Around the Year in 100 Posts!

OneYearLogo_BlogPost

Today marks one year since I decided to start sharing my ideas with the world through Dolled Up Design and what better way to share then in my 100th post!

I started this blog as an outlet for my creative ideas.  I love reading other blogs and seeing their great parties, interior decorating and creative food ideas.  I waste way too much time on Pinterest and decided I needed to start sharing back some of my own ideas rather then just creating board upon board of other people’s ideas.

This is a creative outlet for me.  I enjoyed my previous job as a graphic designer, but when I made the switch to being at home with the kids I felt my skills starting to fall to the wayside.  I began this blog as a way to try and establish myself as more then just “Camden and Keira’s mom” and am hoping in the process I might inspire other people to bring out their creative side.

I am surprised to see my post count as high as it is because it honestly doesn’t feel like I am able to spend as much time on my blog as I would like.  Between keeping up with the kids and moving this past year, this is definitely an accomplishment for me.  I am also proud and excited to have been chosen to join Moms & Munchkins as a Party Tip contributor so hopefully that gives me the push to come up with even more great ideas in the year ahead.  I have tons of projects floating around in my head, but it is always a matter of finding the time to execute and document these great ideas!

Like a lot of my projects, my blog is a work in progress.  The overall look of the blog still leaves something to be desired and the linking up to all the different avenues of social media makes my head spin!  There is definite room for improvement and I hope as I move forward and my blog continues to grow that it only continues to become better.

So, in celebration of One year and 100 posts, here are my top 10 favorite Dolled Up projects from the past year.  Click on the links to view the full posts!

SONY DSC

SONY DSC

SONY DSC

SONY DSC

SONY DSC

SONY DSC

SONY DSC

SONY DSC

SONY DSC

SONY DSC


And, because it is Thursday, it only seems fitting that I throwback and link to my very first blog post – my Love is Sweet personal candy buffet.

CandyBuffet1

Print

I would like to finish this post with a big thank you to all my readers old and new!

You are the main motivation for this blog and I can’t wait to share more projects and ideas with you in the year ahead.


Celebrations, Parties, Uncategorized

Let Them Have Cake! A Wedding Cake Surprise for my Brother

SONY DSC

Back in June my little brother tied the knot. He is the last of all our siblings to make the step, but has managed to beat us all to the alter in terms of age. I was a little surprised when I first found out his plans to get married so quickly, but he couldn’t have picked a lovelier wife and just seeing the two of them together I know they are the perfect match.

SONY DSC

When I first found out he was engaged, my brother had mentioned maybe having me help with doing some cupcakes for the dessert. Since I had done a massive cake for my older sister’s wedding, it seemed fitting that he would ask and was something I was more then willing to tackle. Then he spent some time in the daily chaos that is my life and I think he got scared of burdening me with one more task.  He and his wife looked at buying a cake from a local bakery but I think it ended up being one of those additional wedding details that they just didn’t feel was worth the cost when they already were paying for other desserts with their catered meal.

Whatever the reasons, I decided that I still wanted him to have a cake. I have enjoyed gifting my time and talents making cakes and creating candy buffets for our other siblings wedding’s, so it just felt wrong not to do something equally special for him.  I know that he enjoys my baking and was confident enough in my baking skills that I could surprise him with something he and his guests could both enjoy.

SONY DSC

The planning process for the cake ended up being a lot more challenging then I would have expected.  The bride had a pinterest board of cake ideas, but browsing through the many different cakes just confused me more.  I know the couple themselves struggled when they were still planning a cake and looking for the perfect cake topper so I was stressed to find something they would really like.  I also was up against the clock a little because up until a few weeks before the wedding I thought they were still ordering themselves a small cutting cake.

One thing I did know is that I wanted to incorporate my dad’s favorite cake. Our dad passed during my second year of university and sadly has not been there to see any of his four children get married. For my older sisters S’mores themed wedding cake, I incorporated the cake base of my dad’s favorite chocolate cake. One cake just didn’t seem impressive enough so, for my brother, I decided to make two cakes – one being Dad’s Chocolate Cake and the second a Wildberry and Almond swirl to match the purple in the wedding colors.

SONY DSC

SONY DSC

For the toppers, I ended up cutting out the wedding graphic from the invitation and attached it to skewers to stick into the cake.  The bride had designed it herself so I knew it was an image she liked and decided it would look cute atop the cake.  To compliment the owl image, I recreated the flower graphics also used on the invite and printed off several of them to glue to toothpicks and stick throughout the two cakes.  On the second cake, I saw a cute banner as one of the ideas on her pinterest board, so I decided to go with that and use the phrase “Better Together”.   I knew they didn’t like lovey-dovey sayings, so this seemed perfect.  I think paper cut-outs looked cute on the cakes and it was a very inexpensive option for the toppers.

SONY DSC

I kept the icing finishes simple, with a more rustic buttercream technique on the wildberry cake and a simple swirl pattern on the chocolate cake.

SONY DSC

To go with my gift of cake, I came across Green Apple Danglers on Etsy that makes these adorable personalized forks. I had a pair done with “Mr” and “Mrs” and added their wedding date at the end of each fork.

SONY DSC

To cut the cakes, I knew the wedding couple didn’t really want the traditional “pretty” wedding knife and server set that they would not know what to do with after the wedding.  My older sister was struggling to come up with a good gift idea and I know my brother has always wanted a really good kitchen knife, so I made the suggestion and that became the cake cutting knife.  I think that knife it has to be one of the sharpest knives ever used to cut a wedding cake!

SONY DSC

Both cakes turned out delicious and I was glad I was able to pull it off as a surprise for the happy couple. The bride happened to tag along to Costco on the day I went to buy the supplies and I was so happy she didn’t question my need for 4 pounds of butter and 4 bags of icing sugar!

SONY DSC

One other great detail on their wedding day was these adorable candy packet’s my mom made for the favors.  She used her Cricut to cut each of the pieces and then stamped and assembled each by hand.  Tucked inside the final sleeves were a couple York Peppermint Patties (yum!).  I think this clearly shows where I get my craftiness from and I look forward to sharing more of her card creations in future blog posts.

SONY DSC

Congratulations again Dylan and Jodi! Wishing you a lifetime of love, happiness and all things sweet.

And, if you want to learn more about my lovely new sister-in-law Jodi, hop on over to her beauty and lifestyle blog Up the Rollercoaster.

Friday Favorites

Friday Favorites: Costco Folding Wagon

Lately I have been getting stopped everywhere I go, and it is all because of this:

CostcoFoldingWagon

No, it is not the adorable kids, but rather the handy little wagon I have been using to transport them and all our things around in this summer.

I first read about the folding wagon from Costco on an internet forum and don’t think I would have really noticed it in store otherwise.  I was not on the hunt for a wagon, and the outside of the box pictured it used as more of a utility cart then a children’s wagon so I would have never thought it would be comfortable enough to pull the kids around in.

SONY DSC

We already own a plastic Step 2 wagon, so I hesitated to buy this one, but decided the folding style might be easier to throw in the back of the vehicle for day trips or for camping when we get back into it.  At 2 and 4, my kids are just about out of the stroller stage but still get tired when there is a lot of walking involved.  Add on the diaper bags and coolers I usually end up lugging around and a wagon becomes a definite necessity.

SONY DSC

And folding it up couldn’t be easier – I simply grab the toggle handle in the middle of the wagon and it folds smoothly on itself.  After fighting in parking lots to open and close strollers over the last few years, this is a very welcome feature!

SONY DSC

Our wagon has already made numerous trips to the beach, playgrounds, the zoo and splash parks this summer.  At around $60, the wagon has ended up being one of our better purchases.  When I am stopped by people to ask about it, I always feel bad telling them that we bought the wagon from Costco back in April and there is no chance they’d be able to get one now.  It does seems to be something Costco gets in every year so definitely keep an eye out come Spring if you are wanting one – and believe me, you probably do!

And if you just can’t wait, Canadian Tire does carry this folding Broadstone Wagon at a slightly higher price tag.  From what I saw of my neighbour’s, it does seem to fold a little smaller then the Costco style, but I am not sure I love that the bottom is a separate piece that needs inserted and removed each time you fold.

SONY DSC

FridayFavoritesTitle


Recipes, Savory, Sweet

Treats for the Beach

SONY DSC

This week we hosted another playdate at the private beach in our subdivision with a bunch of our friends from playgroup.  The kids and I spend so much time together that it is nice to plan dates that give them a chance to play with other kids and me a chance to actually get some adult interaction in.

I seem to be going into a little bit of party planning withdrawal because I felt the need to whip up a few last minute treats for the occasion.   I always find recipes I would like to try, so it is nice to make them when I have a crowd and won’t end up consuming the majority all on my own.


Summer Sand Pudding

Not long ago my sister posted this adorable Summer Sand Pudding from Ma Nouvelle Mode on my Facebook timeline and I have been wanting to put my own spin on it and make it into individual beach buckets.  What better place to serve it then on a beach playdate?

SONY DSC

Ingredients

  • 1 package Golden Oreo cookies
  • 2 or 3 regular Oreo cookies
  • 8 ounces cream cheese (1 block)
  • 1/4 cup butter
  • 2/3 cup icing (powdered) sugar
  • 2 boxes of white chocolate instant pudding (or vanilla)
  • 2 3/4 cups of milk
  • 1/2 of a large tub of Whipped topping (Cool Whip), thawed

Pudding Directions

  1. Cream together softened cream cheese, butter, and powdered sugar in stand mixer.
  2. In another bowl, whish together the pudding powder and milk.
  3. Slowly add pudding to cream cheese mixture to combine.
  4. Fold in the whipped topping.

SONY DSC

To make the sand, use a food processor to finely crush the entire package of Golden Oreo’s with 2 or 3 of the regular chocolate Oreo’s.  The original recipe calls for Vanilla wafers so those can also be substituted for the Golden Oreo’s.

(I discovered Ariel tucked into my pantry when I went to take out the food processor and thought it was quite fitting for the task at hand!)

SONY DSC

To assemble the sand pails, I layered the pudding and cookie crumb mixture in Dixie cups – pudding, cookie crumbs, pudding, cookie crumbs.  I found some blue candy twists for the handle and simply inserted those in, forming an arch.  I was planning to finish them off with a candy fish but ended up going with some star shaped sprinkles instead.

If you can’t find Dixie cups, any small cup will work.  I have seen shot glass sized red solo cups that would be cute with a red licorice handle.

SONY DSC

Both the kids and adults really seemed to enjoy the pudding – the kids were happy because of the sprinkles and sour candy handles, and I think the addition of the cream cheese made it a rich, decadent dessert for us grown-ups.


Watermelon Salsa

I also got around to making The Scent of Orange’s Watermelon Salsa I included in my Refreshing Watermelon Ideas post a few weeks back and it did not disappoint!  There was some tedious chopping involved, but it came together fairly quick and was something you could easily make a day or two ahead of time.  I was a little skeptical of the ingredients, and even bought some tomatoes as backup, but the watermelon pairs so perfectly with the cilantro, onion, cucumber and lime juice that it is all you really need to create a refreshing salsa.  As a bonus, I also found the watermelon is far easier to dice up then a bunch of tomatoes would be and you still get the nice traditional red color of salsa from the watermelon.  For our playdate it was served with tortilla chips, but I think it would also be a good summer meal on top of grilled chicken.

SONY DSC


Fruit Skewers

Who doesn’t love a fruit skewer?  I believe I have a few different versions of these pinned on my various pinterest boards, but I have never actually made them for any of my parties.  I love the idea, but always get to thinking that sharp skewers and children would not be a good combination.  I had some Dollar store wooden coffee stir sticks in the pantry leftover from creating cupcake toppers, so I decided to try using those and they worked perfect!  No one stabbed themselves and the kids all seemed pretty excited to eat their fruit off a stick.

SONY DSC

My skewers included honeydew, watermelon, pineapple and strawberries but you could do just about any fruit you want.  To make it even easier, you could even buy the Costco fruit tray and just skewer the pre-cut fruit pieces!


Corndog Muffins

One other item I made were some corndog muffins.  They ended up sticking to the pan and weren’t really picture worthy, but they did taste good and I think they are worth attempting again with a different cornbread muffin recipe and some better non-stick spray.  I like that they are easily portable and can be served at any temperature, making them an easy picnic item.  I was short on time so I used a cornbread mix and simply inserted one inch pieces of hot dog into each mini muffin well, then baked as directed.

SONY DSC

All in all it was a great day.  I can’t say enough good things about our lake and I am so happy we are able to invite our friends to share in the fun on hot days.  There wasn’t much time for adult interaction with the young kids going in ever which direction, but they all enjoyed the beach so that is what really counts.  And it did lead to talk of planning a kid-free mommy’s night out so hopefully we can make that happen!